The article is split into three parts:
- Creating a Google Cloud project and deploying your site (part1)
- Setting up a custom domain for your site (part 2)
- Enabling SSL via Cloudflare (what you're reading now)
If you haven't read part 1 of this article, please check it out here. Part 2 is available here. Now lets continue with setting up your free, secure, site!
In order to add SSL (HTTPS) to your web site, you'll need to sign up with Cloudflare. This will not only give you free SSL but will also make your content globally distributed which results in a faster loading web site. Sign up to Cloudflare to continue.
Caveat: At the present time, Google App Engine and Cloudflare can't be used in Full mode due to some origin certificate issues. However, Flexible mode works and provides the same benefits to your end users. The only difference is that Cloudflare servers will not use SSL when talking to Google's servers.
Lets get started with setting up SSL on your site. In Cloudflare, click on '+ Add site', enter your domain name and click 'Begin Scan'.
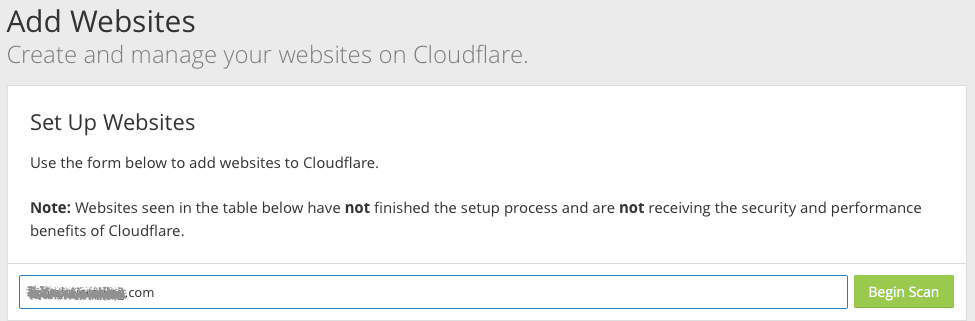
Your site will be scanned, which can take a bit of time. This checks the DNS entries that were created in part 2 of this article.

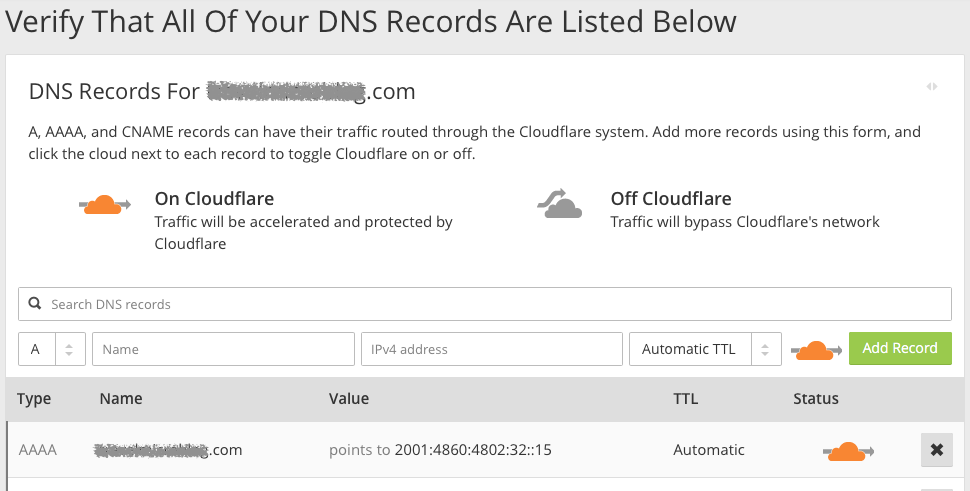
Once the scan is complete, Cloudflare will present you with the DNS records that you entered earlier, check these are correct. If the A and AAAA records do not match up, simply update them right here with what Google provided in part 2 of this article.
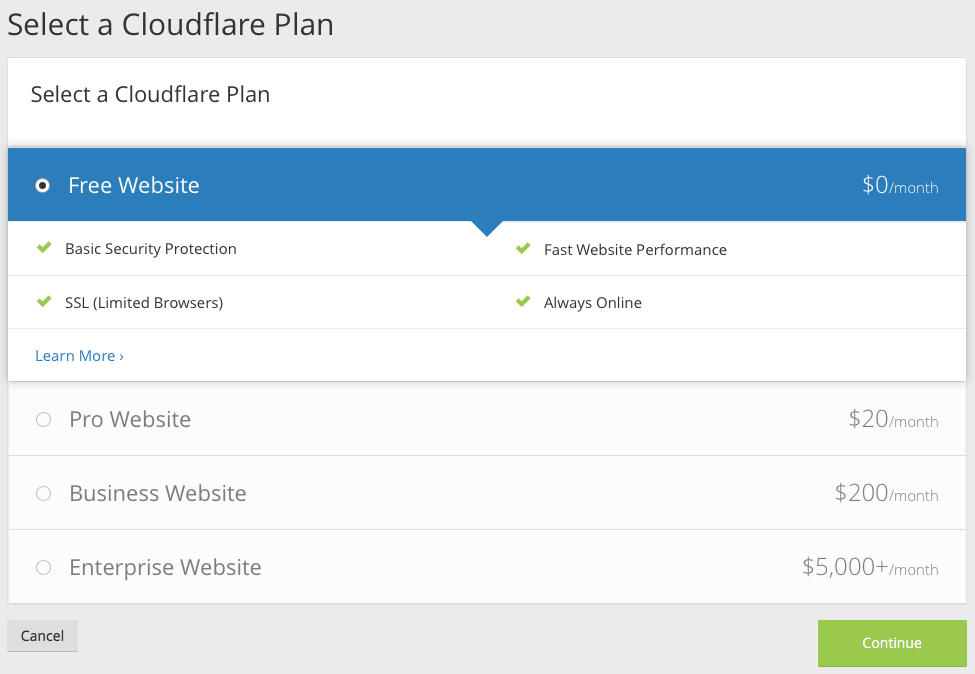
After verifying DNS records, continue to select your Cloudflare plan, just pick the Free option to continue.
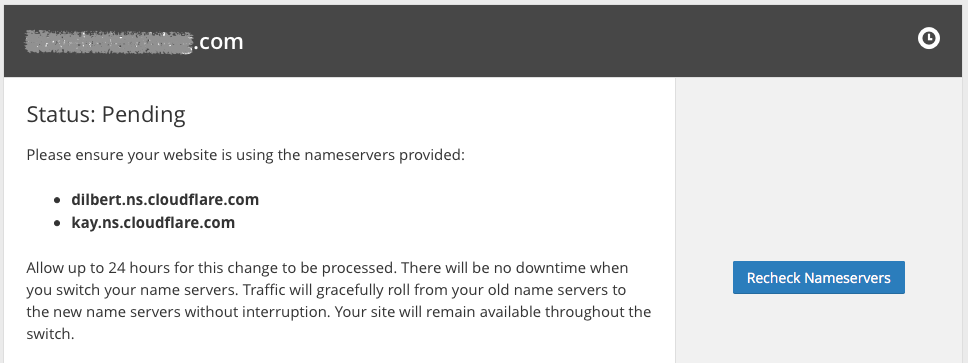
Then you will be shown new Name Server information that you need to update at your registra's end (where your domain name is registered and where you were changing DNS records in part 2).
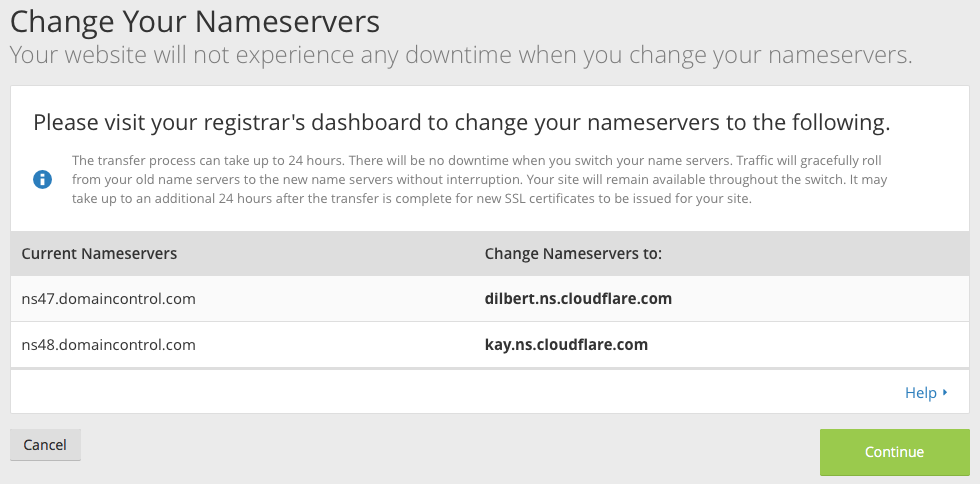
After you update the Name Servers, it can take another 24 hours for changes to take effect. You can either leave it here and come back later or continue on with the setup. Recheck the servers from time to time.
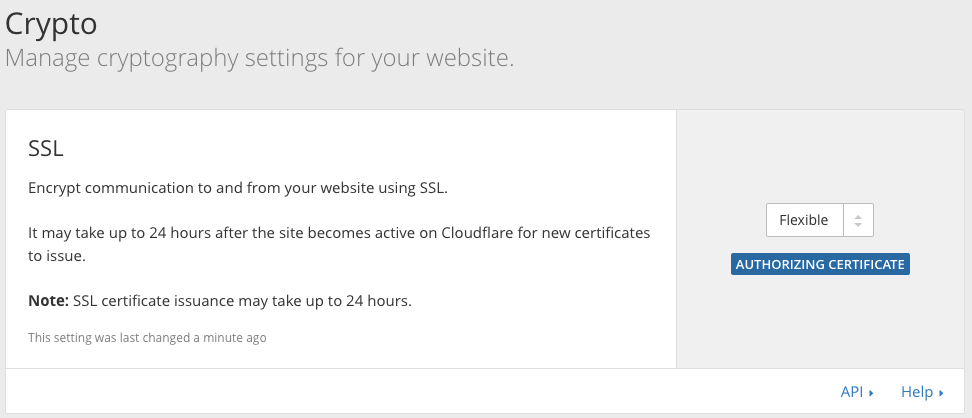
While the Name Servers are changing over, go to the Crypto section and change SSL to 'Flexible'. This will enable SSL/HTTPS on your web site. This step can also take 24 hours to complete.
Now just wait until both the Name Servers have updated and the SSL certificate has been issued. Eventually you will get green status on both -
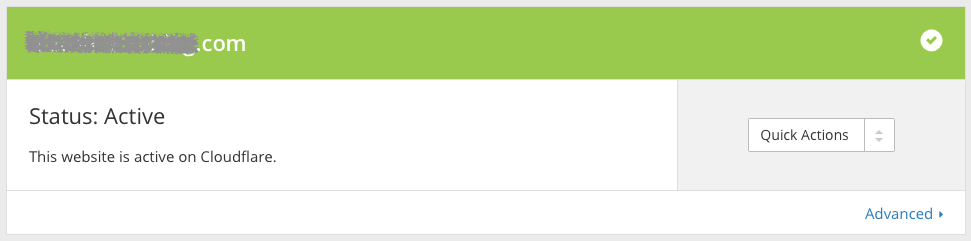

That's it! Your web site will now be available via HTTPS and a secure lock icon will appear next to the web site address.

-i
