When I added WiFi connectivity to the Portabee, it was to reduce the amount of wires that were around my desk, but then I thought, what if I could make the whole thing standalone where I could potentially keep the printer somewhere else entirely (not in my office room). Because I was using a RaspberryPi, I had an option of getting a cheap LCD TFT monitor (cost me $11 on ebay) and some kind of an input device - I went for a 'ring mouse' which is basically a mini trackball with some buttons, this cost $15 on ebay.
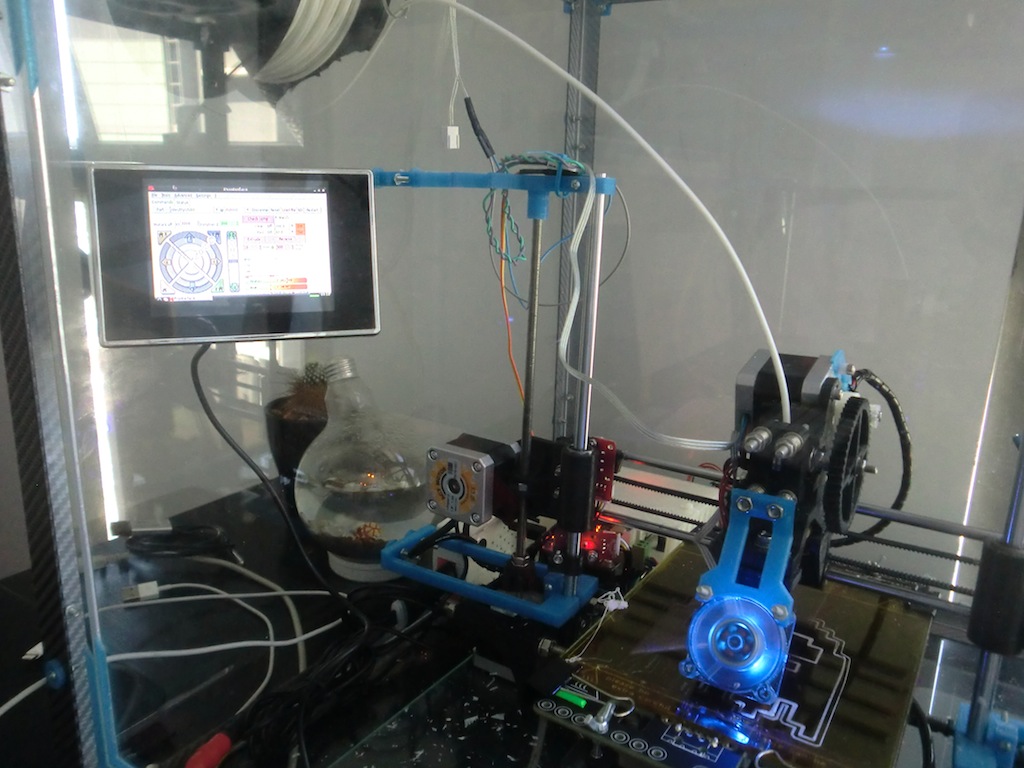
The end result was this:
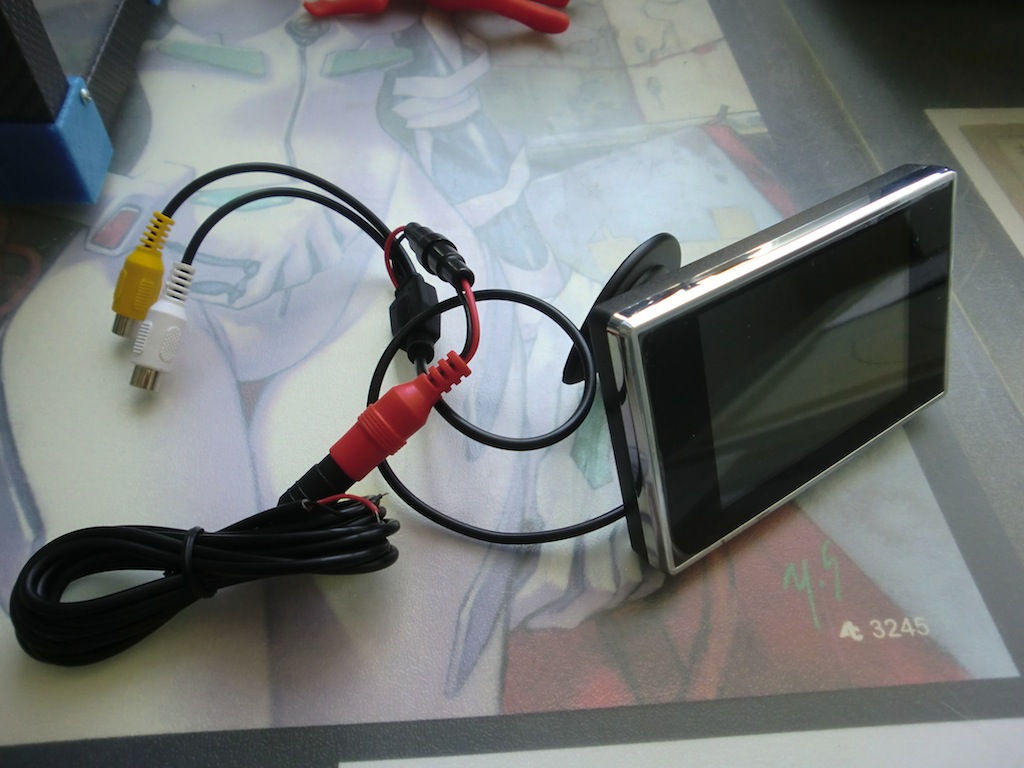
It took about 4 weeks for the monitor to arrive, but give it's cost I was fine with waiting. This is what was in the package when it arrived:
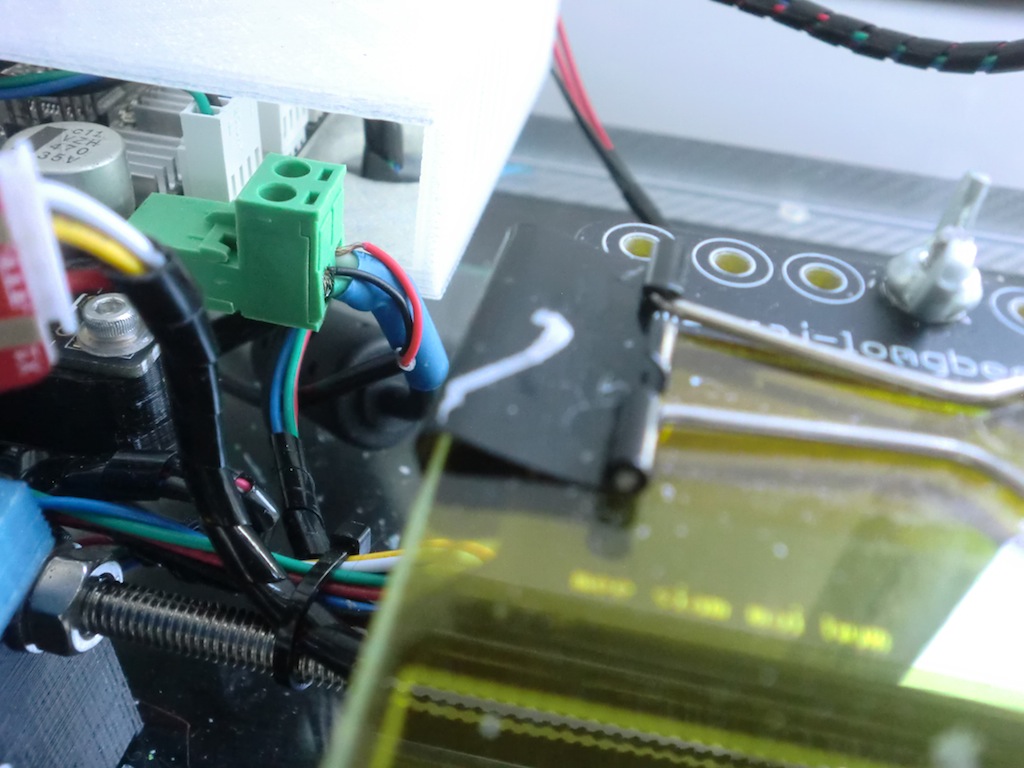
The monitor is a 3.5" TFT LCD monitor that requires 12v to run. It has two AV inputs and when connected to the RaspberryPi runs at 656x416 resolution. It came with a wire that had the power plug on one end and bare wires on the other, this was perfect because I just undid the screws on the Portabee's power supply, pushed the wiring in and redid the screws, like this:
Now the monitor will power up as soon as the Portabee is getting power.
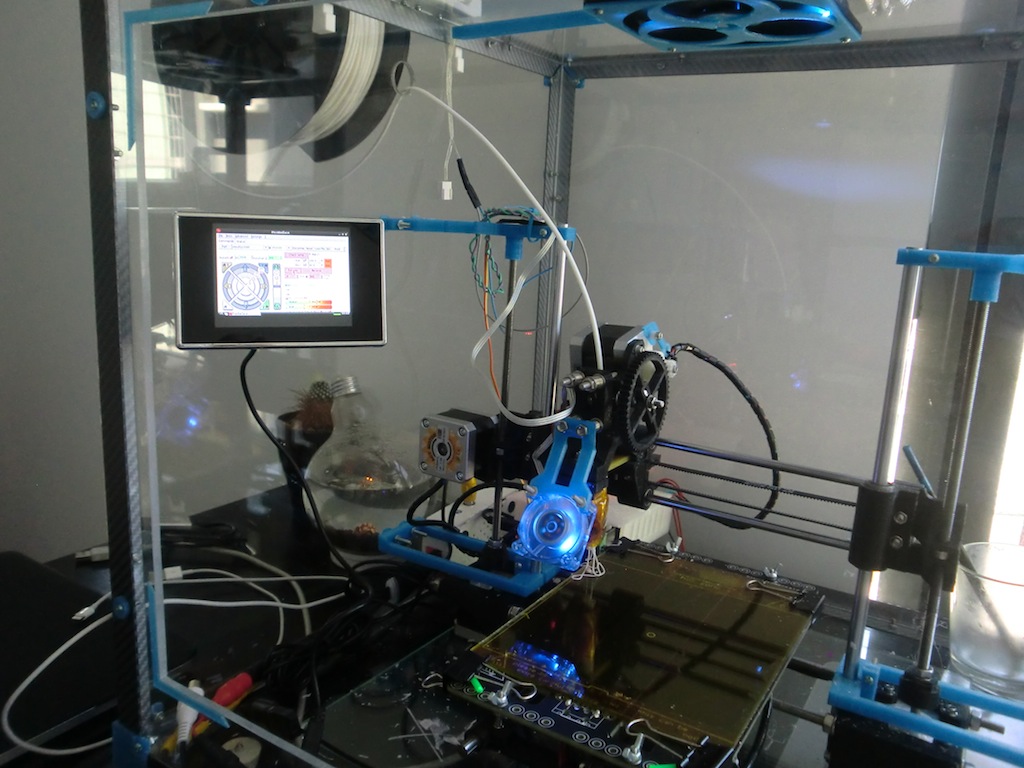
Testing it out with the RaspberryPi:
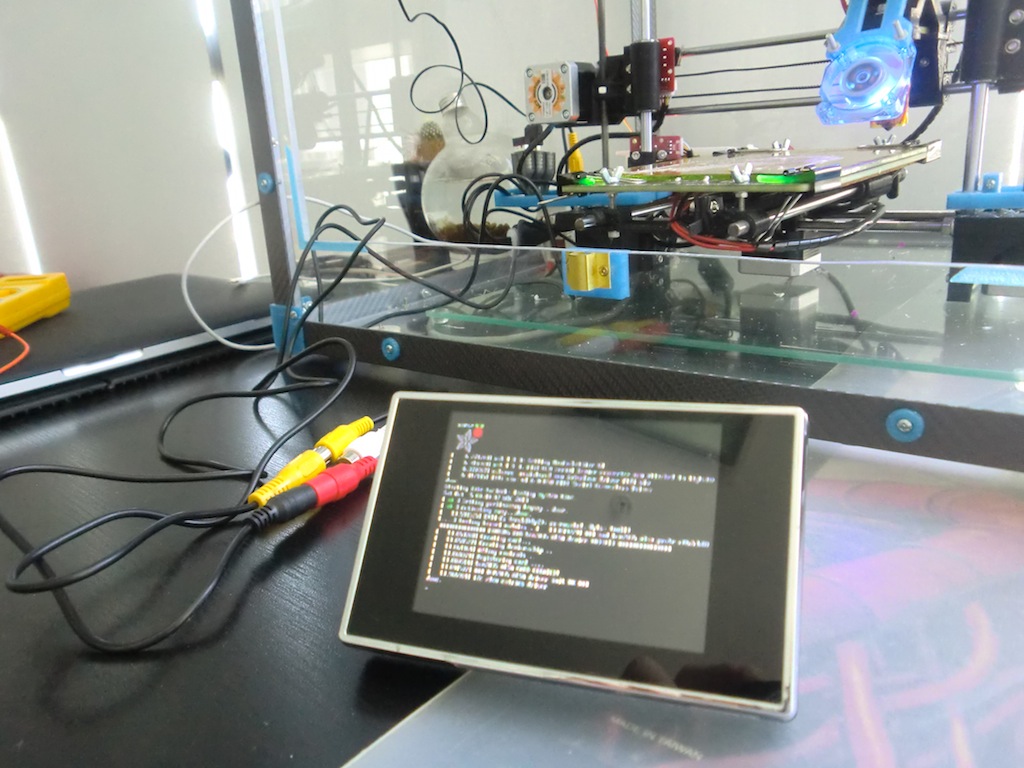
At this point because I still had my old VNC setup, X was not started so I was left with the login prompt. So the first thing was to SSH into the Pi and change some settings. I still wanted to use VNC to remote control the PiBee, but I also wanted to be able to use the monitor/trackball directly. This meant that I had to enable X on startup, disable the existing VNC server and install and configure x11vnc so that the :0 display could be shared over the network.
So first I disabled VNC and enabled X on startup.
[email protected]:/etc/init.d# mv /etc/init.d/vncboot /root/
[email protected]:/etc/init.d# update-rc.d /etc/init.d/vncboot remove
[email protected]:/etc/init.d# raspi-config
> 3 Enable Boot to Desktop/Scratch
> Desktop Log in as user 'pi' at the graphical desktop
[email protected]:/etc/init.d# restart
Once the PiBee restarted, I had a graphical desktop, but at this point Ponterface was not running on startup again and no there was no VNC.
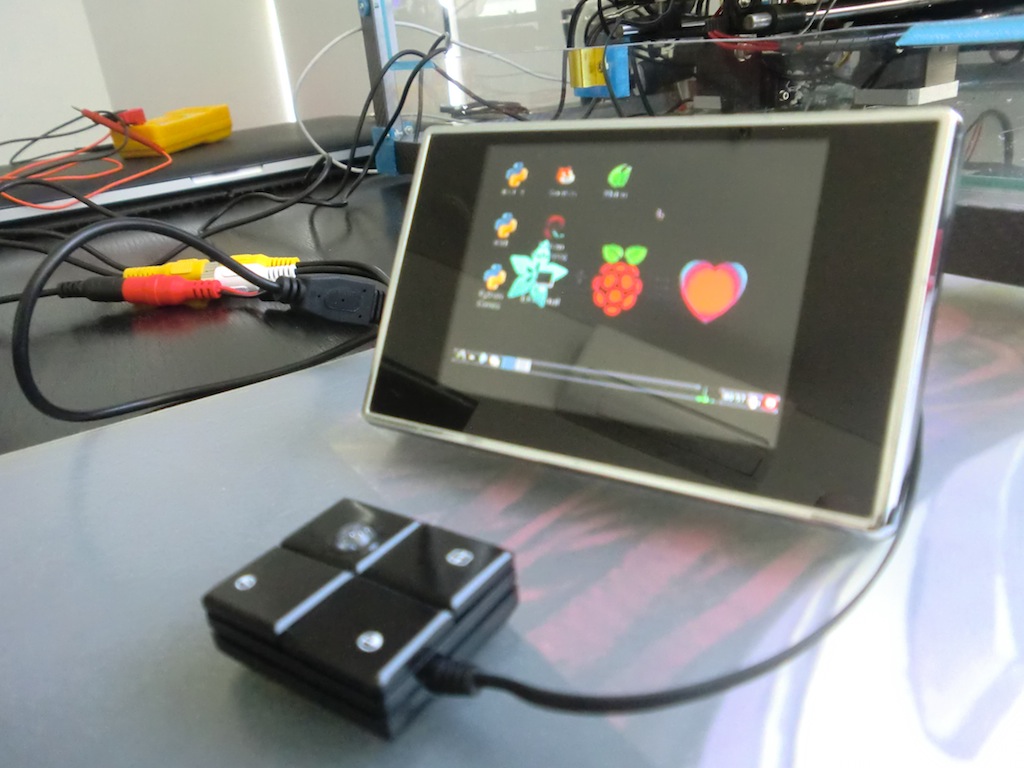
Incidentally, the trackball can be seen in the above photo, it's very small, has two buttons for left and right click, a button for scroll lock and another button underneath that works as the 3rd mouse button. All I had to do with this is remove the ring band by taking the trackball apart.
So then I installed x11vnc.
[email protected]:~# apt-get install x11vnc
Then I created an 'autostart' file in /home/pi/.config/lxsession/LXDE/autostart with the following content:
/home/pi/autostart.sh
Then I created another file (/home/pi/autostart.sh) with the following commands:
#!/bin/sh
/usr/bin/x11vnc -q -display :0 -autoport 5901 -forever -usepw -bg
/usr/bin/python /home/pi/pronterface/Printrun/pronterface.py -a&
...and as the pi user changed the permissions of this file so it can be executed:
[email protected] ~ $ chmod 755 /home/pi/autostart.sh
What the autostart.sh script does is launch x11vnc on port 5901 and start Ponterface. I chose port 5901 so that I would not have to update the Avahi configuration so that Screen Sharing from my Mac would keep working.
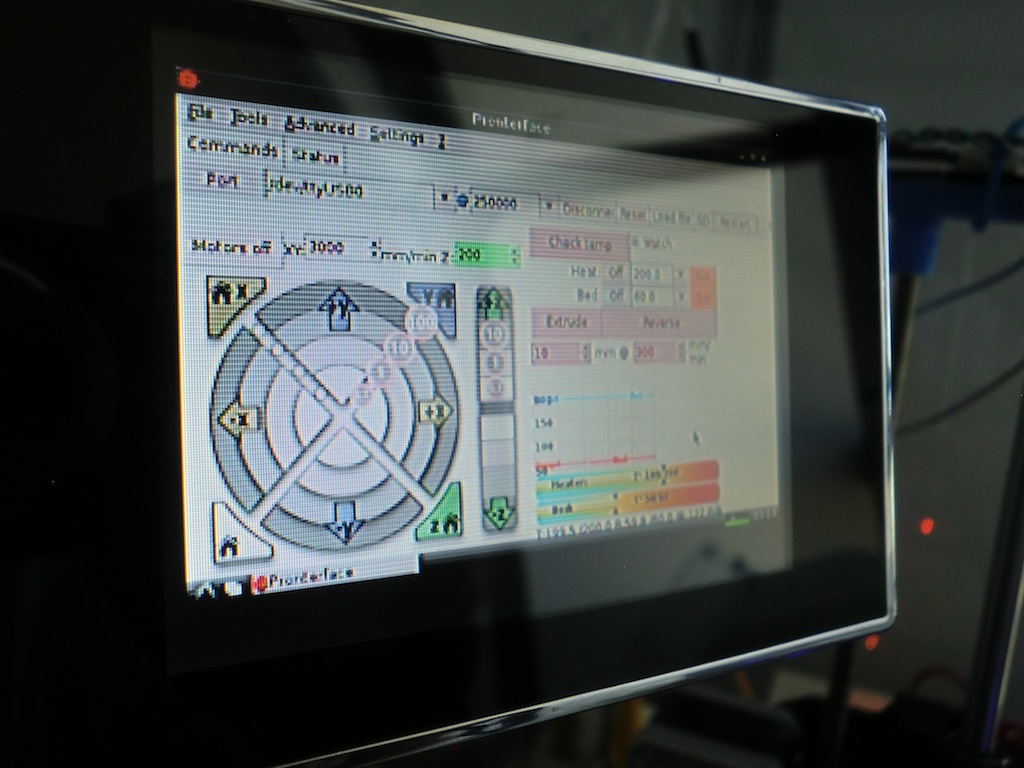
After a restart, I get the Ponterface UI come up as before:
Trying out Screen Sharing:
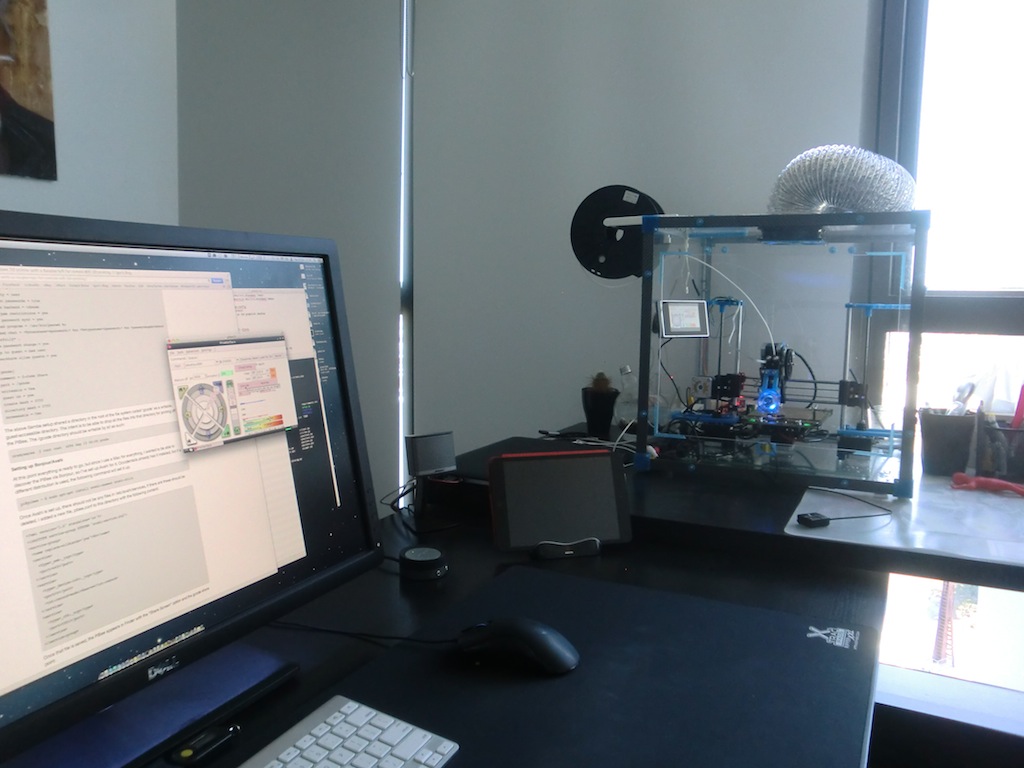
Looking closer at the monitor, it is not great, but you can't expect much from an AV connection, it gives you a (barely) usable resolution, text is hard to read, but when you only have to press a few buttons to run a 3D print job, it's not a huge issue.
Overall I am quite happy with this setup now.
Edit: I was able to get the monitor to run at 640x512 resolution by updating the following in the /boot/config.txt
overscan_left=16
sdtv_mode=2
-i
