9-Dec-2014
I'm in the process of rebuilding my 3D printer and having to print new parts on the existing printer itself. An issue I've been running into has been uneven shrinkage across a print, which leads to unusable parts since they out of shape and are not level. My solution to this has been to use diluted PVA on the printer bed to get proper adhesion and a straight print.
What I've been doing is mixing about 1 part of liquid PVA with 10 parts water. I then heat up the 3D printer bed to the desired temperature (60C for PLA) and brush on the solution. I keep brushing the bed to spread the solution evenly until it dries out. At this point, the printer bed is ready for a new print.
Here's a comparison of the results.
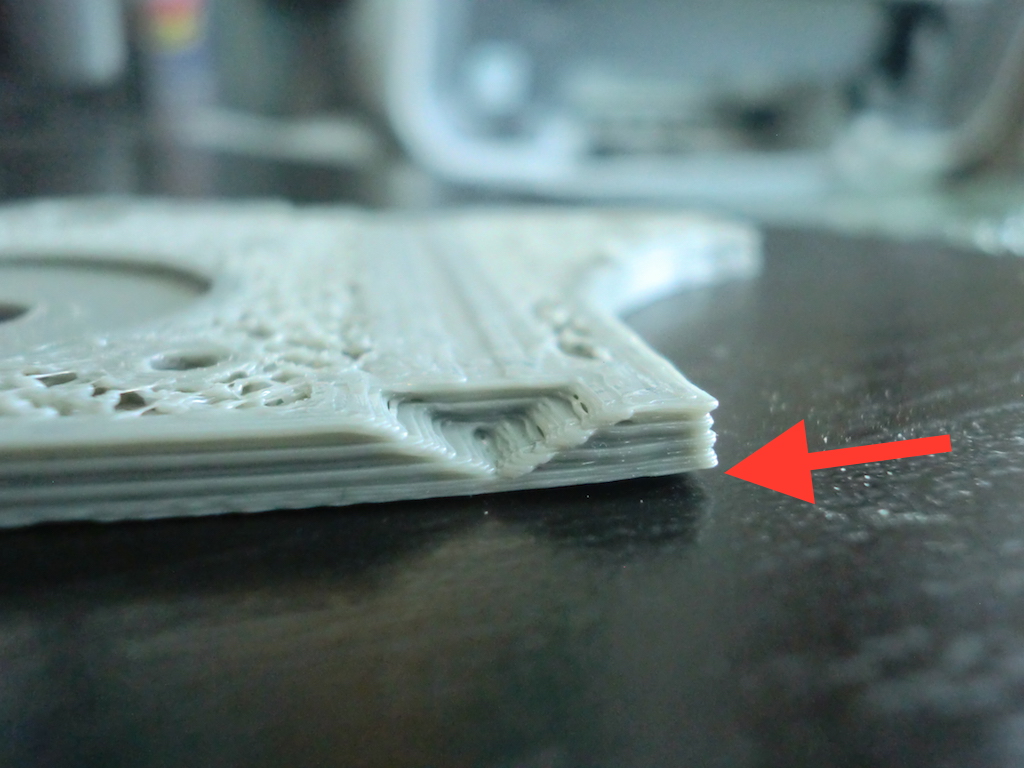
Without PVA (there is a noticeable lift on one of the edges of the print):
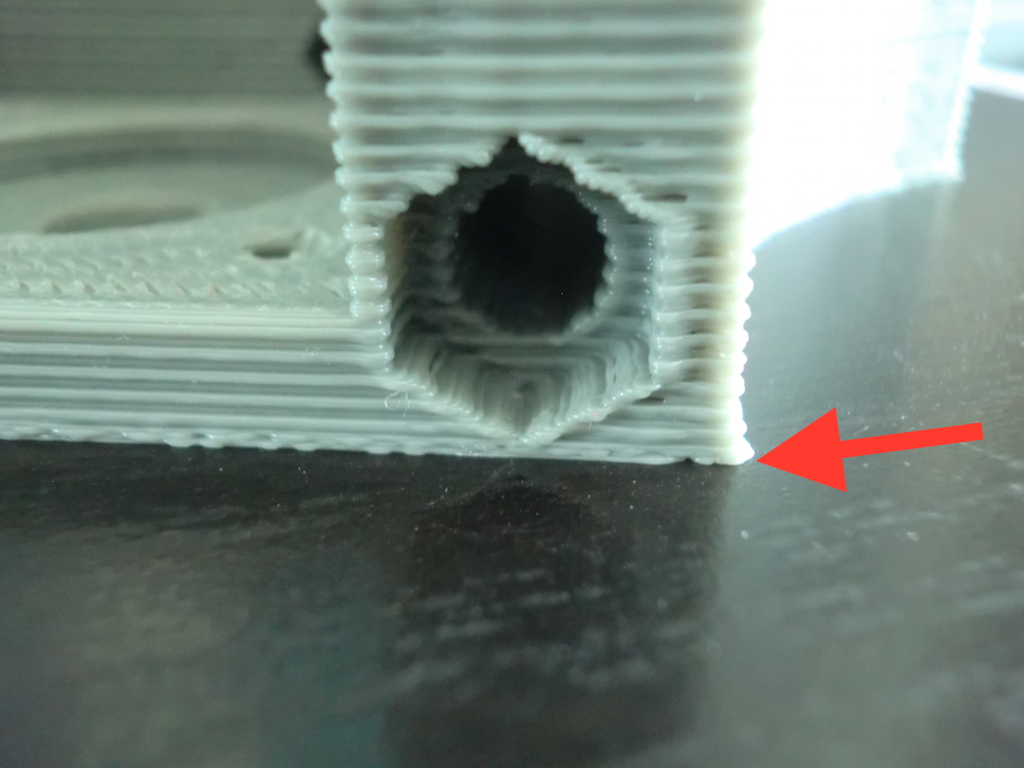
With PVA (no lift on the edge):
The downside is that the printer bed needs to be cleaned after every single print or it will begin to accumulate layers of PVA.
-i
A quick disclaimer...
Although I put in a great effort into researching all the topics I cover, mistakes can happen.
Use of any information from my blog posts should be at own risk and I do not hold any liability towards any information misuse or damages caused by following any of my posts.
All content and opinions expressed on this Blog are my own and do not represent the opinions of my employer (Oracle).
Use of any information contained in this blog post/article is subject to
this disclaimer.
Igor Kromin