Overall, there are five steps, these are:
- Create a private key on your web server
- Create a Certificate Signing Request (CSR)
- Process the CSR to issue a certificate
- Upload the certificate to the web server
- Install the certificate
The certificate I used is a COMODO PositiveSSL certificate from ssls.com. The same instructions should work for other certificates though.
To get started, log into your cPanel and navigate to Security, SSL/TLS.
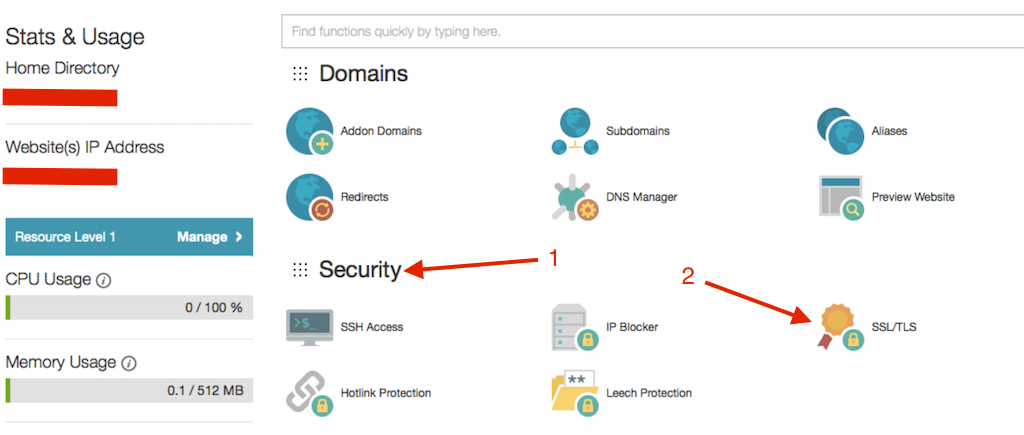
This will present the SSL/TLS Manager.
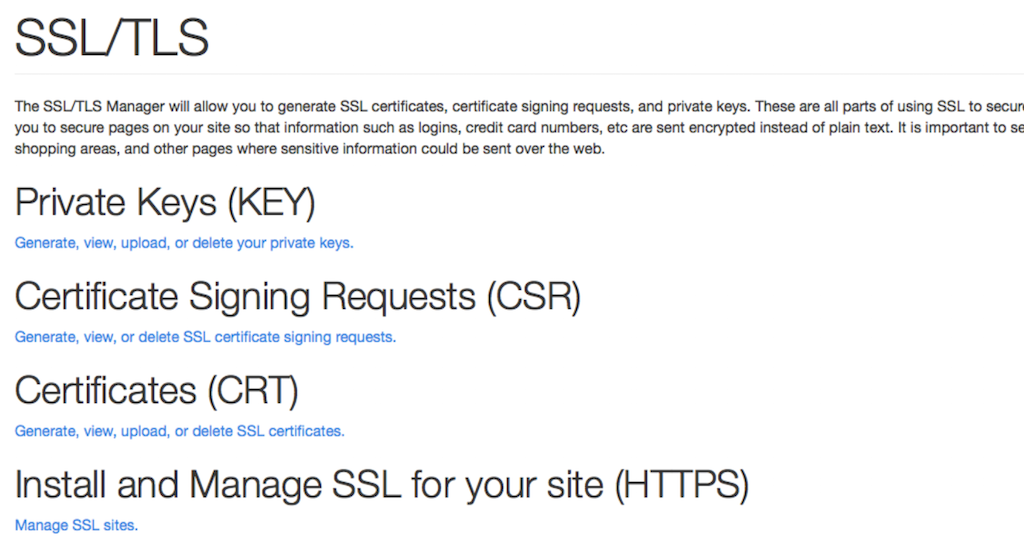
Step 1. From here navigate to Private Keys and click the link to generate a key. Select 2048 bits, type in a description if desired (I'd recommend using your domain name) and click Generate. The key will be stored on the server for you. You may need to create a stronger key, depending on the certificate issuer, however for me, the instructions said to created one that was 2048 bits.
Now return to the SSL/TLS Manager.
Step 2. Navigate to Certificate Signing Requests (CSR) and click the generate link. Select the key you created in the previous step, fill out any other mandatory and optional information and click Generate. Make sure you put the 'www' version of your domain name because that will cover both the domain name with and without 'www' in it.
Once your CSR is ready, copy the encoded CSR and go over to your certificate issuer.
Step 3. At your certificate issuer there should be an option to issue or activate a certificate, or like in my case to re-issue it. When performing this step, simply paste the CSR from the previous step and follow the rest of the prompts. You will be asked for your email address and contact details, make sure these are entered correctly because the certificate is emailed to you typically.
At the end of this step you should have an email from your certificate issuer with the certificate and an optional CA bundle.
Step 4. Copy the encoded certificate into the clipboard and head back to the SSL/TLS Manager again. Now navigate to Certificates (CRT) and click the upload link. On the next screen paste the certificate into the box provided (at the top of the page, for some reason I had to scroll up when doing this). Click Save Certificate and head back to the SSL/TLS Manager.
Step 5. Navigate to Install and Manage SSL for your site (HTTPS) and click the manage link. On the next screen select your domain and click Autofill by Domain. This will fill in everything that you need for you. If something isn't filled in, revise the steps above. Note that the CA bundle is optional and will most likely not be filled in, this is ok to leave blank.
Finally scroll to the bottom and click Install Certificate. A few moment later you should get a confirmation box and you're done!
-i
