23-Aug-2015
It's been some time since I've had to create a fresh Raspberry Pi SD card and I'm really pleased how easy it is to do now. There is no need to get your hands dirty with command line tools like
diskutil or
dd, just download a graphical app and let it do the work for you. In my case I used the
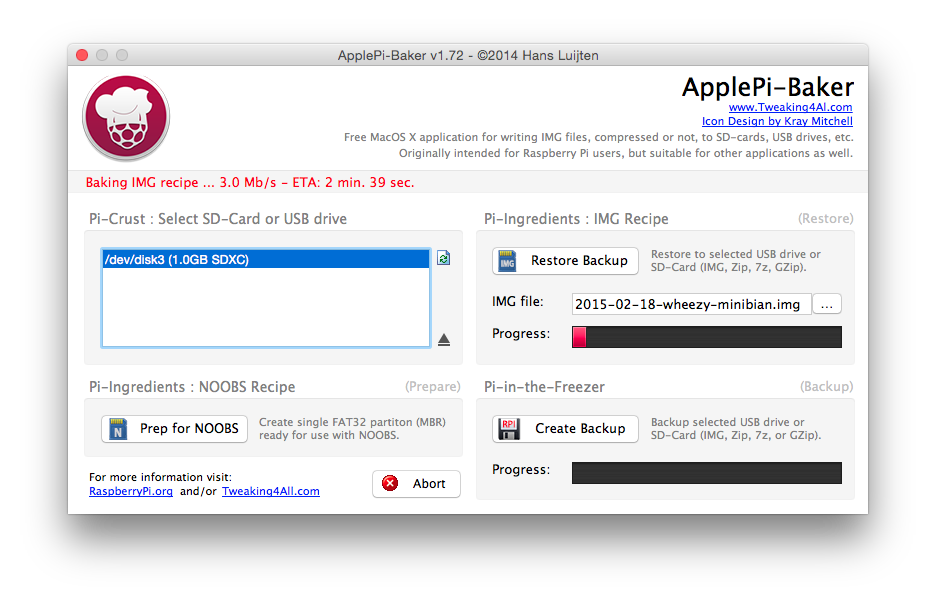
ApplePi Baker. The app is super easy to use and it shows you progress so you don't have to be guessing how much time is left before your SD card is ready to go.
When you launch the app, it asks for your
root password. This isn't stored and is required to write to the SD card, so it's safe to provide.
The app detects any SD cards connected to your Mac, simple select it in the
'Pi-Crust' section, then select your .img file in the
'Pi-Ingredients' section. To write the image to the SD card, click
Restore Backup and wait for it to complete.
Once the image is written, you're notified that you can eject the SD card.
That's all there is to it. You can also create a backup of your existing SD card using this app.
Enjoy!
-i
A quick disclaimer...
Although I put in a great effort into researching all the topics I cover, mistakes can happen.
Use of any information from my blog posts should be at own risk and I do not hold any liability towards any information misuse or damages caused by following any of my posts.
All content and opinions expressed on this Blog are my own and do not represent the opinions of my employer (Oracle).
Use of any information contained in this blog post/article is subject to
this disclaimer.
Igor Kromin