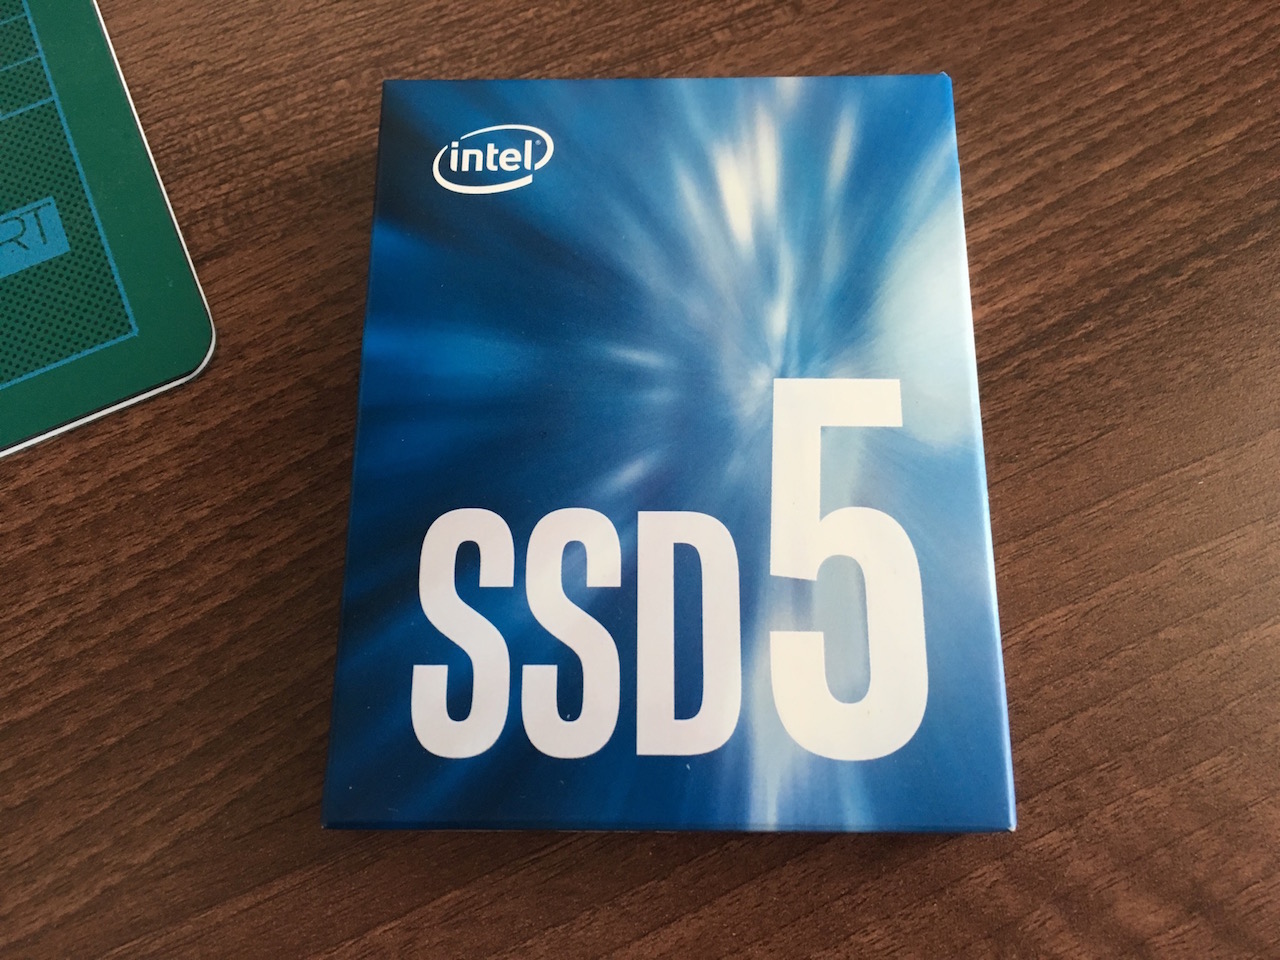
I managed to dig up the hardware maintenance manual for this laptop that indicated that it's possible to fit an M.2 SSD inside. So I went out and bought myself an Intel 540 series 120Gb M.2 80mm SSD module. That only cost me $AUD72 which I think is quite cheap and would quadruple the storage in this laptop! It's possible to get M.2 modules with much more space, I just chose the best option for my case.
Note: You need to use a SATA M2 module in this laptop. It doesn't have to be Intel like I used, as long as it's SATA.
*** READ THIS FIRST ***
Since many people are ignoring this notice, I've decided to make it stand out more.
Please do not comment or contact me asking whether a specific drive/brand will work, I am not affiliated with Lenovo and will not be able to provide you with any advice like that. Any comments along these lines will be ignored.
Thanks for understanding and apologies to anyone who is doing the right thing!
So lets see what I did to add the additional storage. Note that I am not replacing the existing eMMC module so there is no need to reinstall Windows.
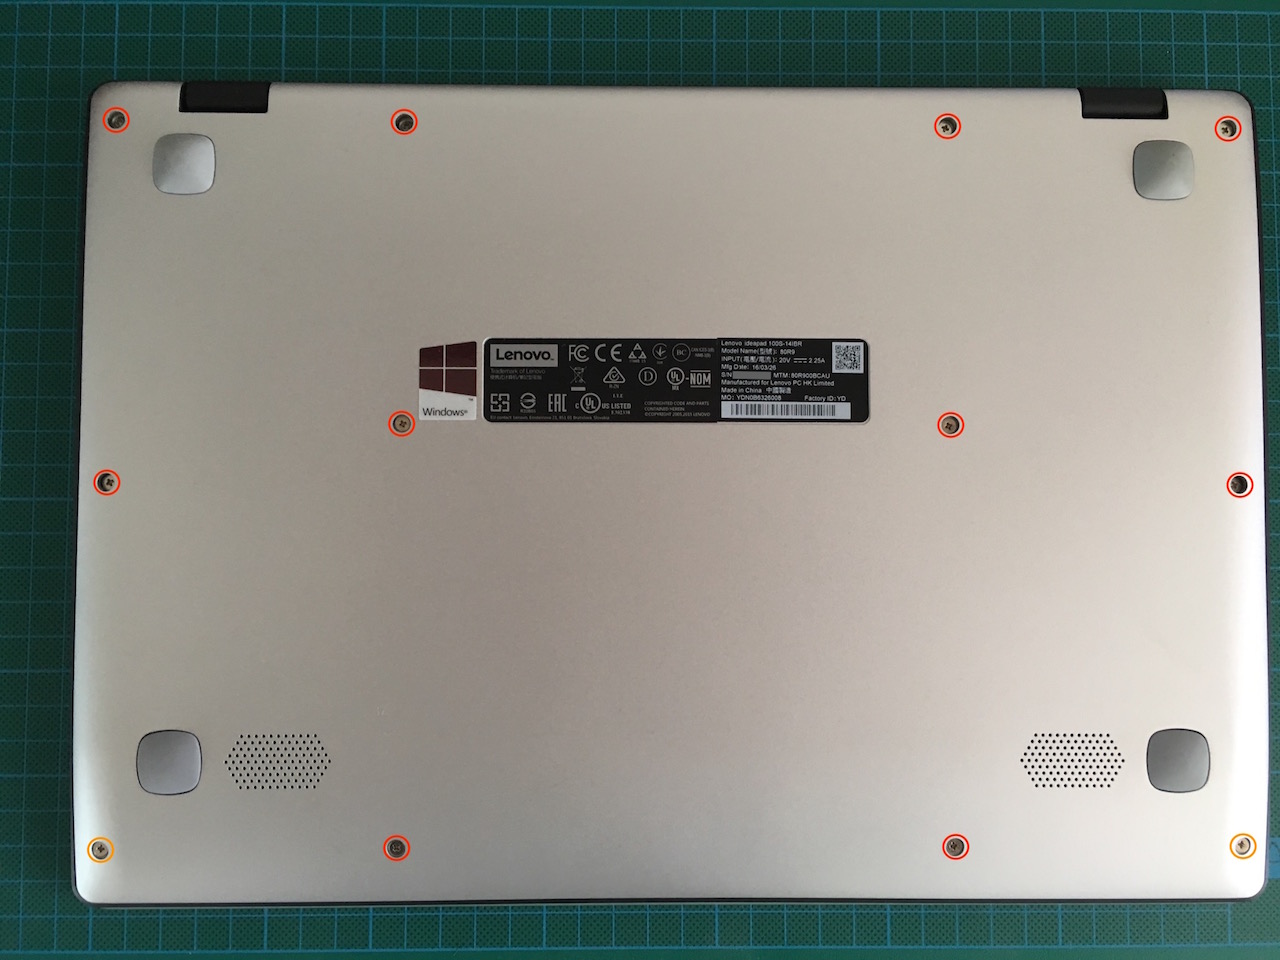
First thing's first - remove the bottom cover. This part is super easy, using a phillips head screwdriver I removed all the screws from the bottom. The ones circled in red are long and the ones with orange circles are shorter screws.
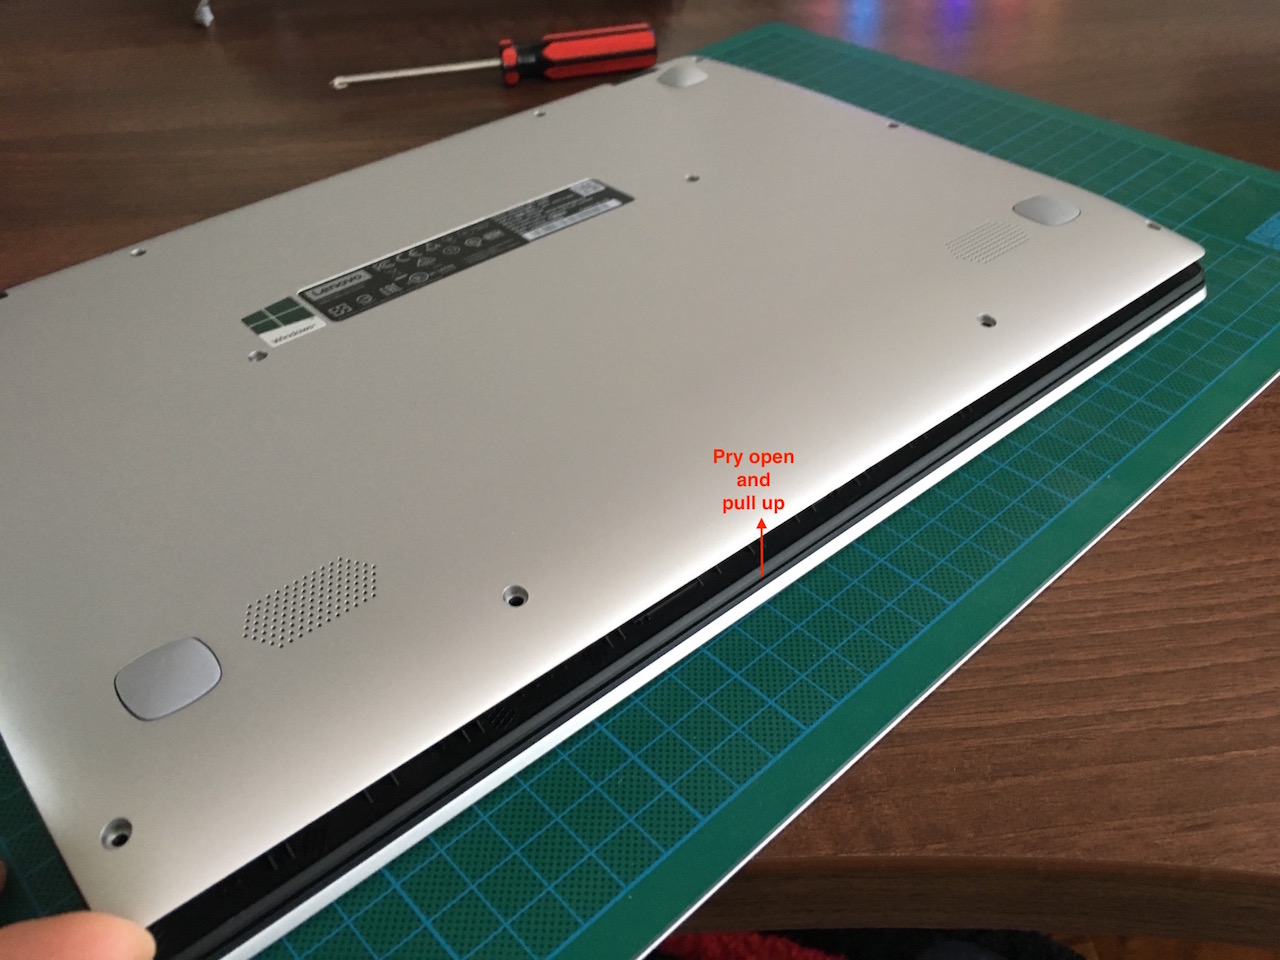
After all the screws were out I gently pried the bottom cover away from the body of the laptop and lifted it up from the front edge.
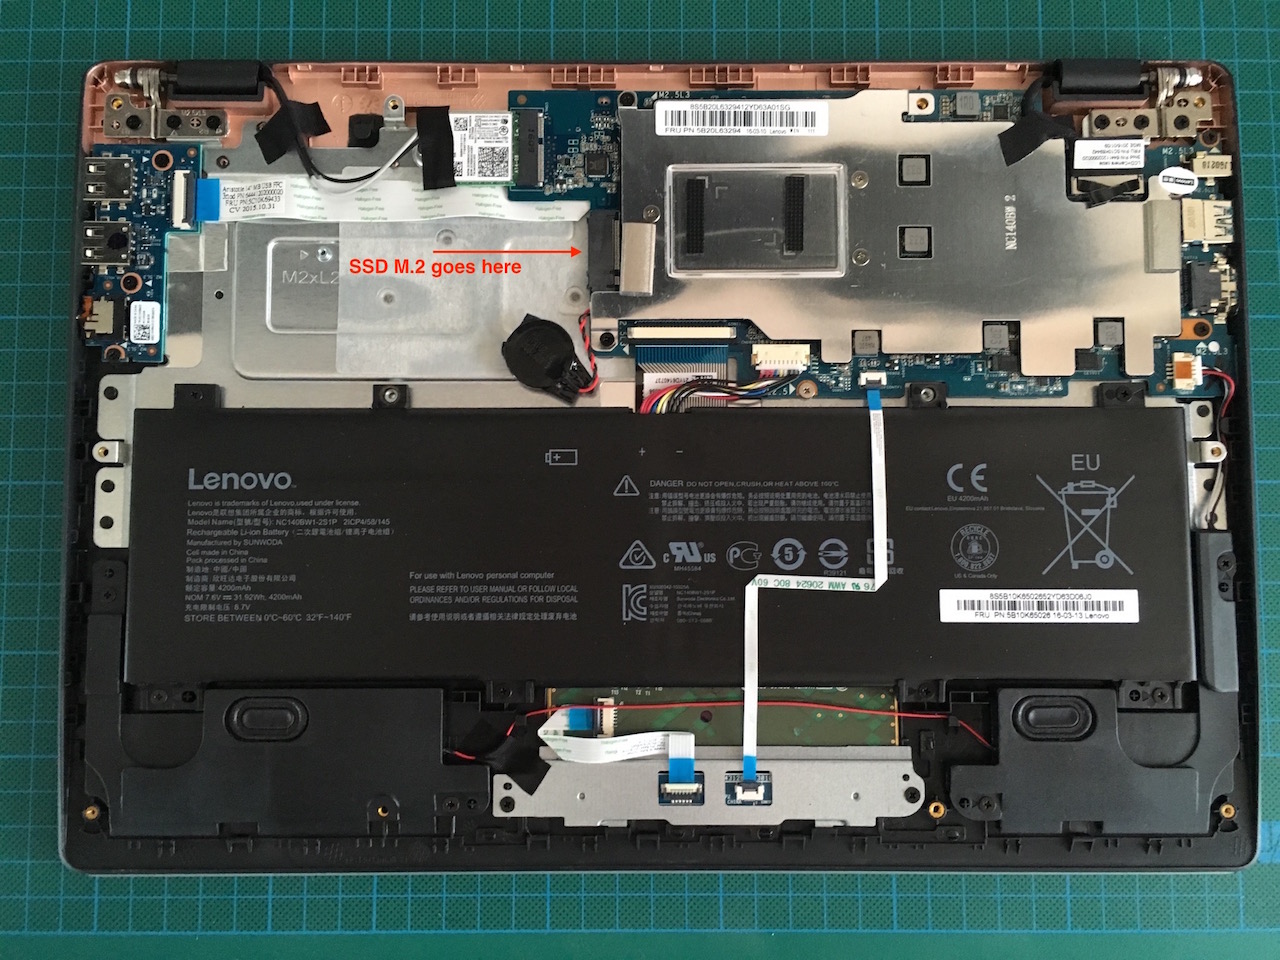
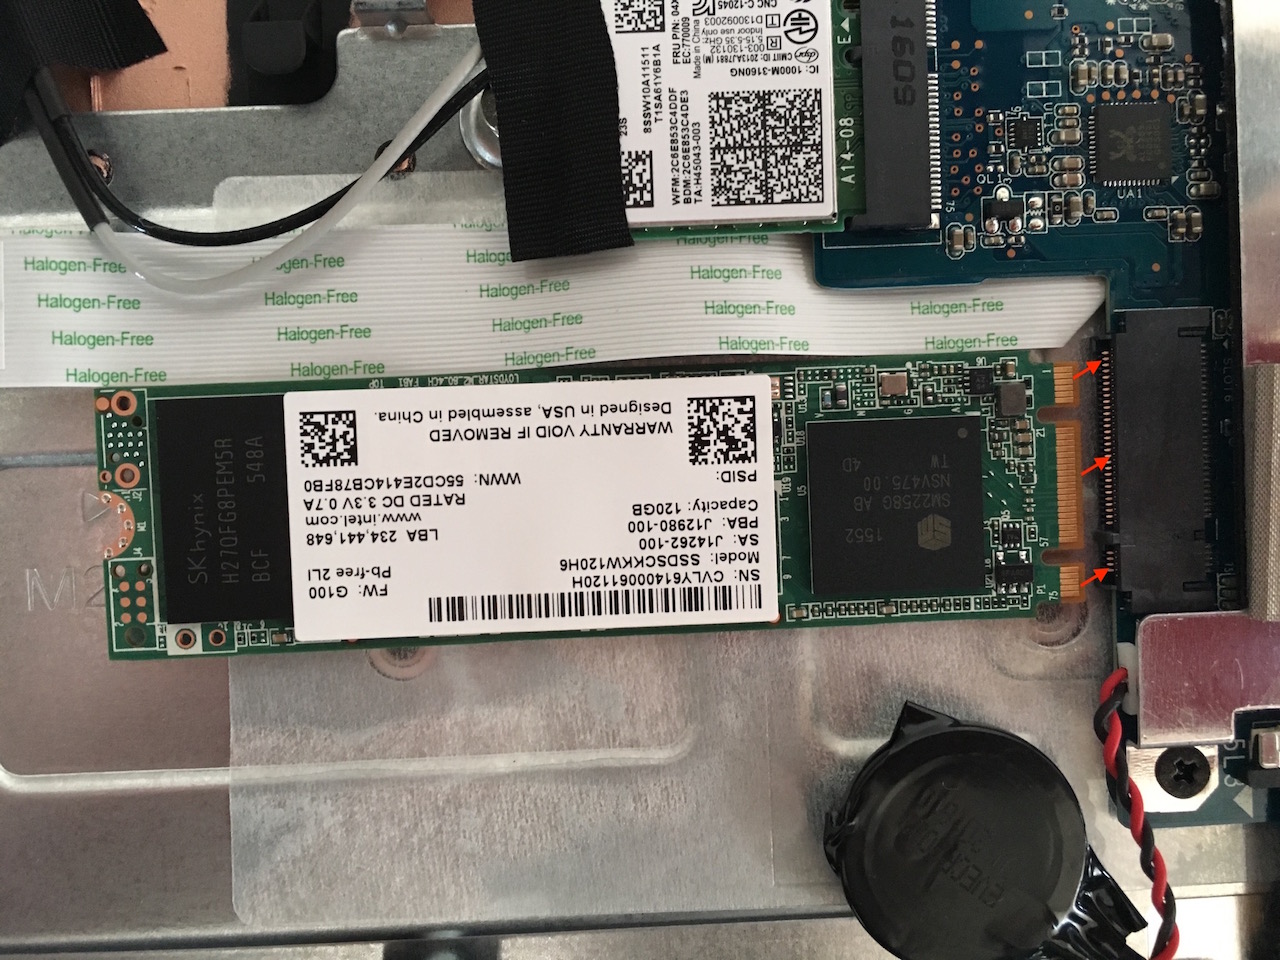
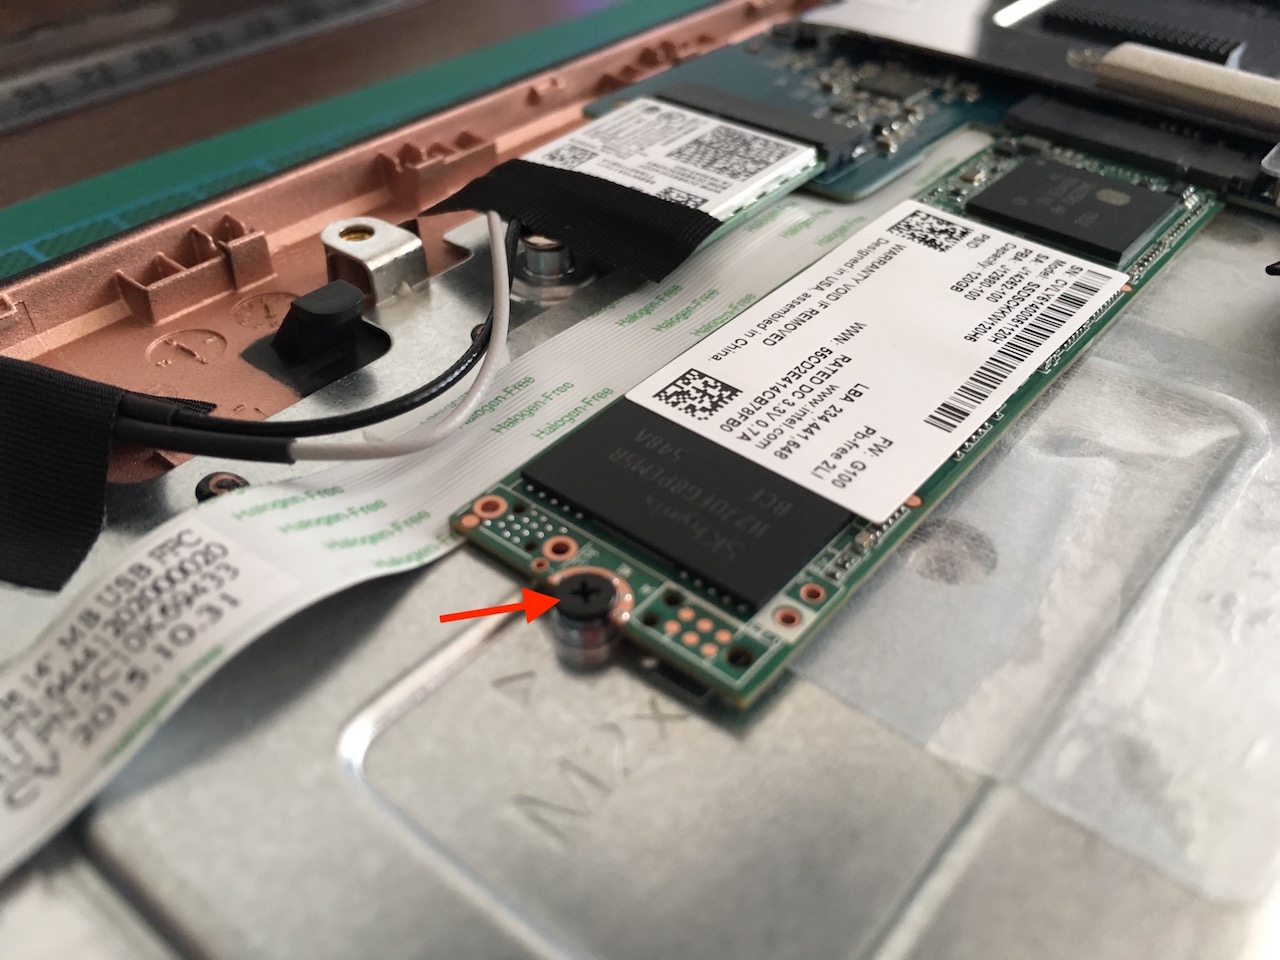
I was surprised how accessible all the components were! The spot for the M.2 SSD module was clearly visible, but there was no screw to hold the module down - I guess since it's not bundled with the laptop there is no need to have this extra screw.
Here's the M.2 SSD module I used...

It's very easy to fit, just orient it with the 4-pin notch towards the battery and slide it in.
I mentioned that there was no screw to hold the M.2 module down. I happened to have a screw that fitted properly but if one is not available, some electrical tape could have been used to hold it down.
That was it in terms of the hardware part. The laptop bottom and screws can be put back in place now. Next step was getting Windows to recognise and use this extra storage.
Windows Device Manager recognised that the M.2 SSD was there, but it didn't come up as drive in Windows Explorer.

I opened Disk Management and it immediately asked me to initialise this disk. Progress!

After initialising I had an unallocated disk, right clicking it and selecting 'New Simple Volume' let me format it, I just followed the wizard-led instructions to competition here, selecting all the defaults.


After the wizard completed I had a Drive D!

It also showed up in Windows Explorer...

At this point I could start using the extra disk. I changed some Windows settings so that it treated the new disk as the default storage location...

Last - I changed the virtual memory settings so that the paging file was now on the new (and faster) D drive. I also made it so that there was no paging file on the C drive - this both frees up space on the drive where Windows is installed and makes sure that the faster disk is used for virtual memory at all times (I allocated 6Gb of virtual memory).

For the cost of $AUD72 and about 30 minutes worth of effort I think this has been a very worthwhile upgrade!
-i
