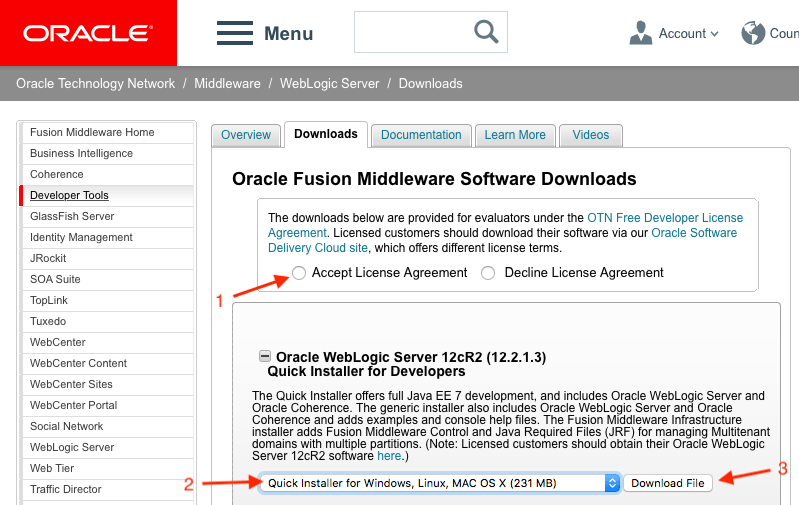
All steps assume that Java is already installed. The first step is of course to download WebLogic from OTN.
This will result in a zip file in the Downloads directory, fmw_12.2.1.3.0_wls_quick_Disk1_1of1.zip, this needs to be unzipped. Then it's time to open the Terminal.
I like to keep my development tools in the /Applications/devtools directory so I have a directory for WebLogic in this location too e.g. /Applications/devtools/wls_12.2.1.3. After extracting the installer we can change to its directory. Here are the commands for these steps...
Terminal Commands
mkdir -p /Applications/devtools/wls_12.2.1.3
cd ~/Downloads/fmw_12.2.1.3.0_wls_quick_Disk1_1of1
When I first used the quick installer I made the mistake of running it by double-clicking the jar file. This unfortunately assumes that the directory where the installer was extracted is the new ORACLE_HOME, which is not desirable, hence I switched to installing WebLogic using this slightly longer method.
Since I wanted ORACLE_HOME to be in /Applications/devtools/wls_12.2.1.3, the installer was ran like this...
Terminal Commands
java -jar fmw_12.2.1.3.0_wls_quick.jar ORACLE_HOME=/Applications/devtools/wls_12.2.1.3
The installer took around 6 minutes to complete.
Terminal Output
Extracting the installer . . . . Done
Checking if CPU speed is above 300 MHz. Actual 2969.6 MHz Passed
Checking swap space: must be greater than 512 MB. Actual 73807 MB Passed
Checking if this platform requires a 64-bit JVM. Actual 64 Passed
Checking temp space: must be greater than 300 MB. Actual 73807 MB Passed
Preparing to launch the Oracle Universal Installer from /private/var/folders/hm/qh4zmdc576gdptgjt6sqftm00000gn/T/OraInstall2018-06-28_02-56-32PM
Log: /private/var/folders/hm/qh4zmdc576gdptgjt6sqftm00000gn/T/OraInstall2018-06-28_02-56-32PM/install2018-06-28_02-56-32PM.log
Setting ORACLE_HOME to /Applications/devtools/wls_12.2.1.3
*****************************************************
Distribution Name : Oracle Fusion Middleware 12c WebLogic and Coherence Developer
Distribution Version : 12.2.1.3.0
Oracle Inventory : /Users/ikromin/oraInventory
Oracle Home : /Applications/devtools/wls_12.2.1.3
Java Home : /Library/Java/JavaVirtualMachines/jdk1.8.0_131.jdk/Contents/Home
*****************************************************
Copyright (c) 1996, 2017, Oracle and/or its affiliates. All rights reserved.
Skipping Software Updates
Validations are enabled for this session.
Verifying data
Copying Files
Percent Complete : 10
Percent Complete : 20
Percent Complete : 30
Percent Complete : 40
Percent Complete : 50
Percent Complete : 60
Percent Complete : 70
Percent Complete : 80
Percent Complete : 90
Percent Complete : 100
The installation of Oracle Fusion Middleware 12c WebLogic and Coherence Developer 12.2.1.3.0 completed successfully.
Logs successfully copied to /Applications/devtools/wls_12.2.1.3/cfgtoollogs/oui.
After the installer does its task it can be deleted and then it's time to create a domain. I find the best way of doing this is using the configuration wizard. First we need to change to the WebLogic ORACLE_HOME and then run the config script, which launches the wizard...
Terminal Commands
cd /Applications/devtools/wls_12.2.1.3
oracle_common/common/bin/config.sh
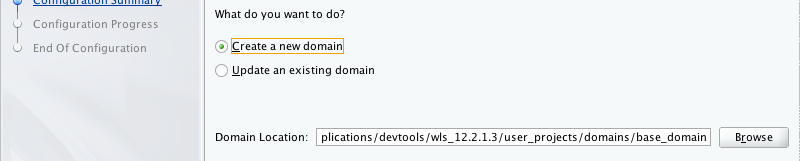
The steps are more or less self explanatory and most default options are the most commonly used ones anyway. Clicking Next on each screen moves the wizard forward. We're creating a new domain...
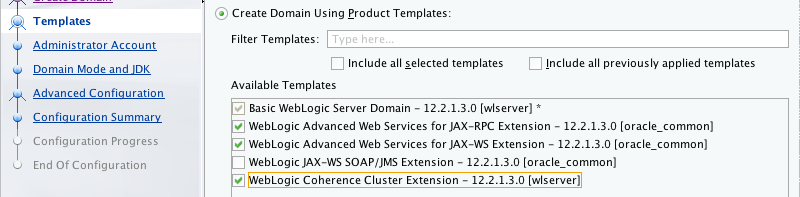
The domain is created from templates. Which ones are chosen depends on your requirements, I like to have all web service and Coherence support but not JMS extensions.
Enter the username and password to use for the admin account next.

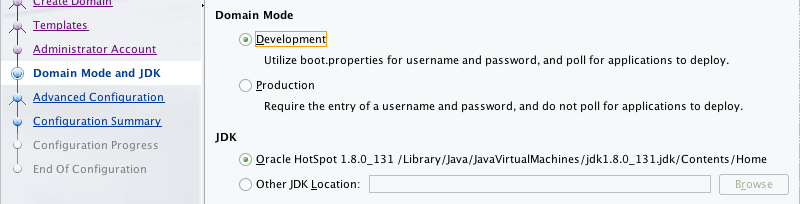
Domain mode should be development to avoid having to enter a password every time WebLogic is being started.
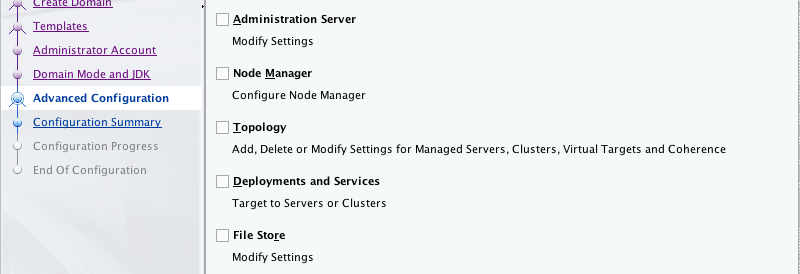
I skip advanced configuration and just go with a simple AdminServer, no managed servers and all other default configuration options. For development purposes a managed server is not really required.
The next lot of screens are the summary, progress and final confirmation.


At this point WebLogic is installed and ready to be started. This is done from the Terminal again...
Terminal Commands
/Applications/devtools/wls_12.2.1.3/user_projects/domains/base_domain/bin/startWebLogic.sh
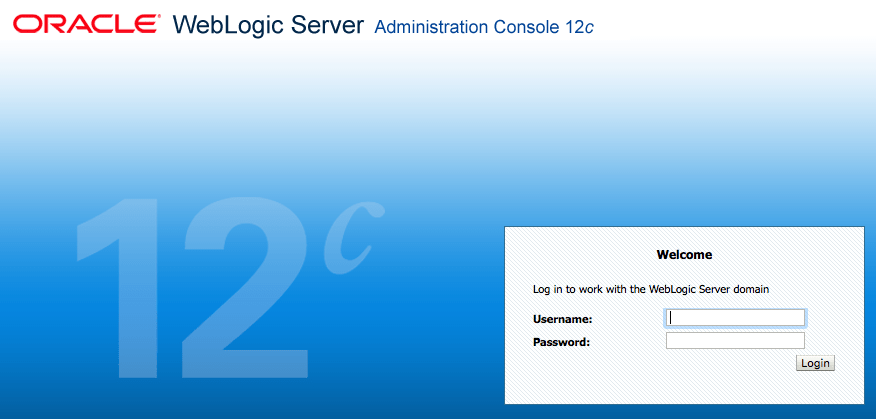
After the server is in the RUNNING state, the Console can be accessed from http://localhost:7001/console.
-i
