Problem - Mobile Safari ignores the download attribute in the link element. This leads to the serialised JSON data being displayed in the browser window without any way of storing it on the user's device. There was no way to disable this.
Solution - Present the user with something that stores data and that they can save to their device. An image is an obvious choice here. This doesn't create the same save/load experience but is close enough to be workable.
I did try using QR codes for this and found them incredibly easy to generate but the decoding side was not so simple and required rather large libraries to be included, so I quickly discarded the idea of using them.
The challenge then was to work out how to store arbitrary text data in a PNG. This was not a new idea and has been done previously, however I didn't want to have a completely generic storage container and was happy to impose some constraints to make my job easier.
Constraints/Requirements
- The generated image had to be easy to save and should have preset dimensions.
- The save/load data I was dealing with was in the order of several dozen kilobytes.
- I wanted to store my data as JSON.
- I didn't want to deal with the details saving/loading in any particular image format.
Sounds simple enough right? Well there were a few catches. But first lets see the general approach.
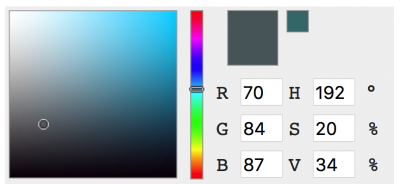
Images are fundamentally 2D arrays of pixels. Each pixel is a tuple of 3 bytes, one for each colour component - RGB. Each of the colour components has a range of 0 to 255. This lends itself to storing byte/character arrays naturally. For example a single pixel can be used to store the array of ASCII characters ['F', 'T', 'W'] by encoding their ASCII codes as a colour intensity like so...
The result is a rather grey and boring pixel but it stores the data we want. Whole sentences can be encoded in the same manner - "The quick brown fox jumps over the lazy dog" - is a sequence of these ASCII codes...
Text
84 104 101
32 113 117
105 99 107
32 98 114
111 119 110
32 102 111
120 32 106
117 109 112
115 32 111
118 101 114
32 116 104
101 32 108
97 122 121
32 100 111
103
Which ends up as 15 pixels like so...
The last 3-tuple only has one character code so it is padded with two zero values to produce the resulting pixel.
That was the basic approach. Then I had to address my requirements:
- Though storing and generating an image that was a 1-pixel line would have been the easiest to implement, this is not easy to tap to save so I had to use a square image of sufficient size. Using a preset maximum size (256 x 256 pixels) of the image worked well towards this but it required keeping track of the size of the actual encoded data. This encoded size was the length of a square and had to be stored in the generated image. Using a single colour of the first pixel would let me have a square of up to 255 x 255 in size - the first line is forfeited to store this size value and since it's a square the last column in the image is also forfeited. The size of the byte/character array being encoded also had to be preserved somehow, this would require more than a byte of storage to store but I had the remainder of the first line worth of pixels to deal with this (which I didn't end up needing due to a fortunate issue I encountered with the alpha channel).
- Since the maximum size of the available pixel data was 255 x 255 pixels, this gave me 65025 pixels to play with. In turn this translated to 195075 bytes (190kB) of text data. This was well above what I actually needed.
- Using TextEncoder I could convert my serialised JSON data into a byte array (Uint8Array in JavaScript).
- Using an off-screen canvas would allow me to manipulate pixel data at will and then convert to an image data URL in my desired format.
Converting objects to a byte array
So now I had the general approach worked out and had a container for my byte array. The next step was to convert my objects into a form that could be stored in a byte array. This was easy, using JSON.stringify() and TextEncoder.encode() I could get a Uint8Array. I could also then work out the size of the square image that would be big enough to store this data.
JavaScript
var strData = JSON.stringify(myObjData);
var uint8array = (new TextEncoder('utf-8')).encode(strData);
var dataSize = Math.ceil(Math.sqrt(uint8array.length / 3));
Converting byte array to an image data
Then it was time to take my byte array data and convert it into an ImageData object that could be used with a canvas. That's where I came across the first issue - ImageData expected a Uint8ClampedArray and I had a Uint8Array. Fundamentally though since my data was already 'clamped' in a sense by the TextEncoder conversion I didn't really have to worry too much.
Since I needed a lossless format to store my image data I went for PNG as the output format. This also meant that instead of storing data as RGB, it would be stored as RGBA. There was an additional Alpha channel per pixel and therefore an extra byte to play with. However after some experimentation I ran into an issue that had to do with RGB corruption when the alpha channel was set to zero.
That threw a spanner in the works and I had to write code to convert my 3-tuple byte array into a 4-tuple array with the 4th (alpha) component being set to full opacity (255). This turned out to be an advantage for decoding later since I could skip all zero-padded data easily. It wasn't the most efficient code but it did the trick.
JavaScript
var paddedData = new Uint8ClampedArray(dataSize * dataSize * 4);
var idx = 0;
for (var i = 0; i < uint8array.length; i += 3) {
var subArray = uint8array.subarray(i, i + 3);
paddedData.set(subArray, idx);
paddedData.set([255], idx + 3);
idx += 4;
}
As a bonus I now had the correctly typed Uint8ClampedArray byte array and could finally construct my ImageData object.
JavaScript
var imageData = new ImageData(paddedData, dataSize, dataSize);
Drawing the image
With the ImageData object available I could now create a canvas and draw the image data that was holding my encoded JSON. First the canvas was created 'off screen' and its context retrieved and the background set to a solid colour (actual colour doesn't matter here).
JavaScript
var imgSize = 256;
var canvas = document.createElement('canvas');
canvas.width = canvas.height = imgSize;
var ctx = canvas.getContext('2d');
ctx.fillStyle = '#AA0000';
ctx.fillRect(0, 0, imgSize, imgSize);
Then I could 'draw' the pixel that represented the size of the square image that encoded my data.
JavaScript
ctx.fillStyle = 'rgb(' + dataSize +',0,0)';
ctx.fillRect(0, 0, 1, 1);
Then I could draw the image data...
JavaScript
ctx.putImageData(imageData, 0, 1);
Saving the image
The image could now be saved from the canvas to the file system (or in the case of mobile Safari displayed in a new tab) with a bit of jQuery code...
JavaScript
$('body').append('<a id="hiddenLink" href="' + canvas.toDataURL() +
'" style="display:none;" download="image.png">Download</a>');
var link = $('#hiddenLink')[0];
link.click();
link.remove();
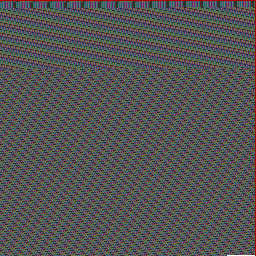
The end result was something like this...

Of course the next step is decoding an image and getting the original JSON back out of it, that will have to wait until the next article however, which is available now - Retrieving data from hijacked PNG images using HTML canvas and Javascript!
-i


