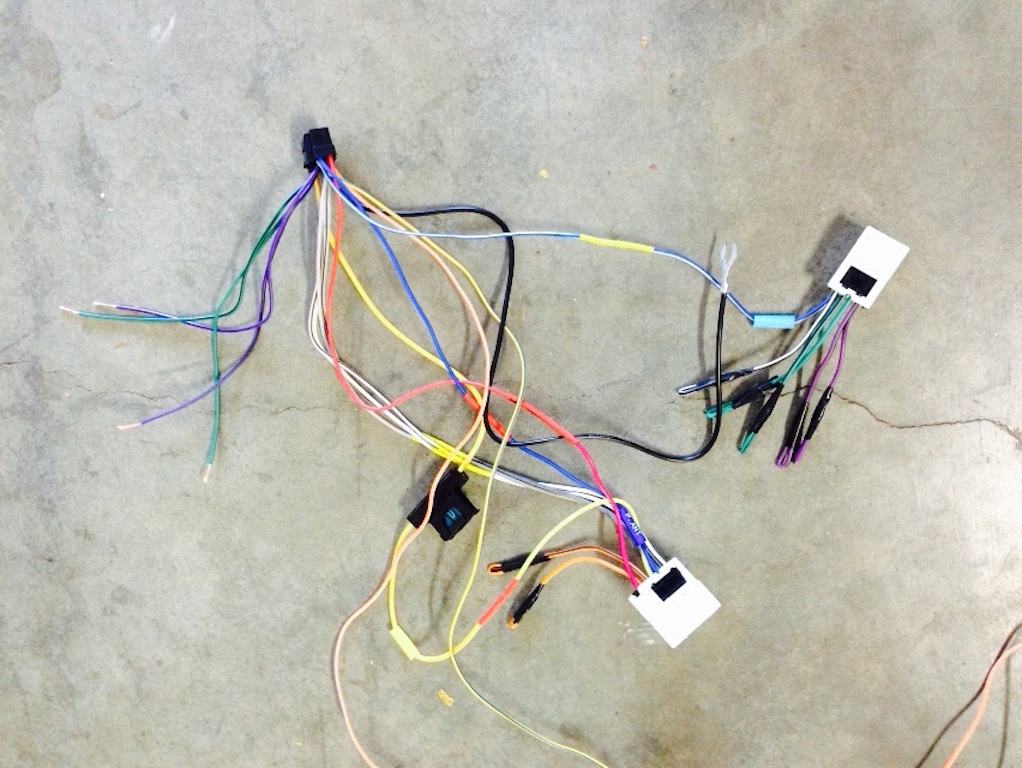
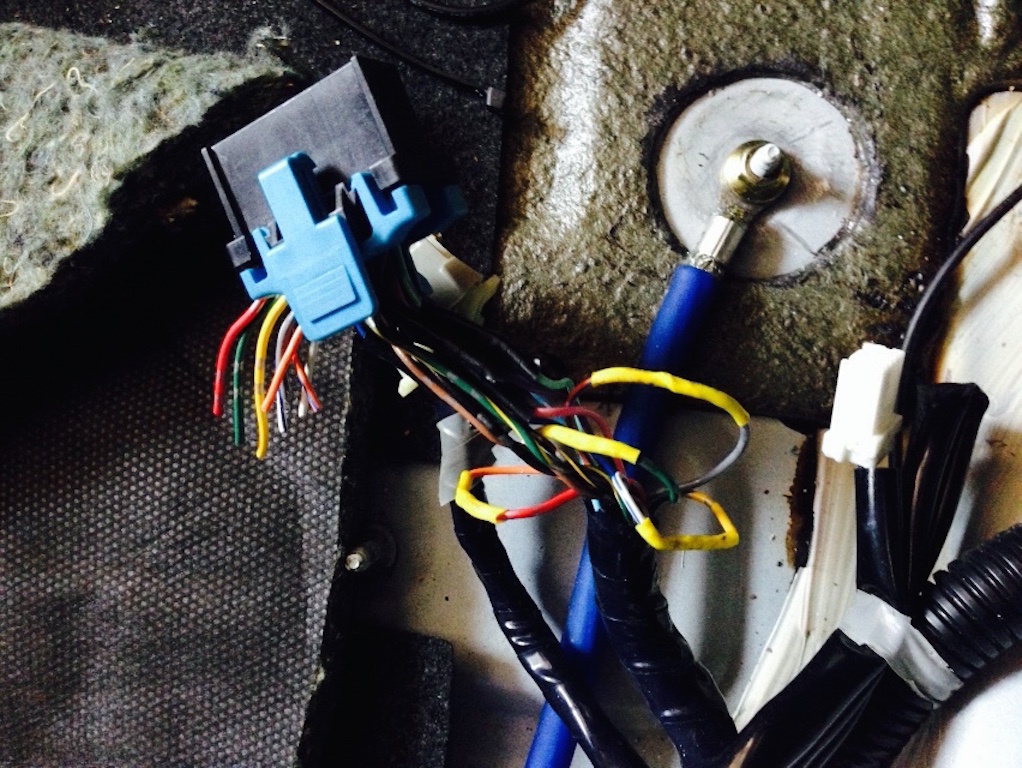
Wiring up the headunit's wiring harness to the Metra 70-7550 was quite straight forward. I hooked up everything apart from the rear speaker connections because in my case, I had separate wires for those running from the speakers and into the centre console. So you can see the purple and green wires in the photo no connected to the Metra harness, I soldered them directly to the speaker wires in the centre console. Some wiring was not necessary so I just isolated those, but didn't pull them out.
Here's a wiring diagram that I used, it's from the Wrathernaut's Double-Din Installation FAQ, Shopping and Resource List.
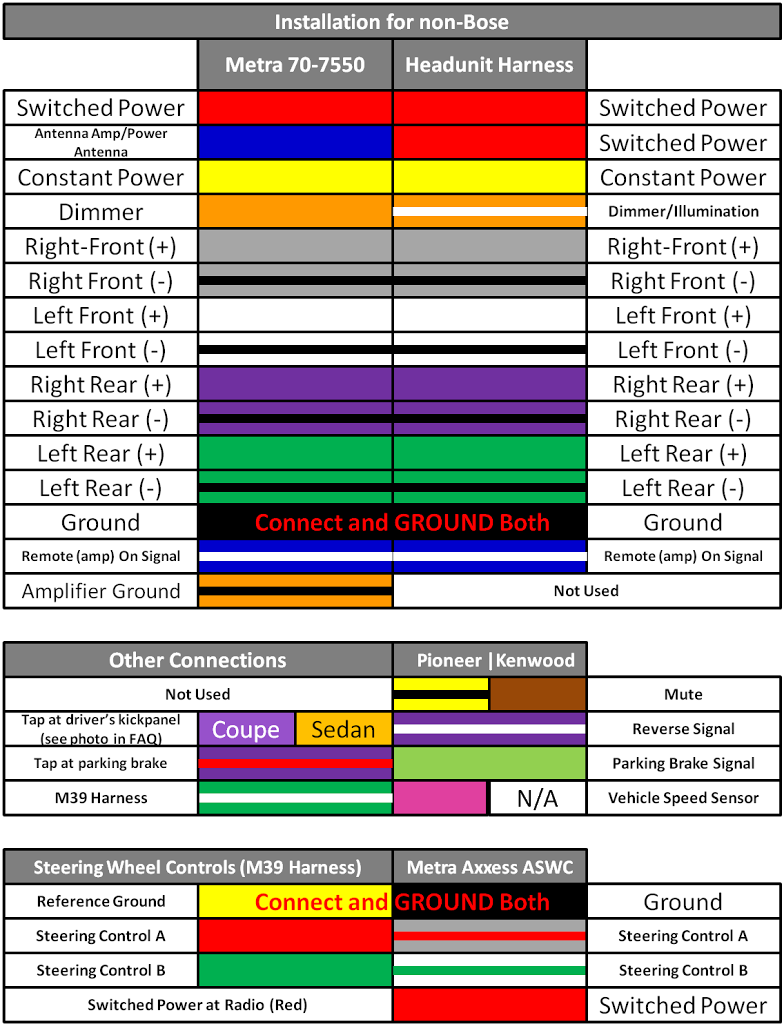
Note: The reverse signal wire was NOT purple as per the diagram, it was in fact Orange, even thought I have a coupe.
The rest of the wiring for the headunit had to be connected too, this includes the antenna, rear camera, etc. We also put the headunit assembly back in place and connected all the stock wiring to it for the aircon control, navigation, etc.
The difficulty came next, the front speakers...I didn't want (or rather it was next to impossible) to run new wiring from the doors to the centre console, so I used stock wiring. This didn't work unless I had the stock amp running, and that sounded terrible. So we decided to see if we can bypass the amp somehow. Well, turns out you can but it's a total pain to find the information.
I managed to track down the following wiring sheet:
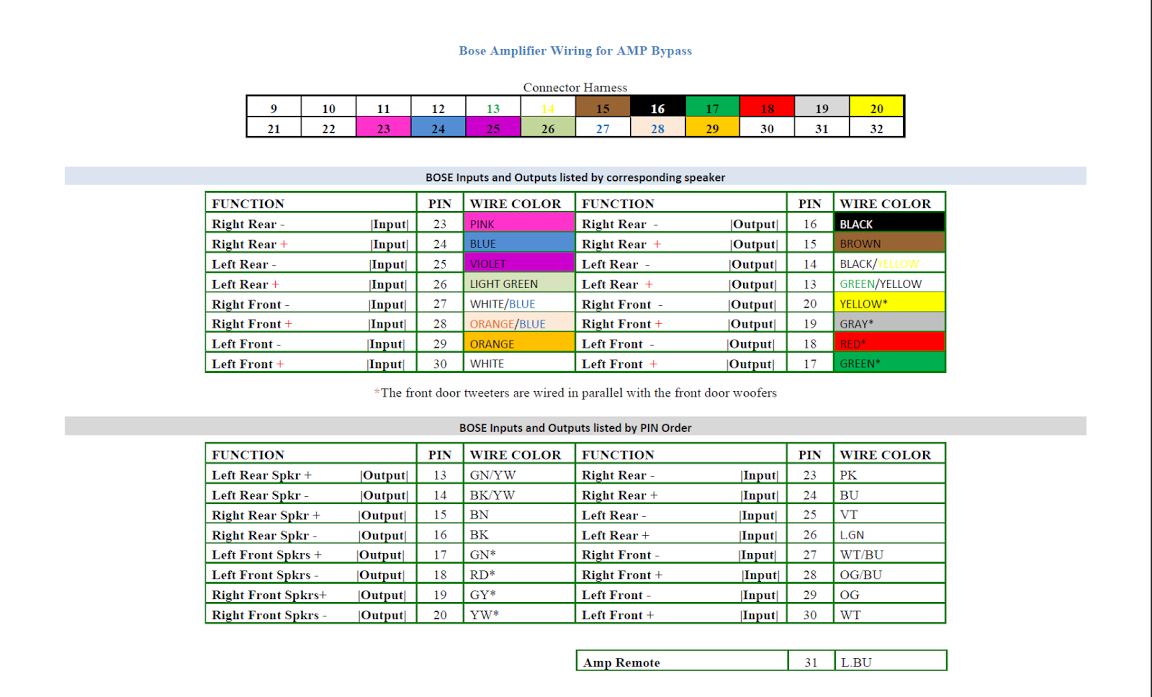
This made the job so much easier, so I removed the stock amp and trialled the bypass...
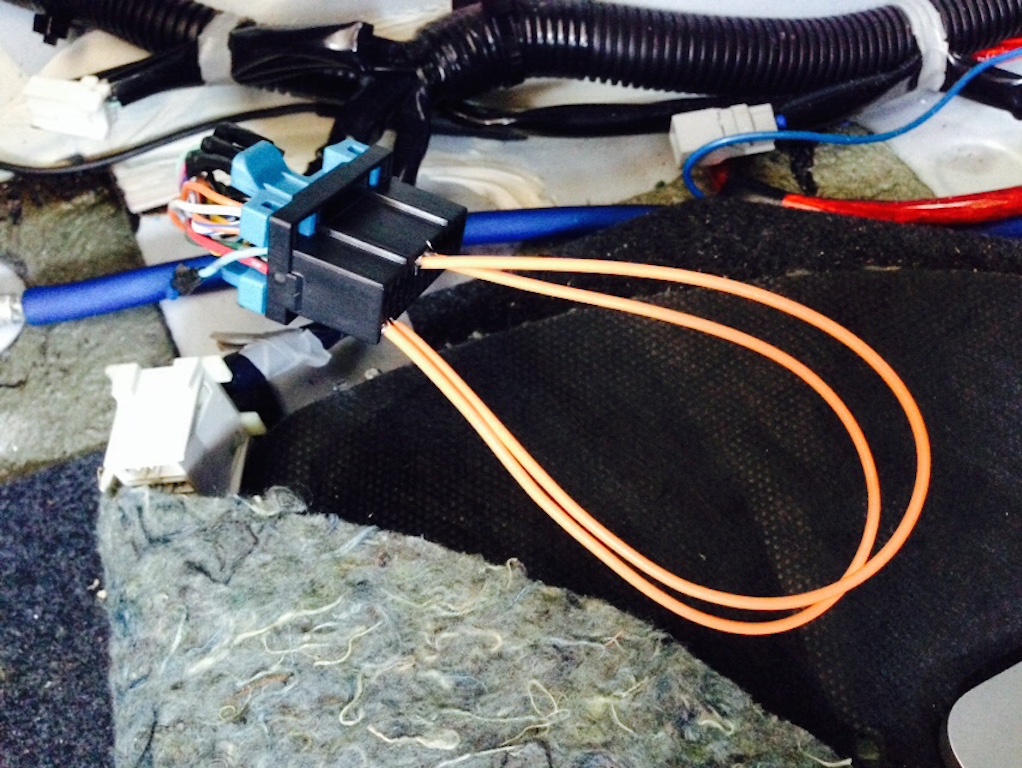
It worked! The front speakers were loud and clear, exactly as they should be, and they were running off the headunit too. At this point I clipped the stock amp wiring and connected the relevant wires together as per the diagram (FR+ input to FR+ output, etc).
With the wiring all done we put the car back together.
We did try to get the steering wheel controls working, but were not sure what should be connected where because the wiring colours did not match the G35 Driver wiring charts. We were also not certain where the M39 harness actually was. I'd like to revisit this at a later point but for now the steering wheel controls do nothing.
-i
