This series of posts describe how a blog, such as FlatPress can be integrated with Facebook to have the ability to post to a Facebook page as well as your own user feed/wall. I will not go into details of how to modify internals of FlatPress to accommodate these features, that's beyond the scope of this article. I am also assuming that you have a Facebook page created already.
The PHP (version 4.0.0) Facebook SDK provides all the classes you would need to establish a session with Facebook and to manipulate the Graph APIs afterwards. This is what I used in the code I'll describe here.
Before going ahead with the code however, you will need to create a Facebook App. This is more or less a dummy App that is used for posting content on your behalf, it doesn't do much else and importantly does not need to go through the Facebook review process.
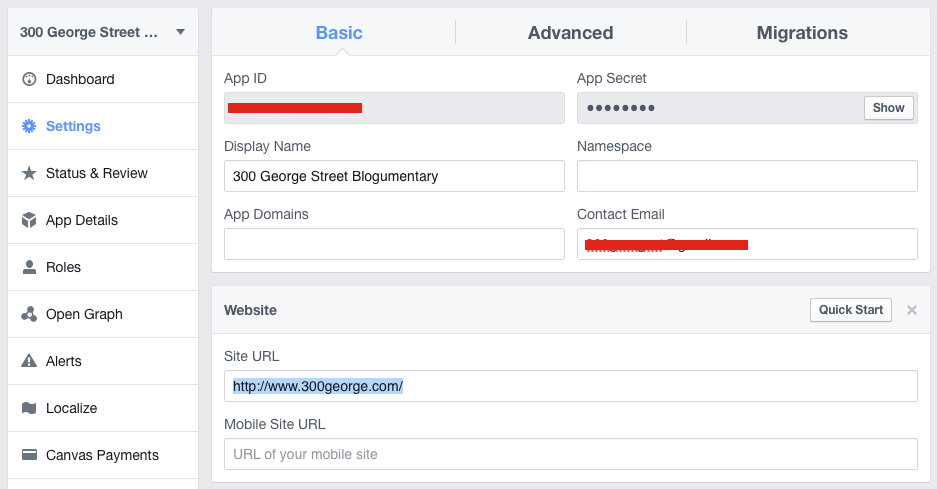
I am going to use my side-project blog, 300 George Street Blogumentary as an example in my screenshots.
First go to the Facebook Developers page and create an app. This is done through the My Apps, Add a New App menu.

For the platform select Website and then click Skip and Create App ID. You can select the Apps for Pages category if prompted.

Fill out the basic App information and in the Settings pane make sure to fill in the Site URL as Facebook checks the originating source of your requests to make sure it matches this URL.
Take a note of the App ID and App Secret as these are needed for the code to work. These should be stored on the server side somewhere, not hard-coded. They are needed to establish a Facebook session.
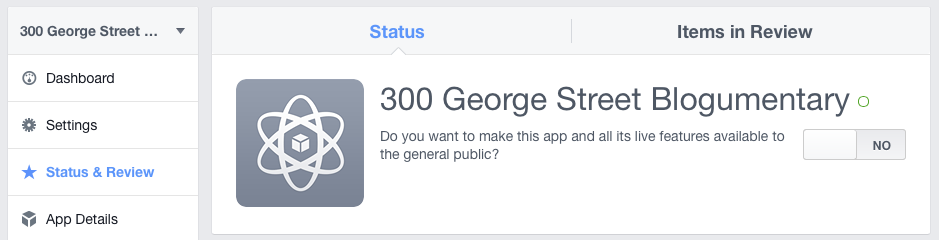
You can make the App public now (or wait until you finished writing the code). If the App is not public, any posts it makes will not be visible to anyone else but yourself. To make the App public, head over to the [i]Status & Review tab and flick the switch, then click Confirm.
Now that the app is set up, head over to your Facebook page that the App will represent and click the About, Page Info link. Scroll all the way down and take note of the Facebook Page ID.

Now all that is left is to get the pre-authenticated token from the Graph API Explorer page. From the Application drop-down, select the App you have just created.

Click Get Access Token and make sure to select the manage_pages and publish_actions on the Extended Permissions tab. After you click Get Access Token a new token will be generated that you can copy/paste, take note of this token.
With all the info assembled you can now get to the code, however that will have to wait until the next post which will be put up soon (in a day or two).
Update: The second part of this series is now available, go check it out to see the PHP code for posting to Facebook.
-i
