Igor Kromin |   Consultant. Coder. Blogger. Tinkerer. Gamer.
Notice: I'm taking a break from blogging to focus on Atari Gamer . com, check it out!

This is a quick guide on how to create an MTOM enabled request in SoapUI. The process is actually very simple with only a small catch.

First you need to set the request properties to enable and force MTOM.
soapuimtom4.png


Then, on the attachments tab click the + icon and select a file to attach.
soapuimtom1.png


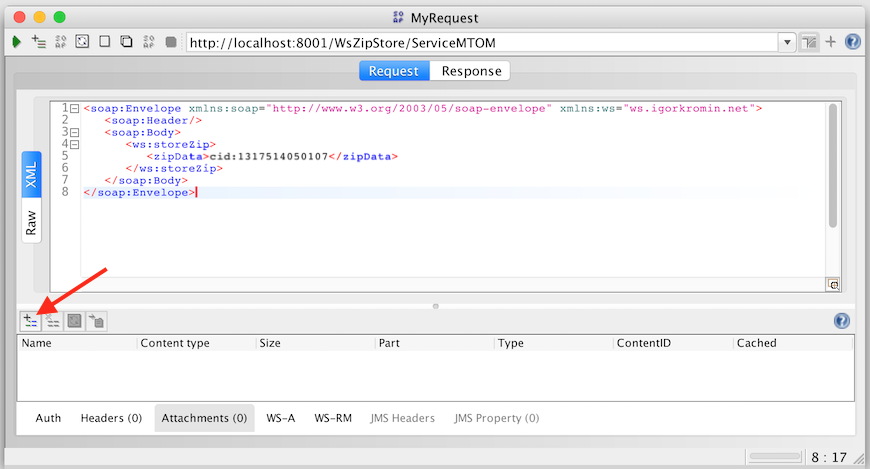
You have the option of caching the file inside the request or not, I usually chose to cache it just in case the original file is deleted.

When SoapUI adds the file, it doesn't select the part for you. This needs to match the cid part ID from within the request. That's the minor catch I mentioned earlier.
soapuimtom2.png


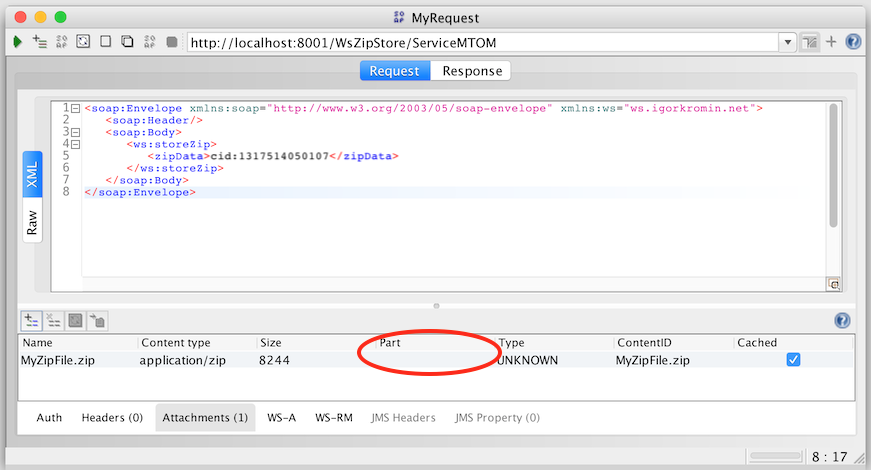
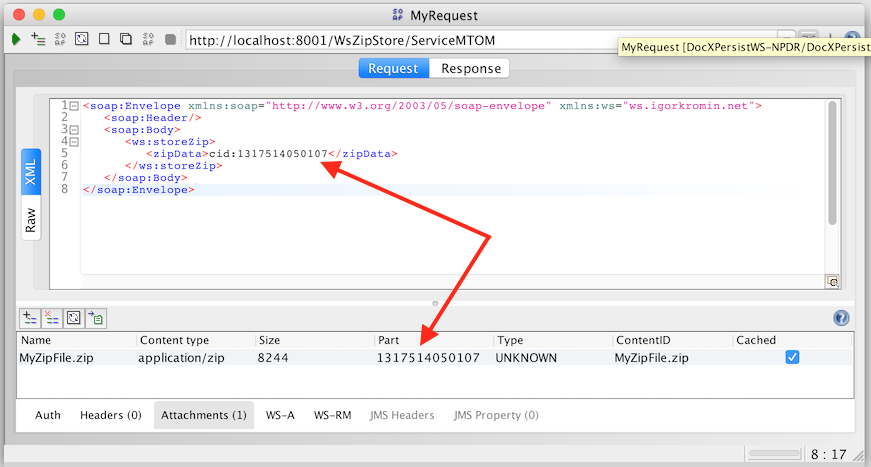
It's just a matter of clicking the table cell under the 'Part' column and selecting the ID to match the ID inside the SOAP body.
soapuimtom3.png


Note: If the above doesn't work, try this...
Change the "cid:" reference in the SOAP body to use the attachment ContentID instead. For example if attachment ContentID is "MyFile.zip" then change the SOAP request to use "cid:MyFile.zip".


That's all there is! The request will then be sent as an MTOM request.

-i

A quick disclaimer...

Although I put in a great effort into researching all the topics I cover, mistakes can happen. If you spot something out of place, please do let me know.

All content and opinions expressed on this Blog are my own and do not represent the opinions of my employer (Oracle). Use of any information contained in this blog post/article is subject to this disclaimer.
Hi! You can search my blog here ⤵
NOTE: (2022) This Blog is no longer maintained and I will not be answering any emails or comments.

I am now focusing on Atari Gamer.