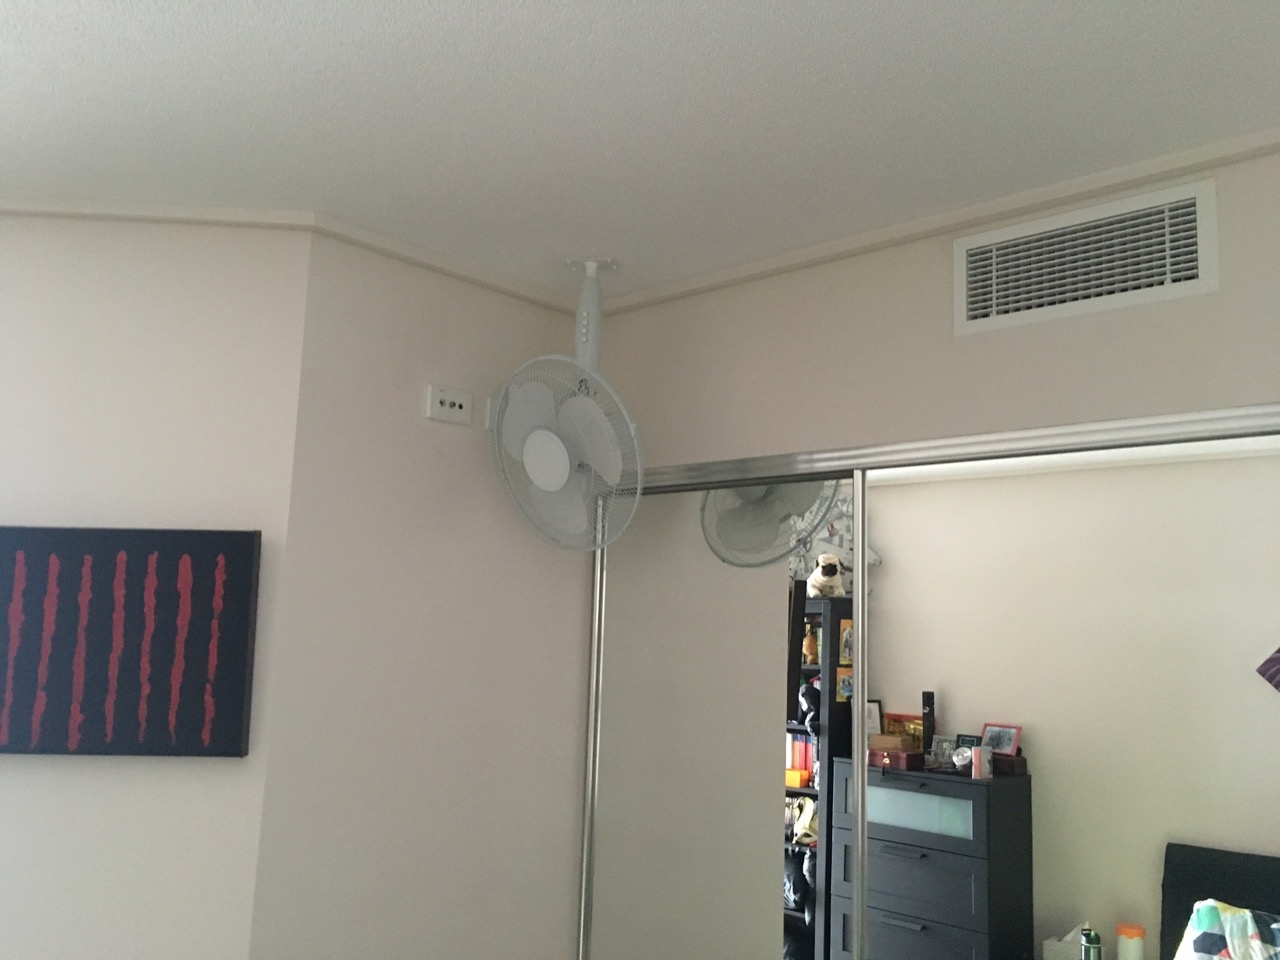
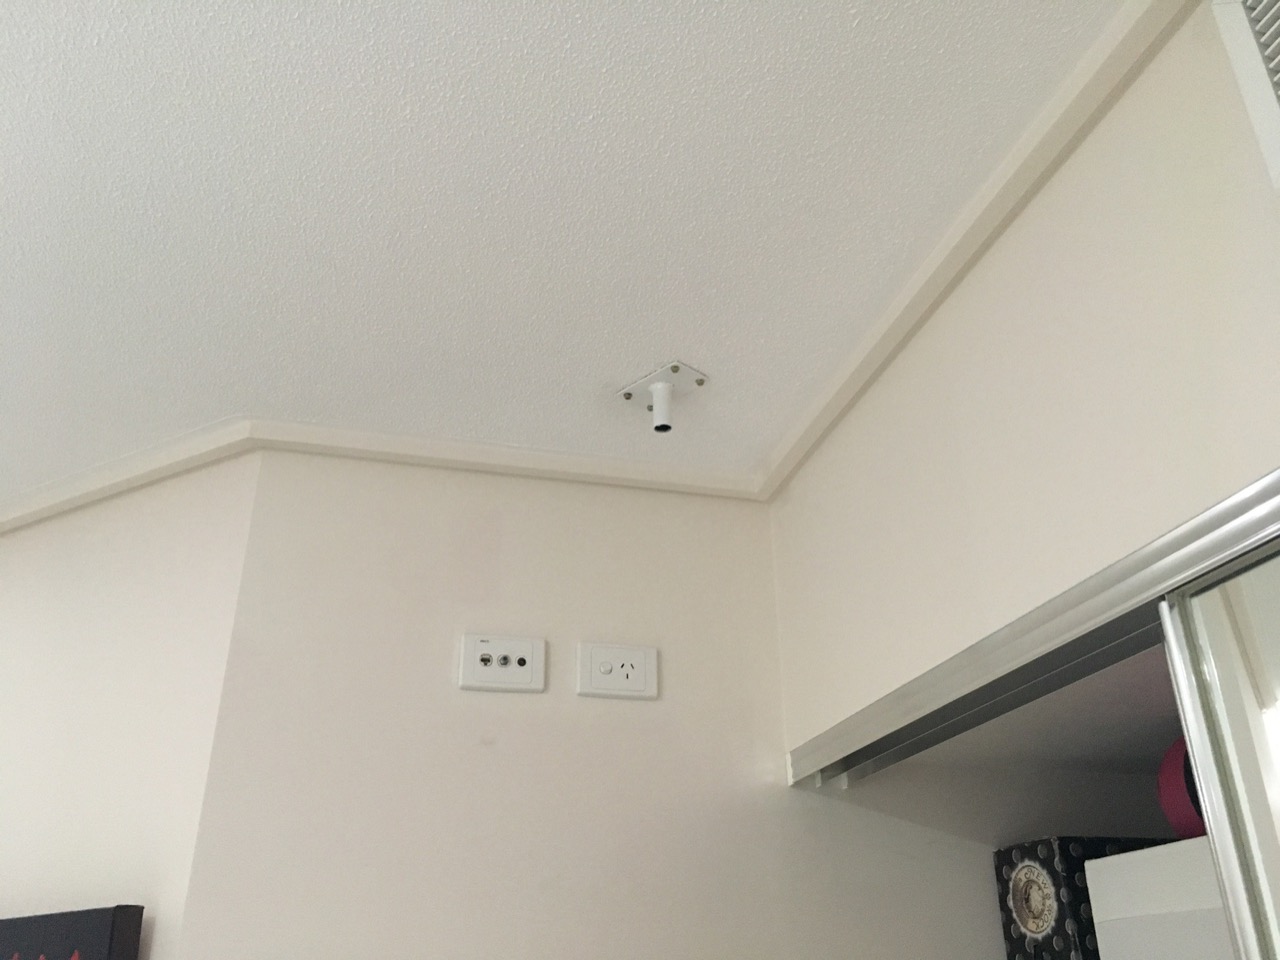
So I had a crazy idea - what if I could mount the fan out of the way and into the ceiling? I already had a mains power socket up high on one of the walls, so wiring would not be an issue. This is what I ended up with...
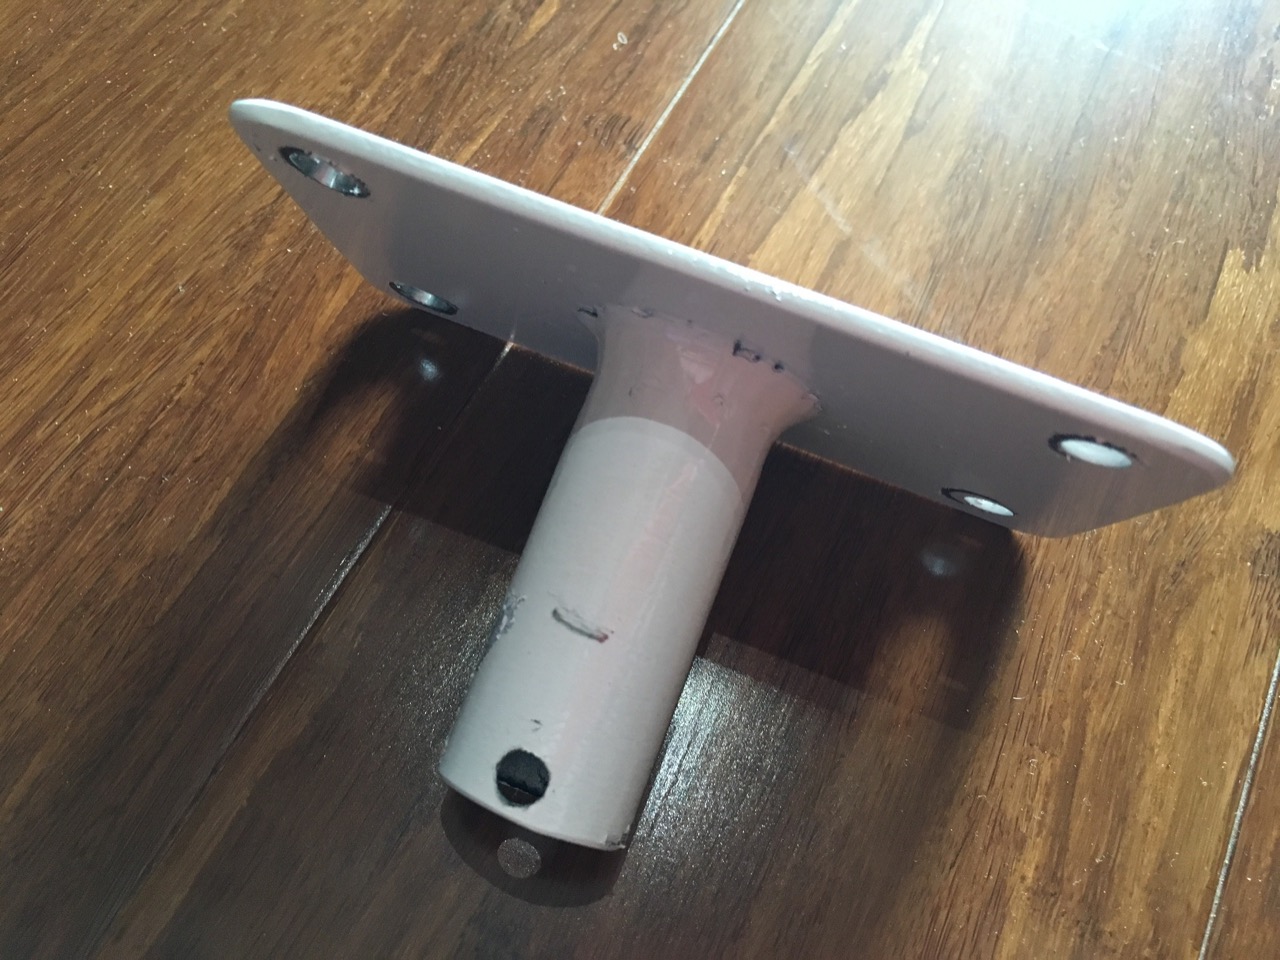
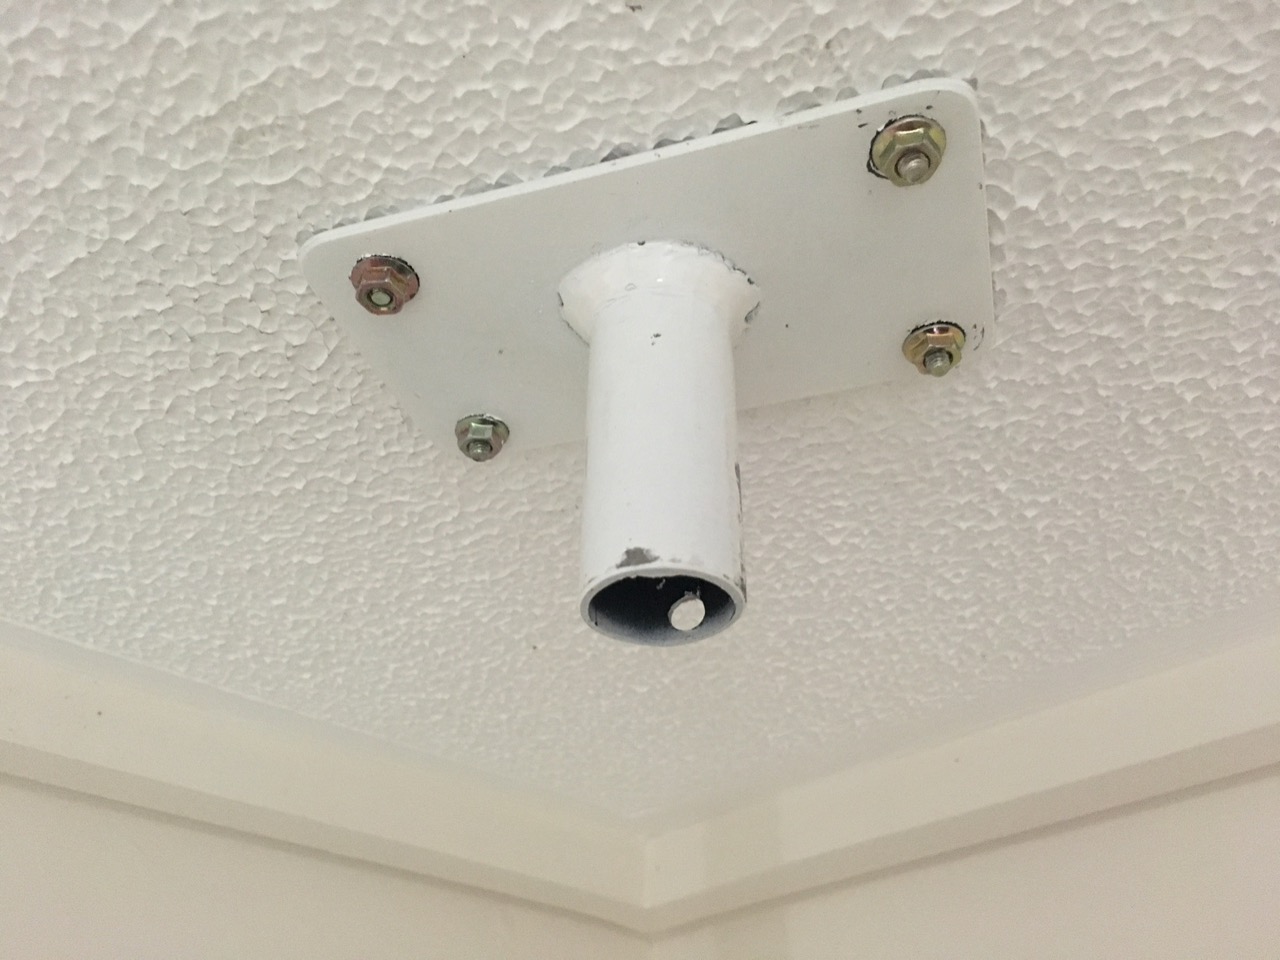
I could have probably installed an actual ceiling fan with a light, but I already had this pedestal fan and it wasn't going to be too much work to mount it to the ceiling. I had my dad make a mounting bracket for me from some scrap material at his workshop. I painted this bracket white to match the ceiling colour. The scratch marks on it are there because I've already pre-fitted it before taking the photo, once the fan was mounted none of those marks were visible.
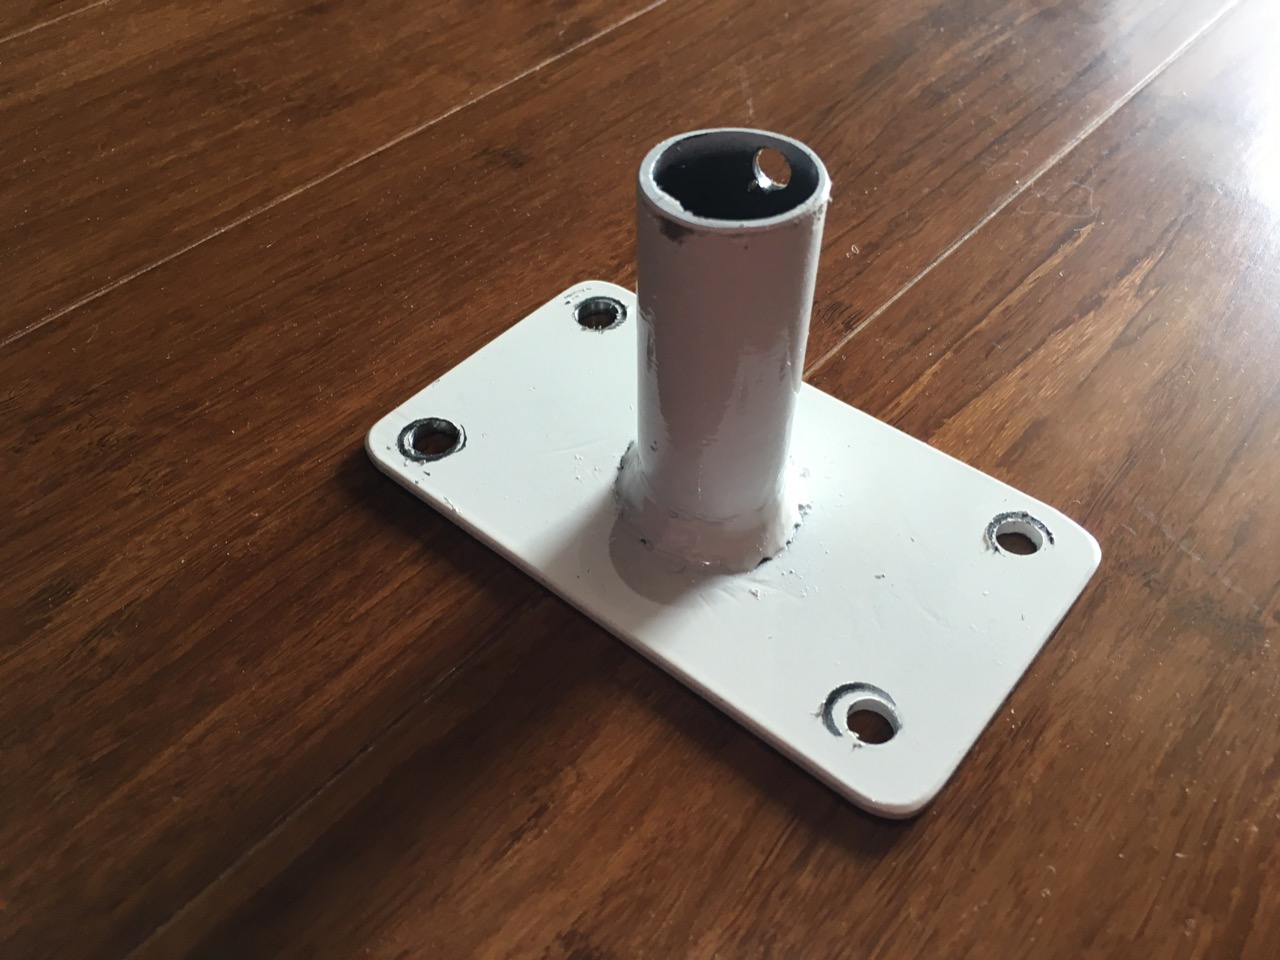
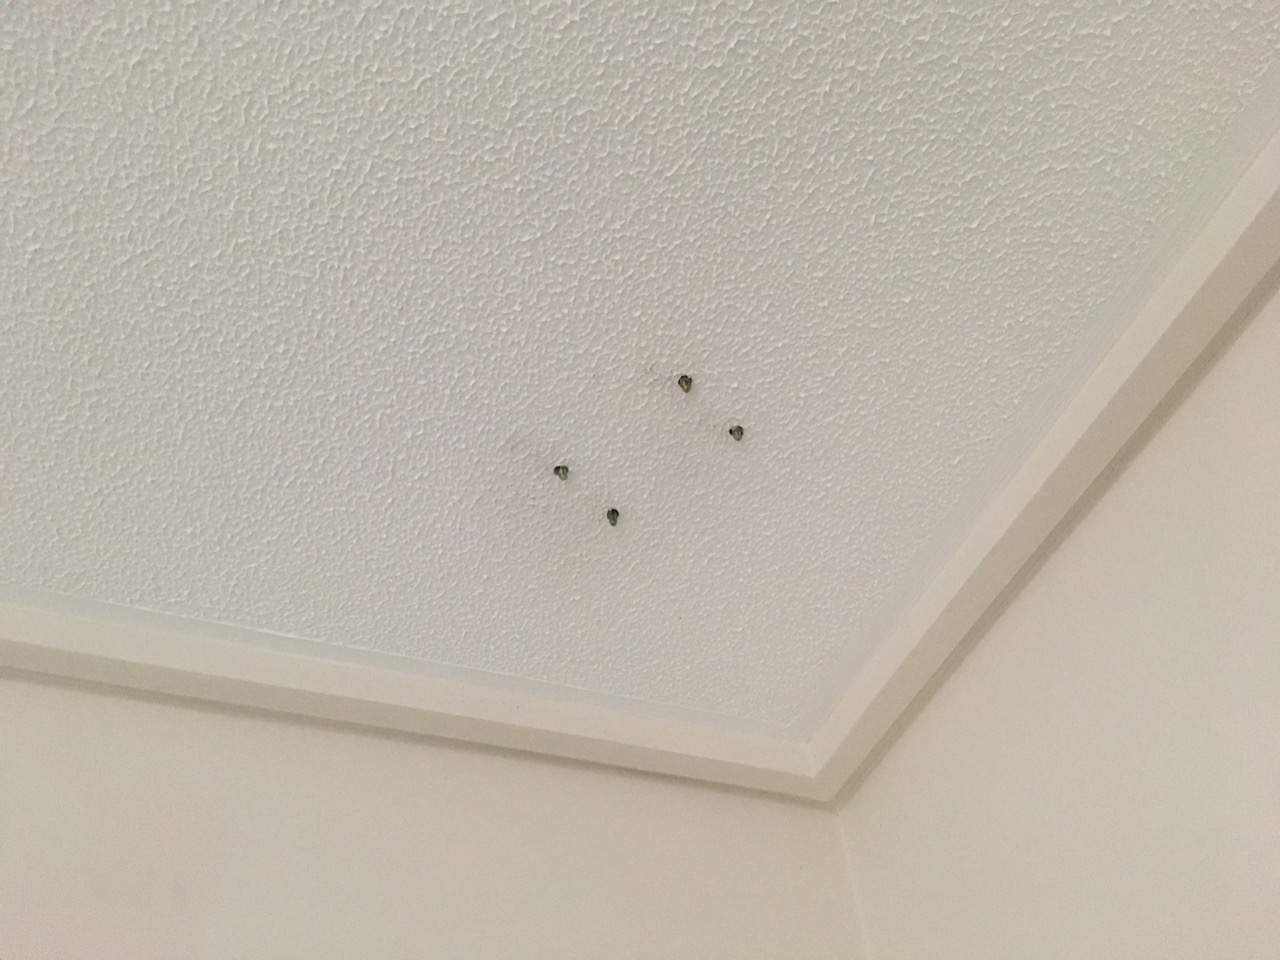
To mount the bracket to the ceiling, I installed 4 dynabolts using a 6mm masonry bit and a hammer drill. One of these didn't fit quite right, so I tried prying it out with some pliers, not an easy task! Once these bolts were in the concrete, there was nothing that would pull them out! I actually ended up hurting myself when the pliers slipped and pinched my thumb, got a huge blood blister, lesson learned though.
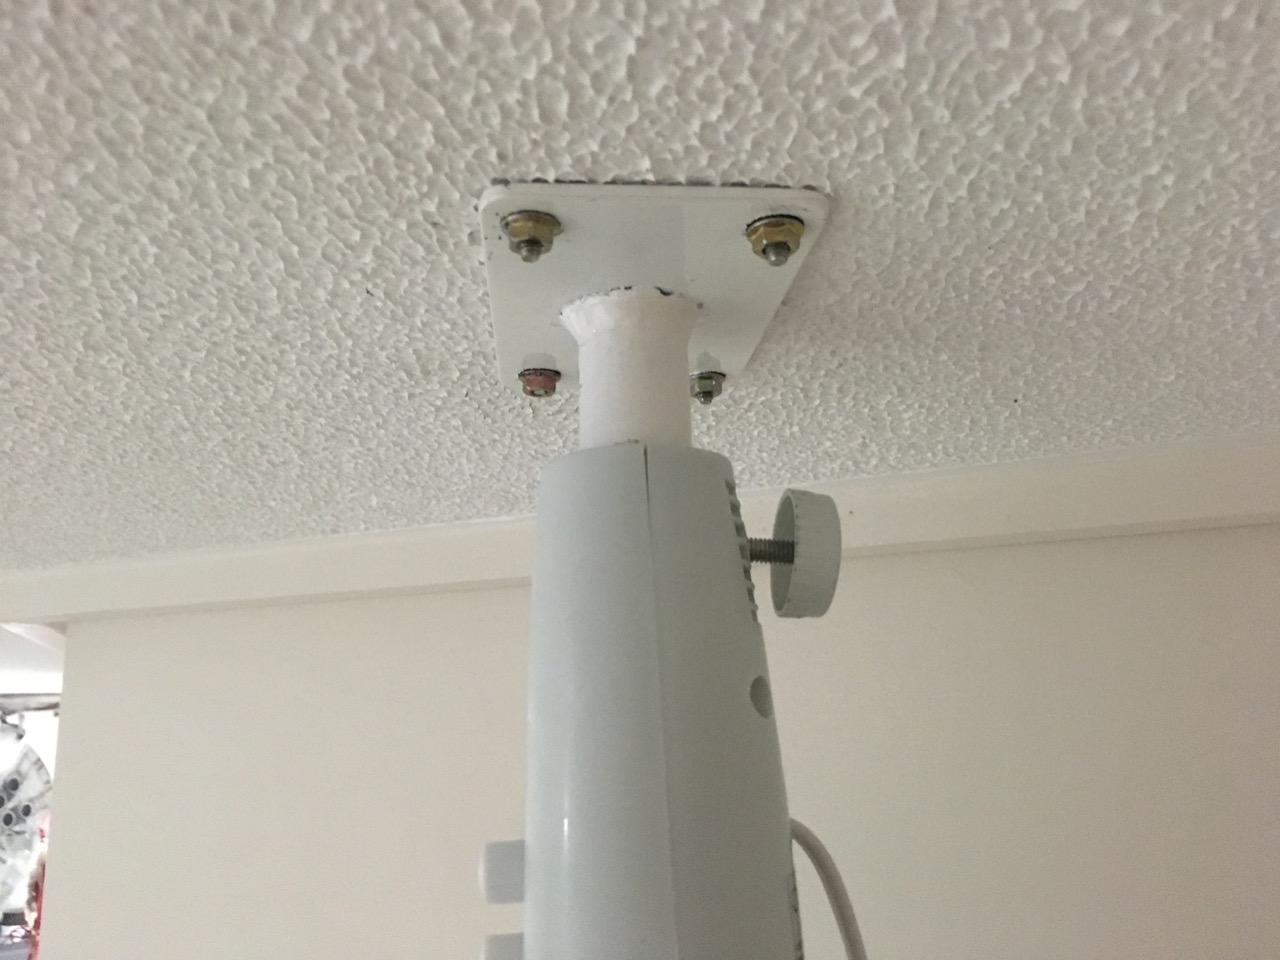
Before I drilled the holes for those bolts I made sure that the fan had enough room to turn fully when on the oscillating setting without hitting any of the walls. I also made sure there was enough room for the AC mains power remote control switch to sit behind the fan.
To hold the fan in place and stop it from falling, I used the fan's existing screw in bolt thing and just made a matching hole on the ceiling bracket. It held pretty well this way and locked the fan into facing in one direction.
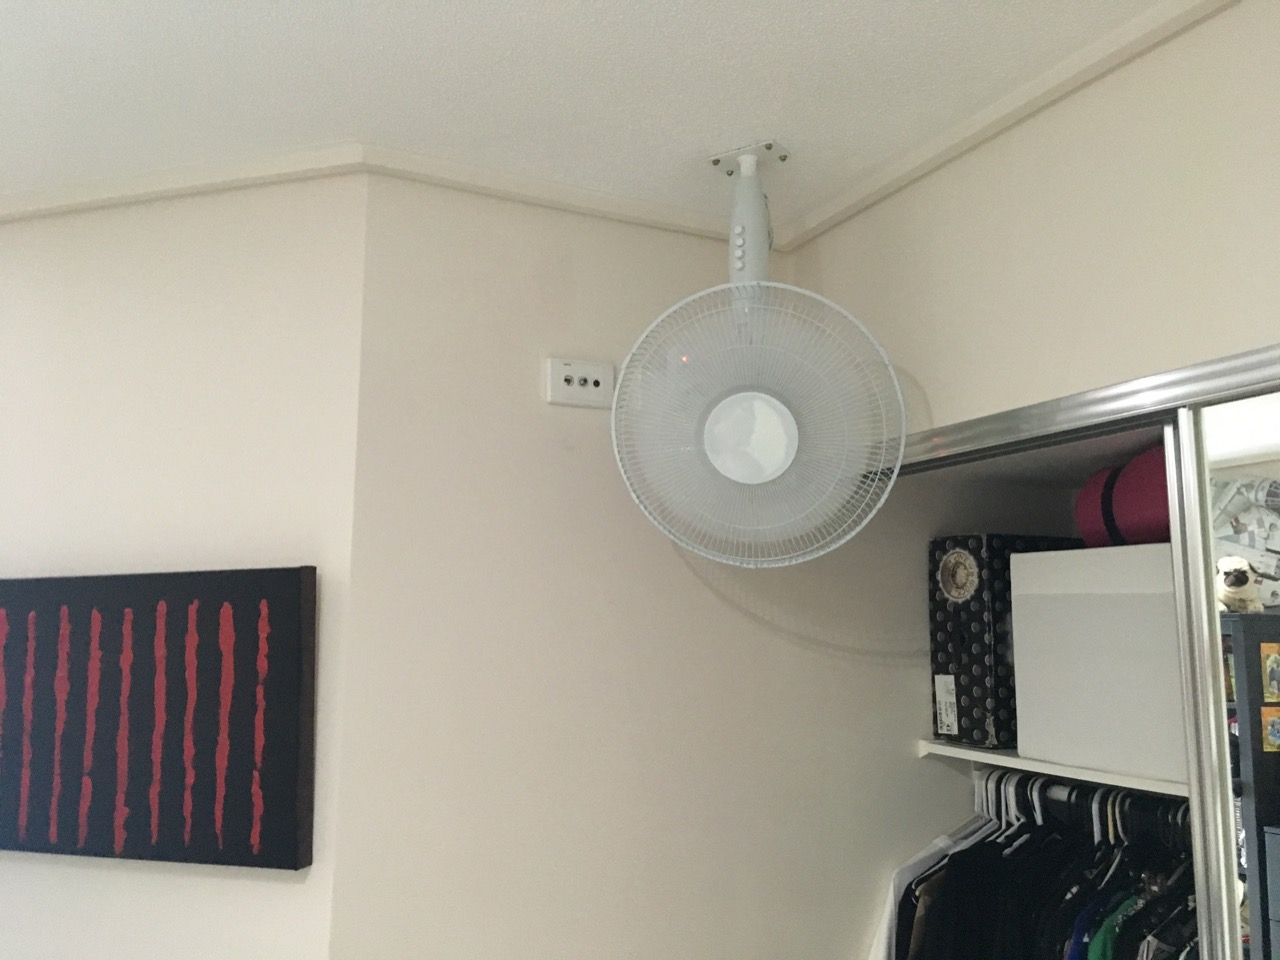
Then it was just a matter of plugging the fan into the mains socket right behind it. Because this fan was mounted up high, I didn't want to have to actually physically turn it on and off all the time, so ended up getting a remote control switch and leaving the fan permanently in the on position. I could then use the remote to switch the mains power to the fan on or off. It's not the best solution since it doesn't let you control the speed of the fan but given the fact that this whole project cost under $30 ($11 for the fan and $18 for the power remote, I already had the dynabolts), that was not a biggie.
I did paint the bolts after everything was in place, this can be seen in the first photo at the start of this post.
So there you go, my crazy idea made into reality and now the fan doesn't get in the way and can be switched on and off pretty easily. Win all around!
-i
