On a side note the video brochure is of very high quality. I was quite impressed with how it was presented, the printing on the cardboard is high res, the construction is solid. Overall an impressive product.
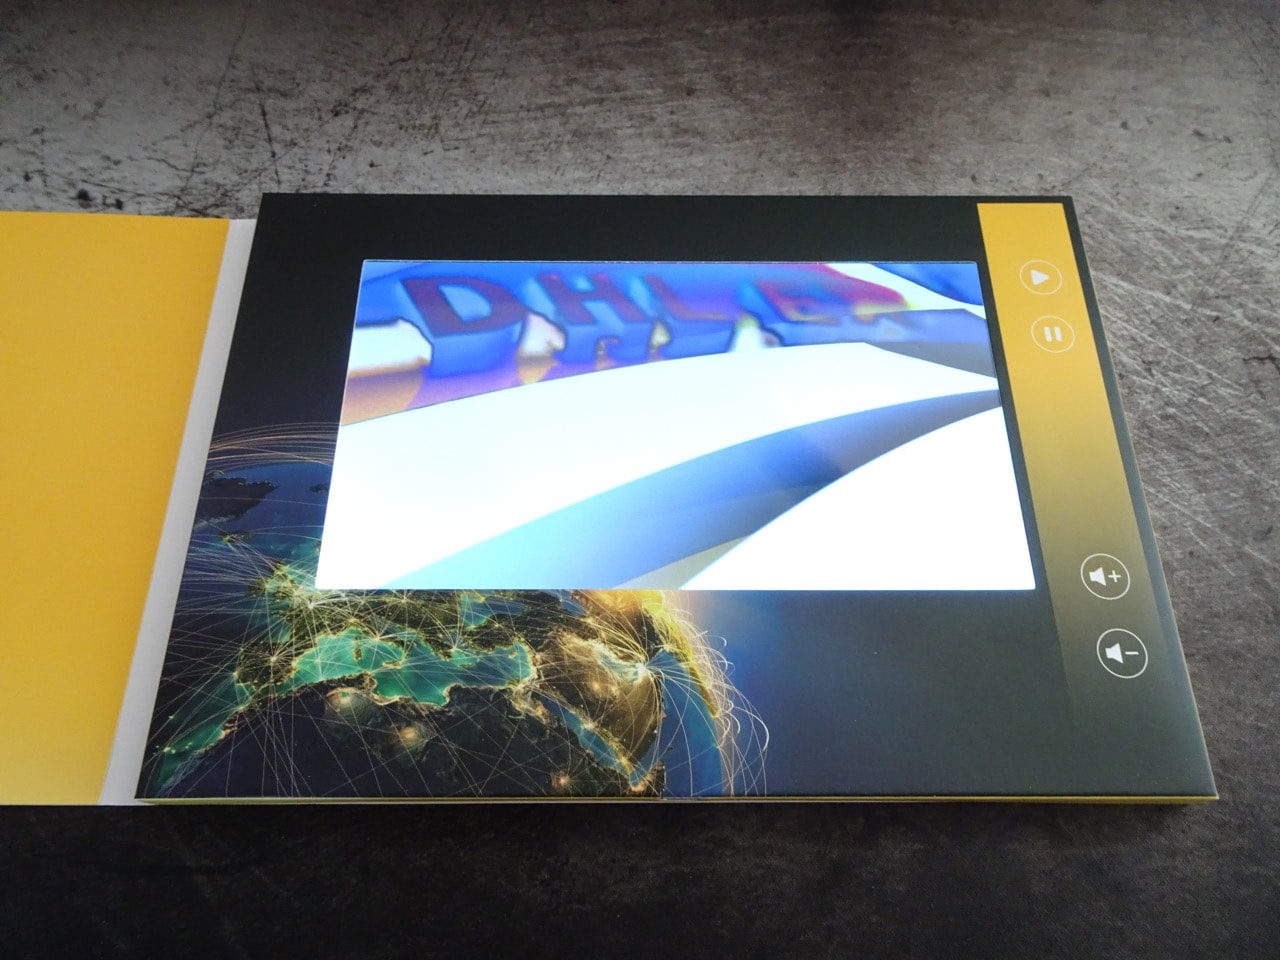
First, this is what the brochure looked like when you opened it up. Upon opening it plays a video on its 7" screen. The triggering is done using a magnet embedded in the cover. More on that later.
Update: I finally got around to messing around with an FTDI , check this out... Reading console output from the E200 Allwinner based Video Brochure.
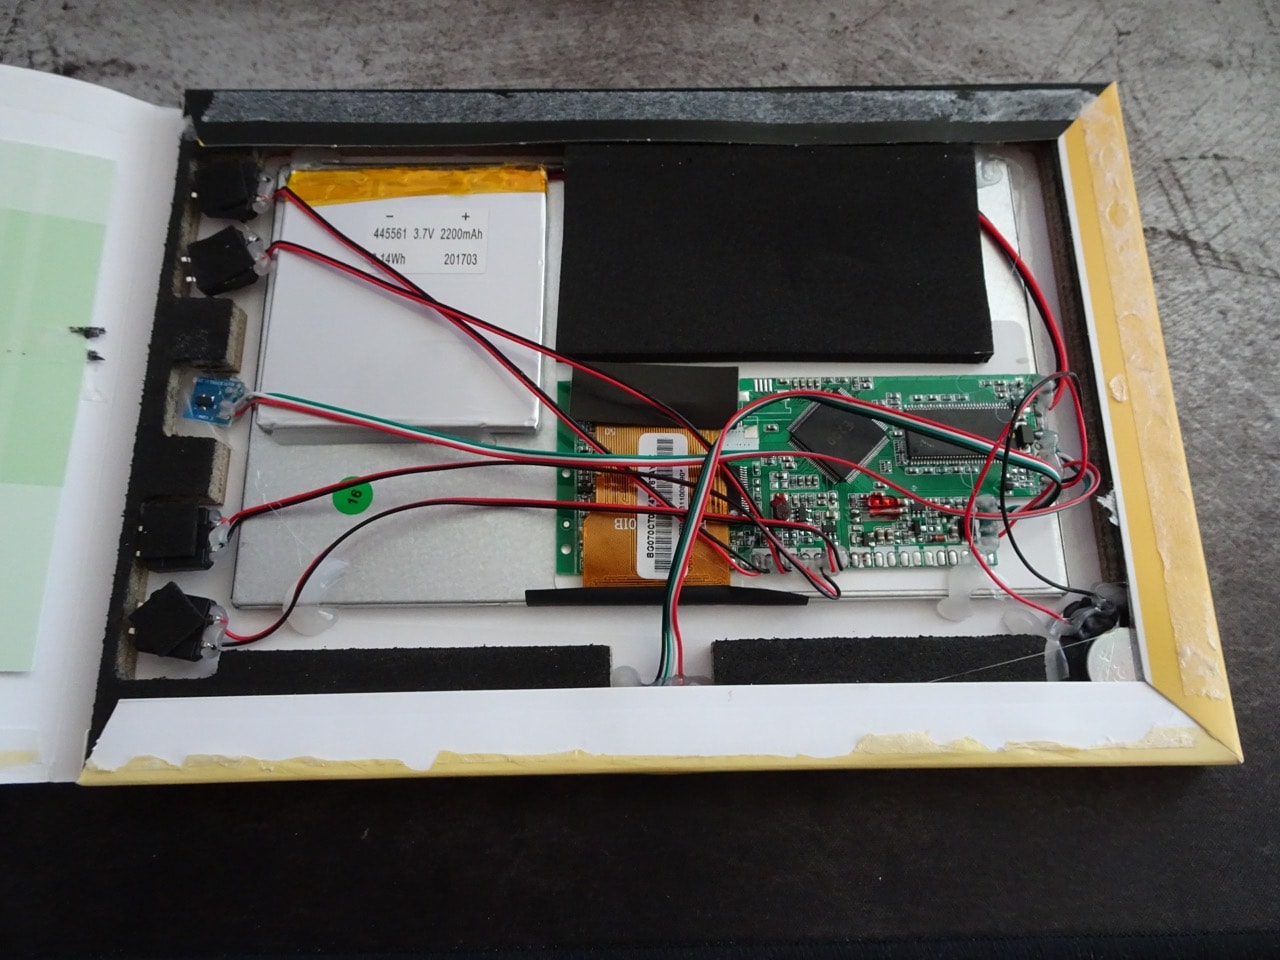
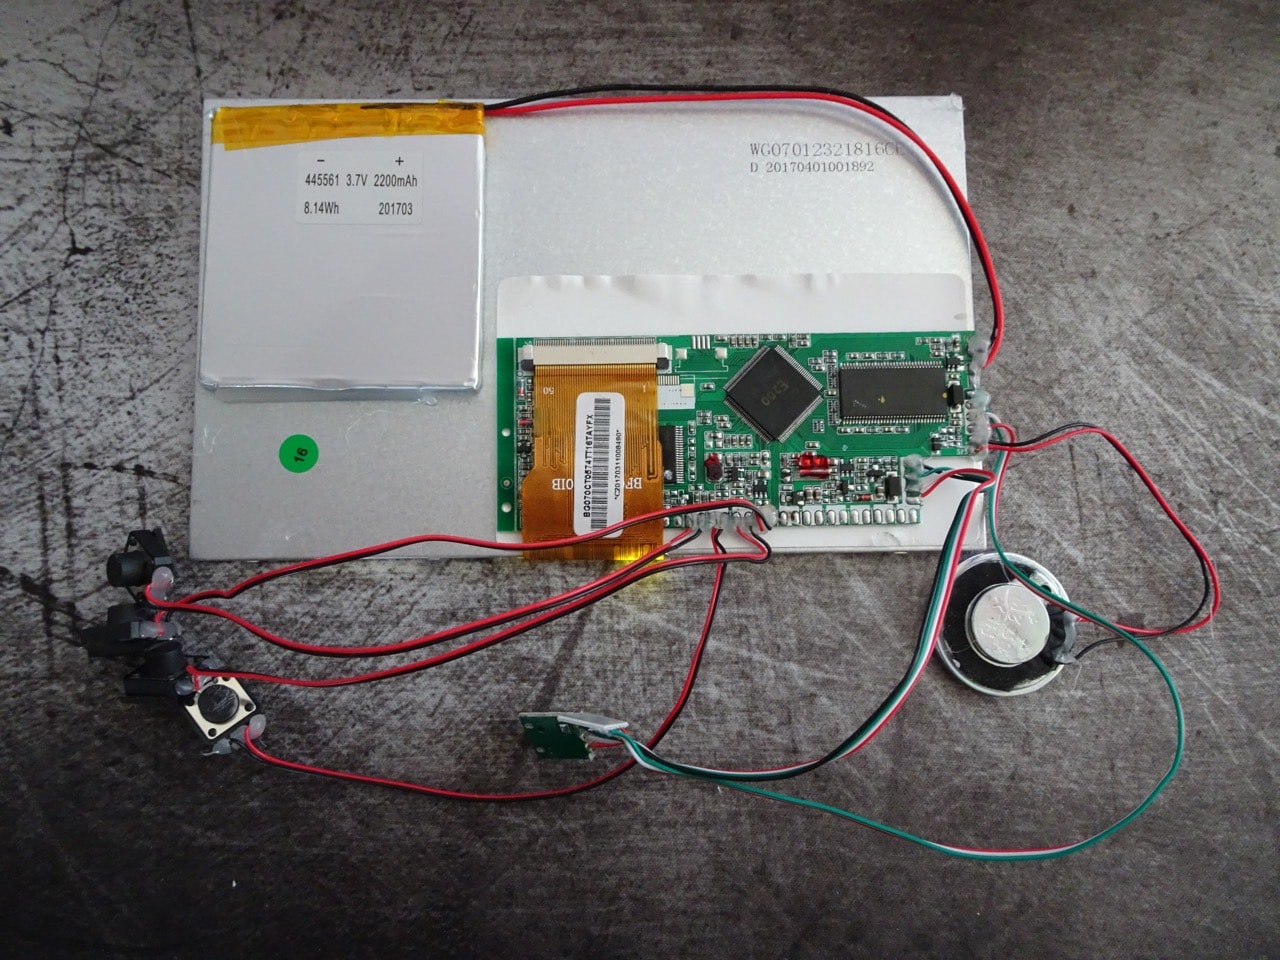
I flipped the whole thing over and used a scalpel to separate the backing piece of cardboard. The glue is super sticky but can be cut through with some care. This is what I found inside. Bunch of switches, battery, the main PCB and of course the screen. Neat!
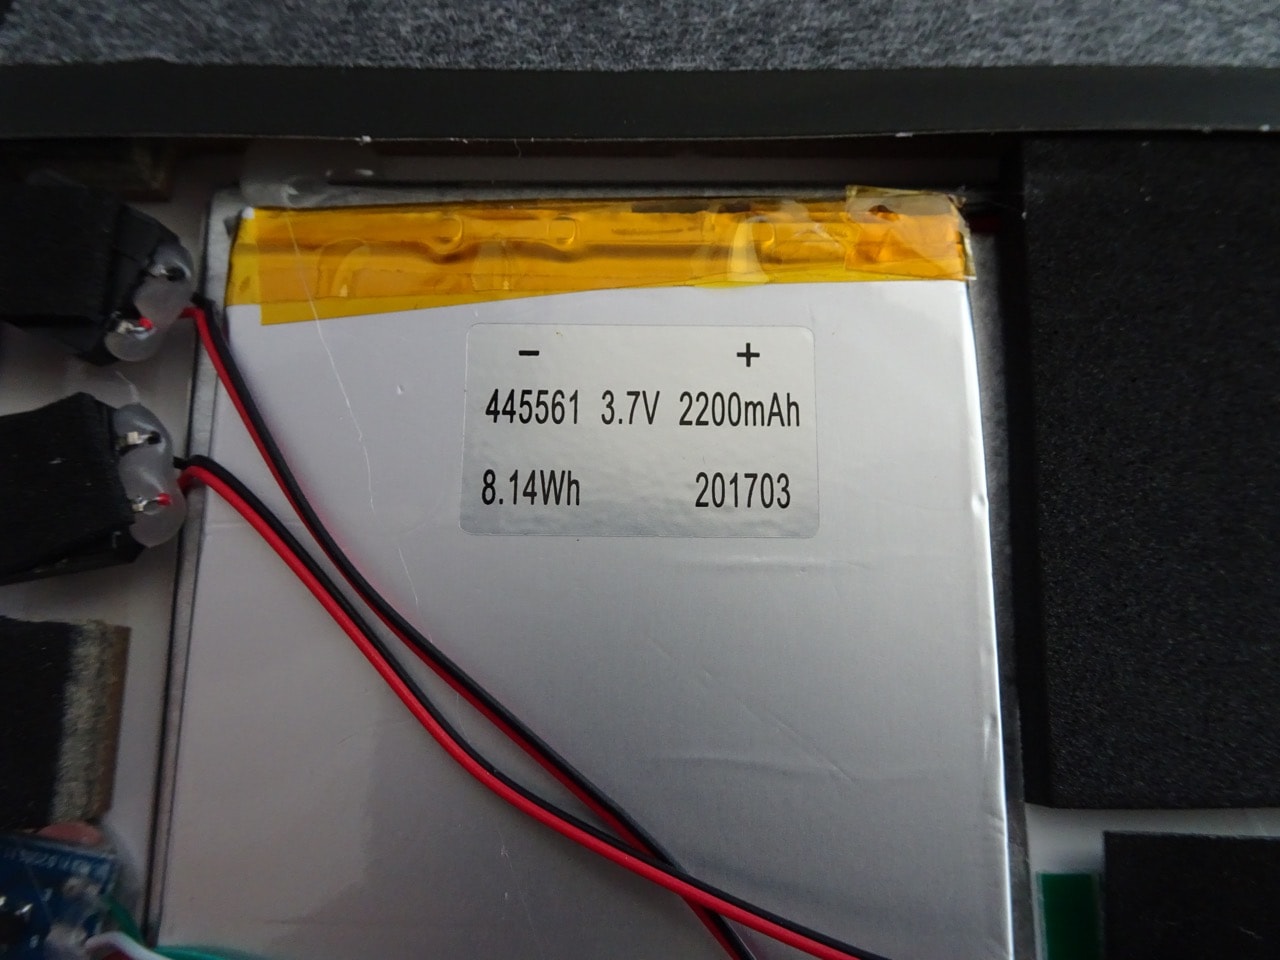
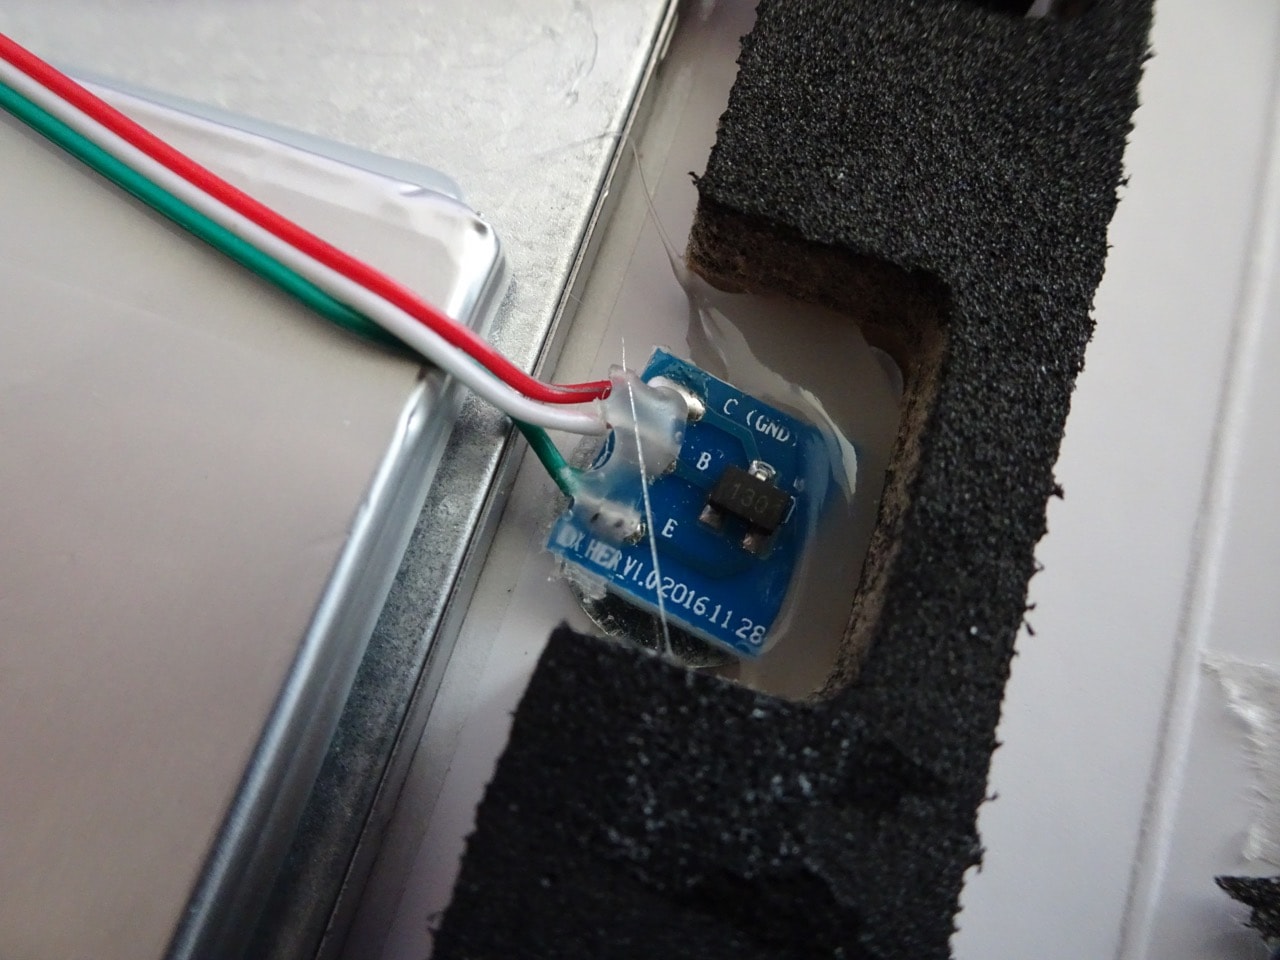
Taking a closer look inside the battery is a 3.7V 2200mAh 8.14Wh cell. The magnetic switch appears to be using an SMD Hall Effect sensor mounted on a small PCB of its own.
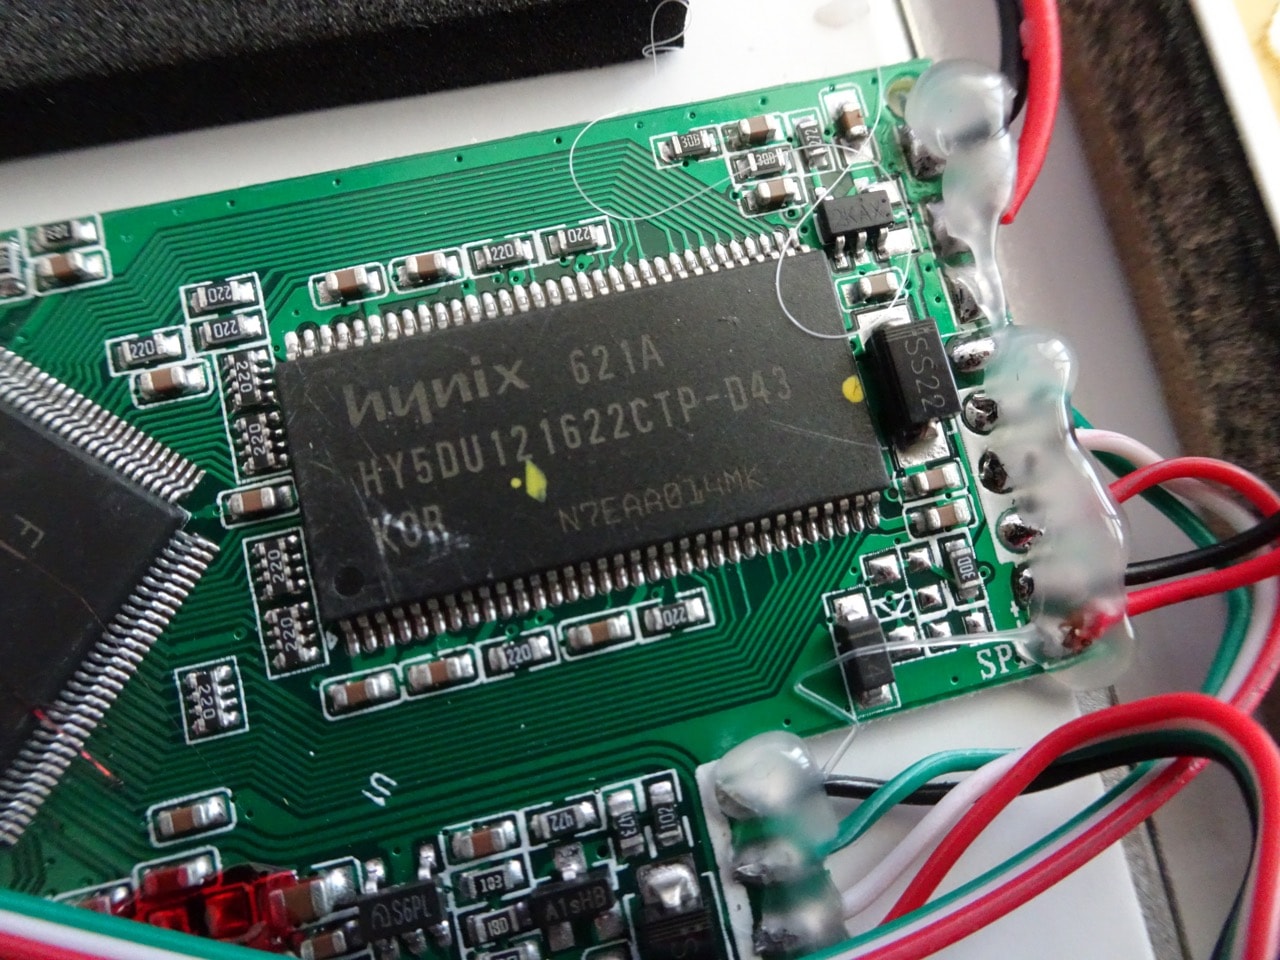
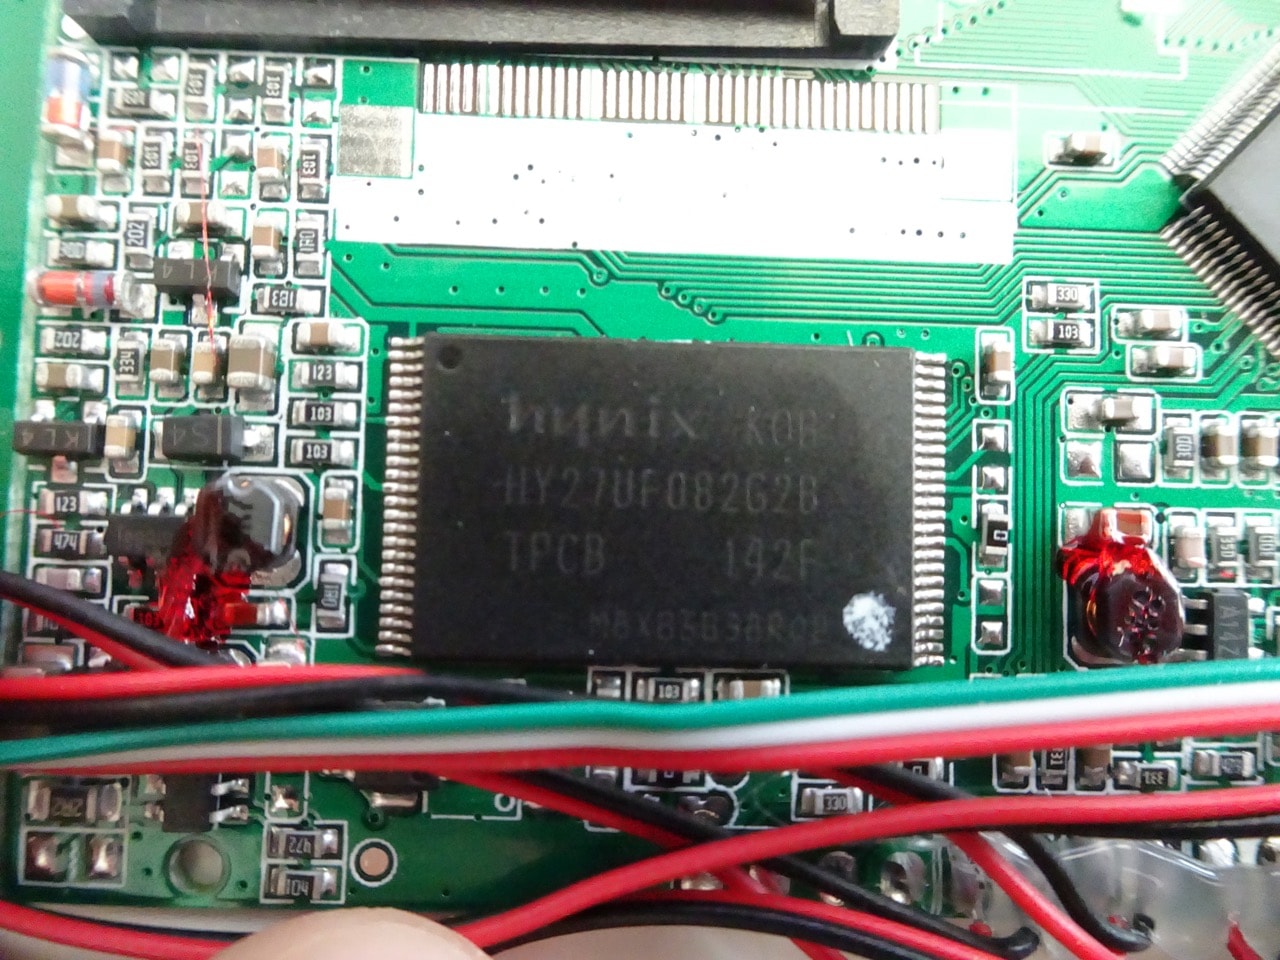
For memory and storage there are two chips, both from Hynix. The first is labelled as Hynix 621A HY5DU121622CTP-D43 - this is a SDRAM chip, though I couldn't figure out what capacity, possibly 512Mb. The other chip is a HY27UF082G2B 2Gb NAND Flash chip.
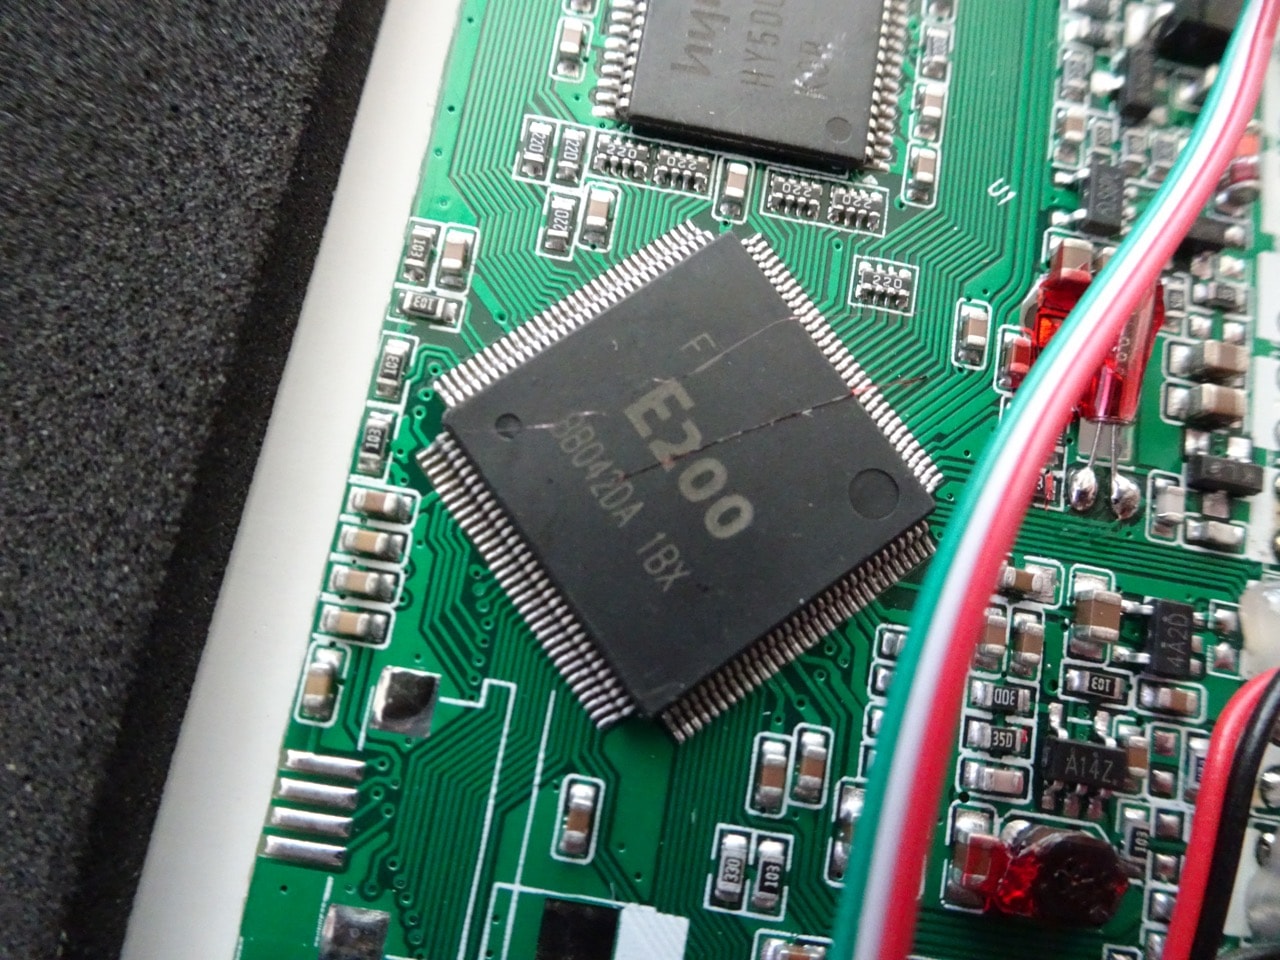
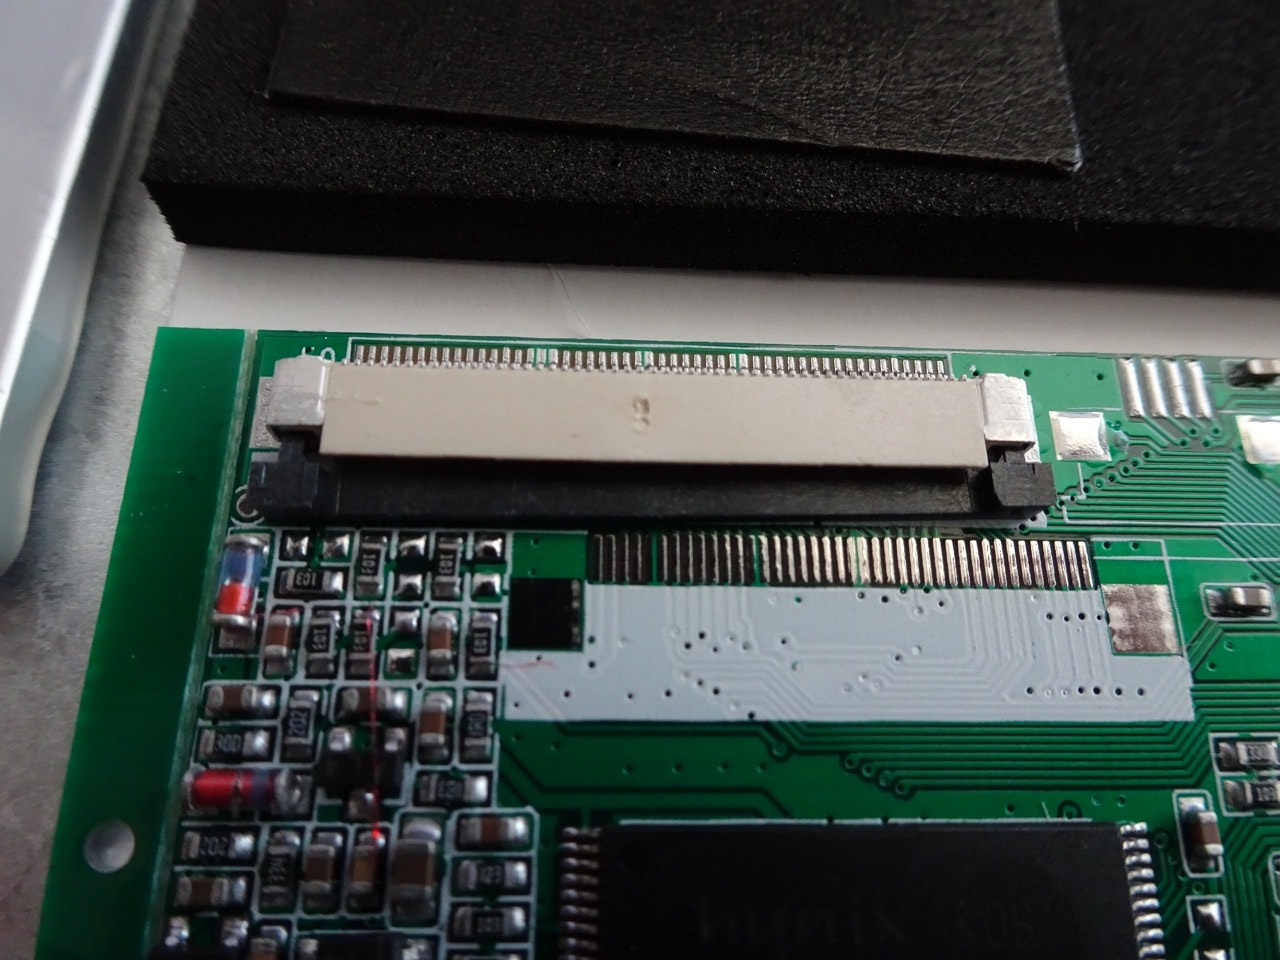
The other large chip is a F1E200 SOC from Allwinner. The screen is connected to a 50pin SMT socket. Interestingly there is a second unpopulated spot on the PCB for a 40pin SMT socket too.
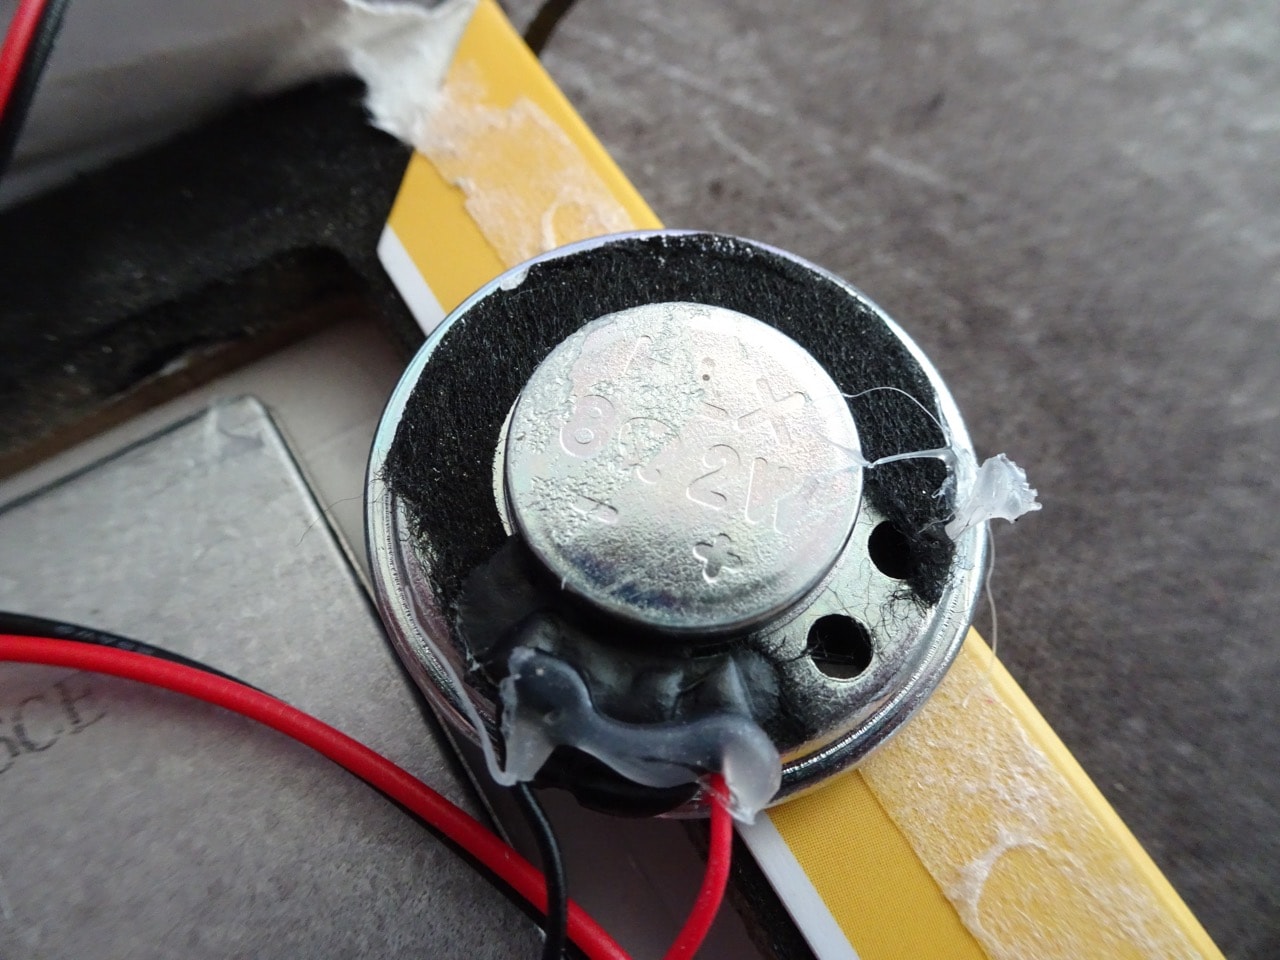
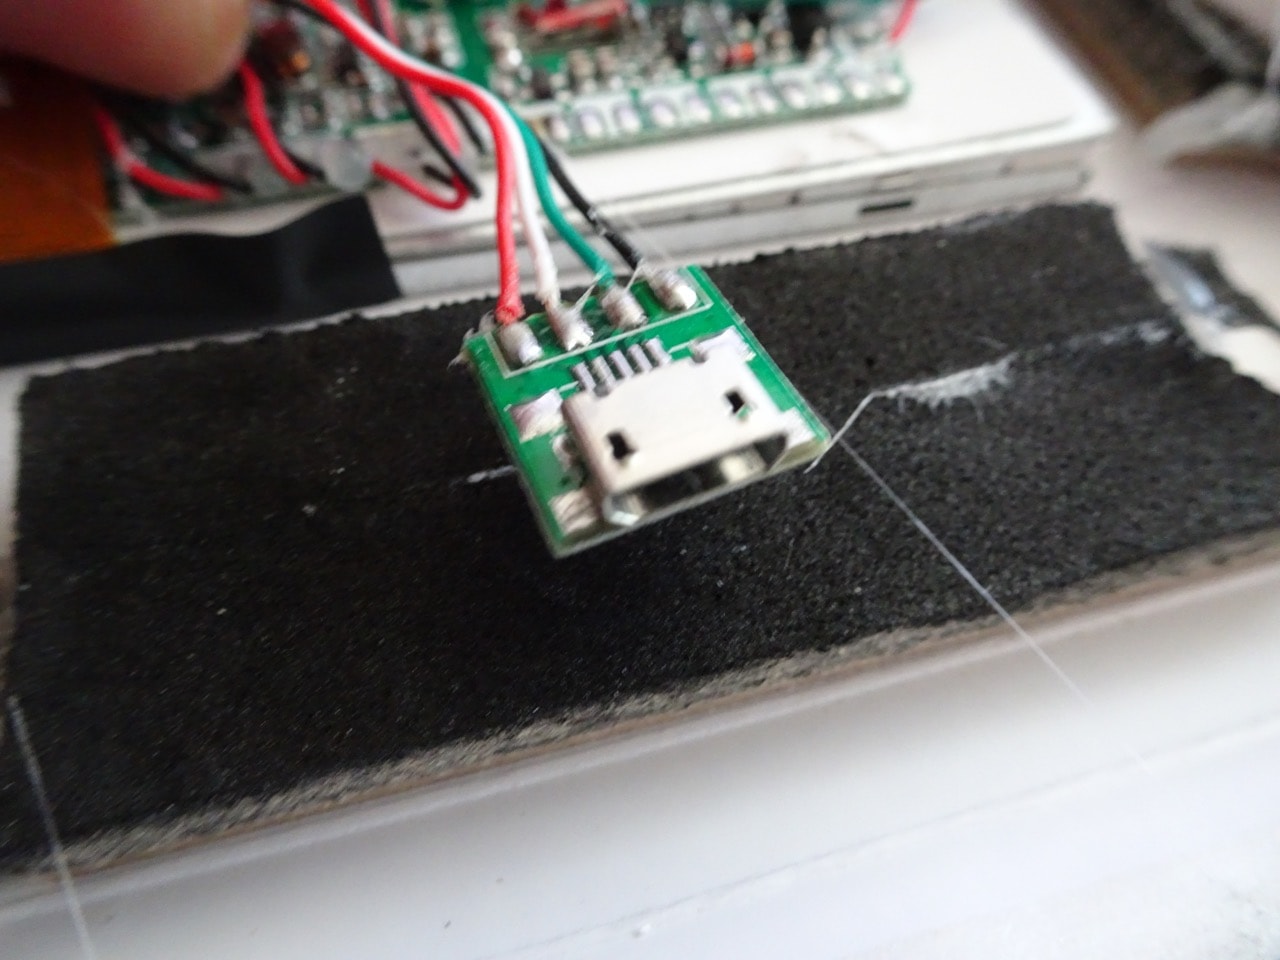
The speaker is an 8Ohm 2W slim all range driver. There's a micro-USB header on its own PCB.
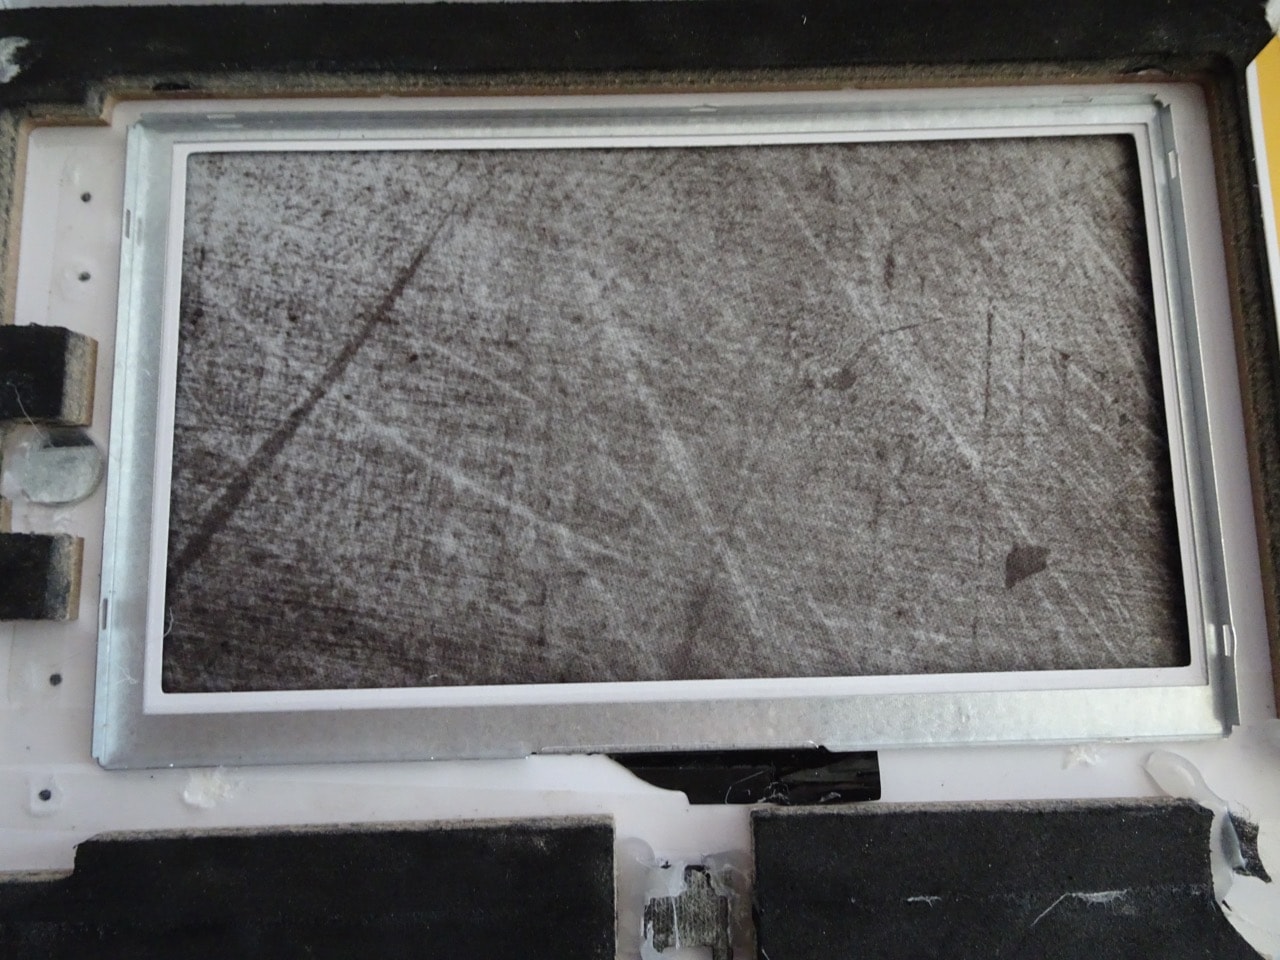
Removing the monitor was a bit of a pain and initially when I pulled it out, the metal frame that held the panel to the backlight stayed firmly glued to the cardboard box. I did eventually manage to free this frame and clean it up with some paint thinner to remove all the sticky glue.
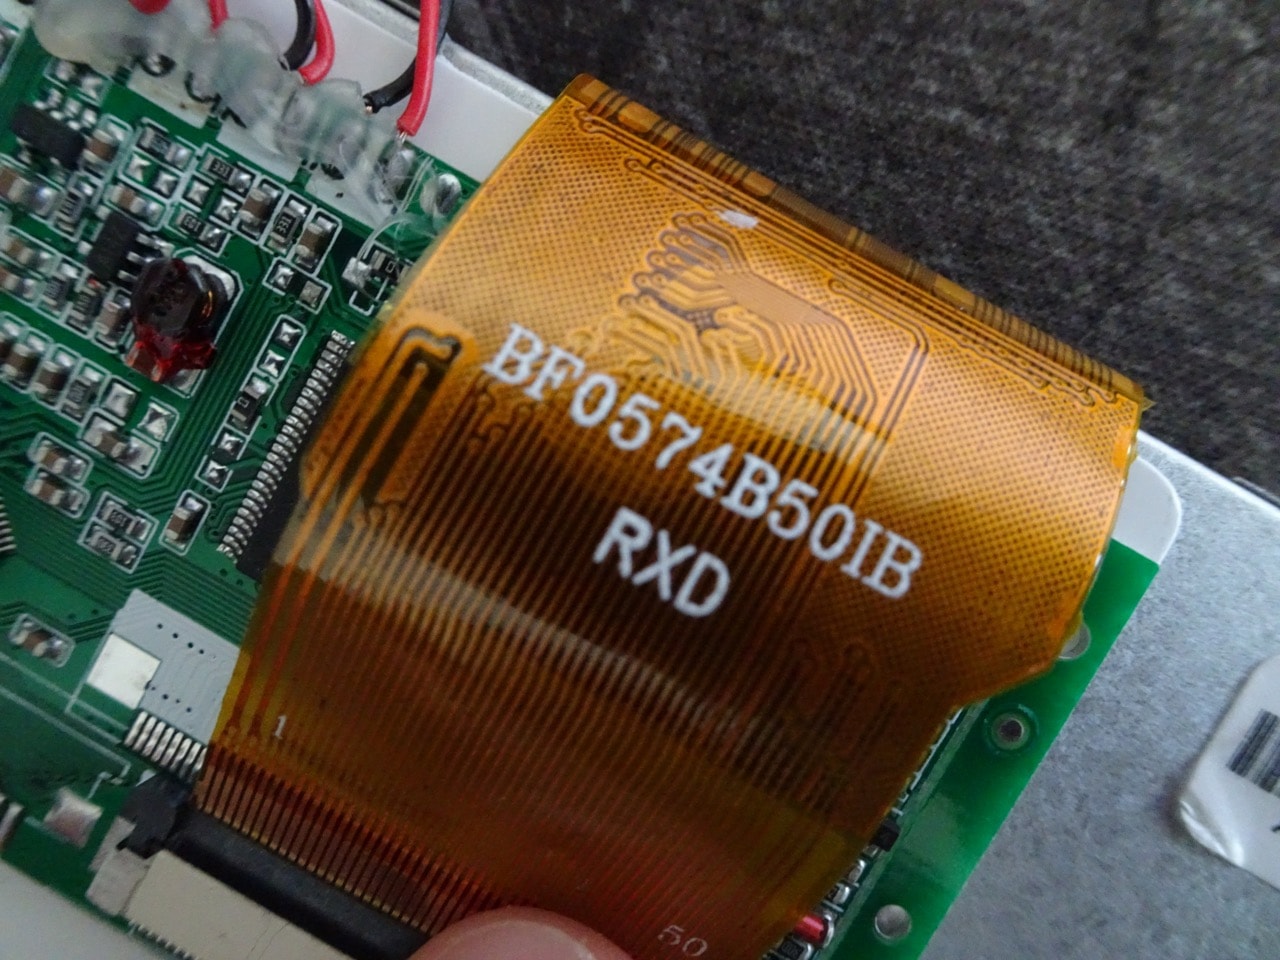
The screen is a TFT LCD with a label of BF0574B50IB RXD on the connector. This screen has a resolution of 1024x600 though I could not find its exact specs online. There are many similar panels on AliExpress though. The back of the main PCB doesn't have anything exciting apart from the Mayways logo and model number MWS_41A4 3_002 A_V1.3.
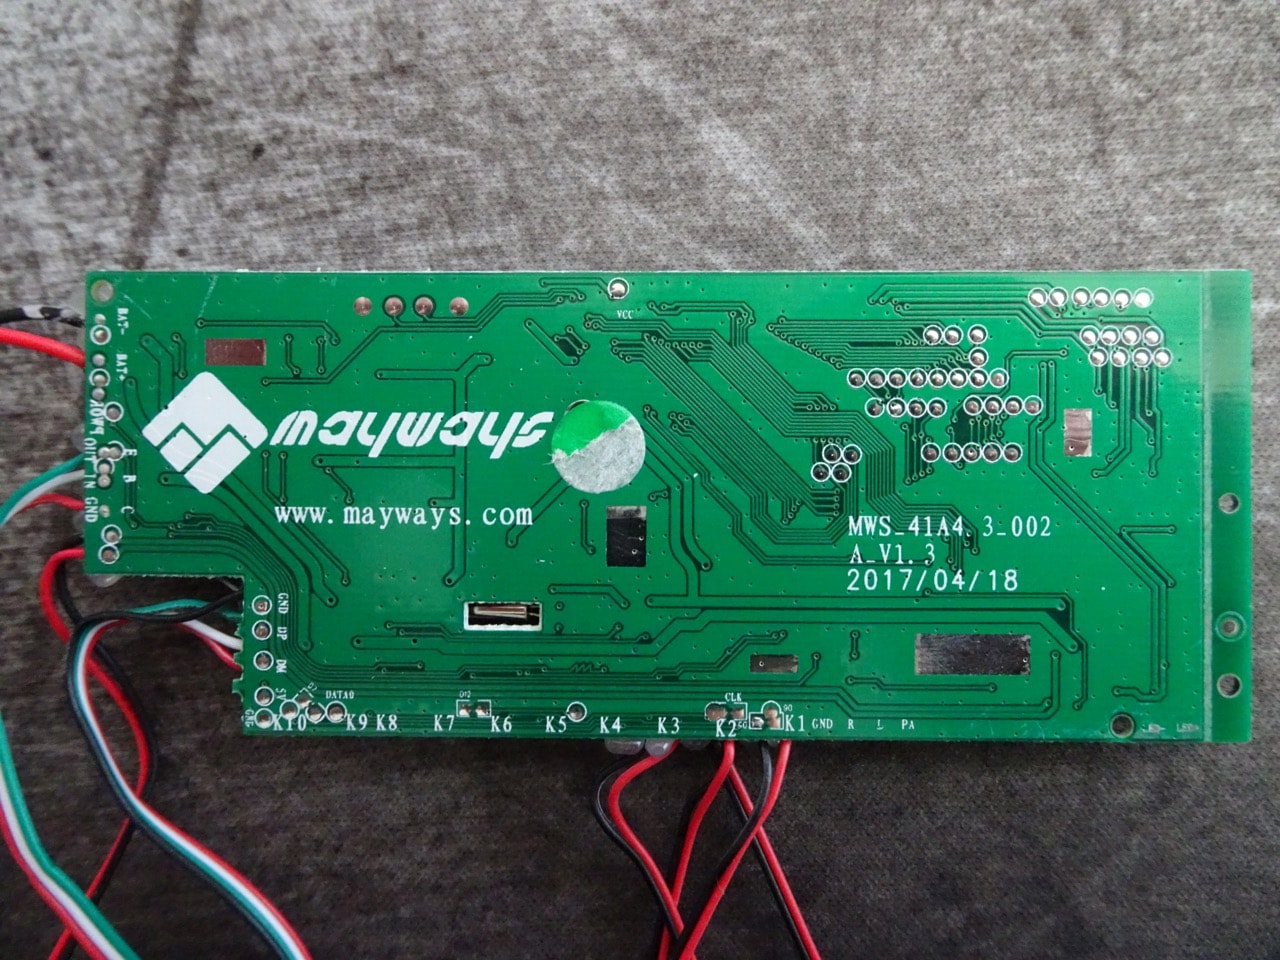
The component side of the PCB has a number of unpopulated pads where switches can be connected. Some of these appear to work when shorted out. In my case they reset the video to the beginning so could be either previous or next buttons.
That's it so far. I ordered an FTDI Serial 232 adapter so I can poke around this video brochure more. Will have more updates as I find something new.
-i
