The previous part of this article left off at the point where LEDE sysupdate firmware was flashed to the router and the router was restarting. That restart took a few minutes and instead of the usual orange and blue colours on the router's front light, LEDE opted for red. That was a bit confusing at first since red usually means bad.
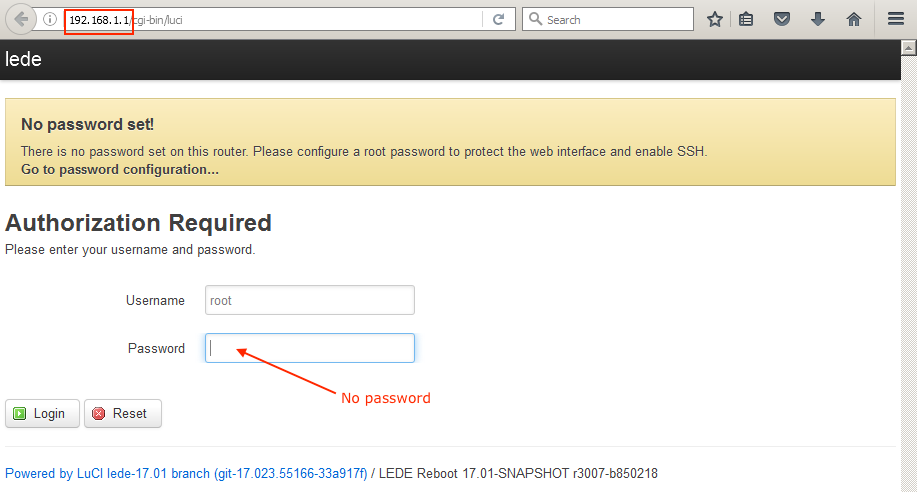
I had to change my laptop's IP configuration again, this time to use the IP address of 192.168.1.100 and default gateway of 192.168.1.1. Then I opened http://192.168.1.1 in the web browser and got the LEDE login screen. Success! There was no password in the default LEDE configuration, but that was something I changed after logging in (not shown here).
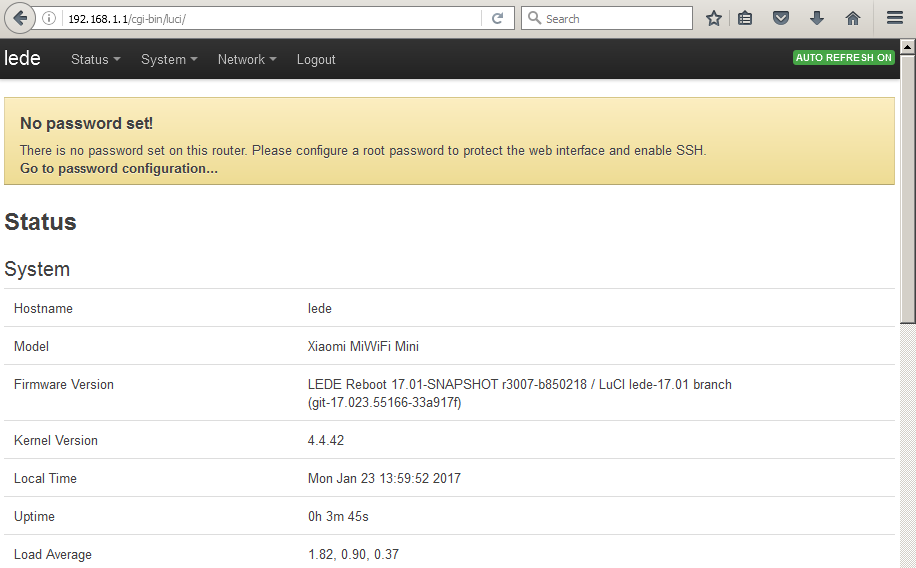
After logging in, the status page was shown. There was some interesting information there but it was not the page I was looking for to continue with my setup.
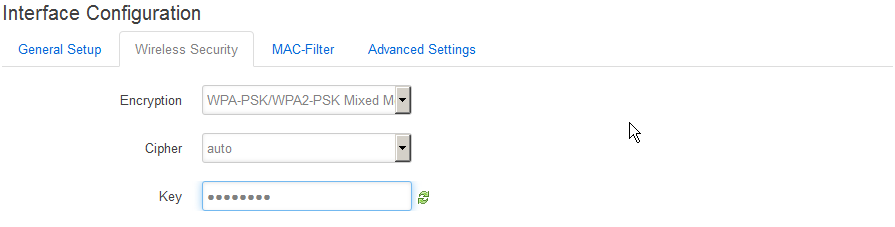
The page I wanted was under the Network menu, then Wireless. All of the available wireless radios were listed here. I was only interested in the 802.11nac, so that's the one I clicked 'Edit' on.

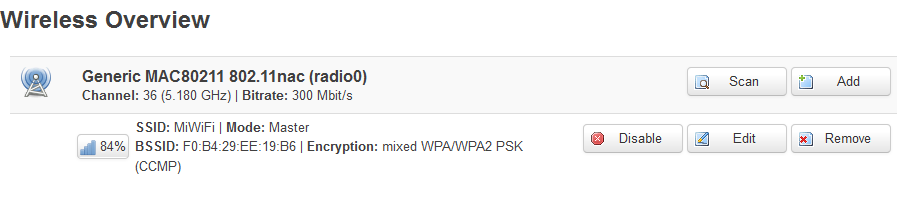
On the next page I updated the ESSID to 'MiWiFi' and set up WPA2 security. Then I saved all the changes and enabled the radio ('Enable' button on the previous page).

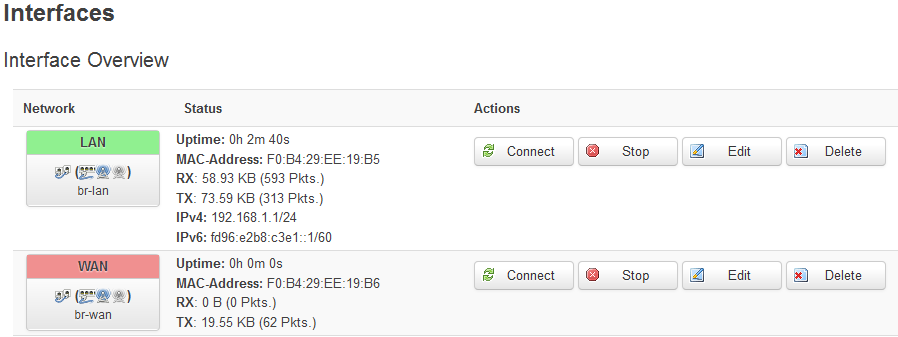
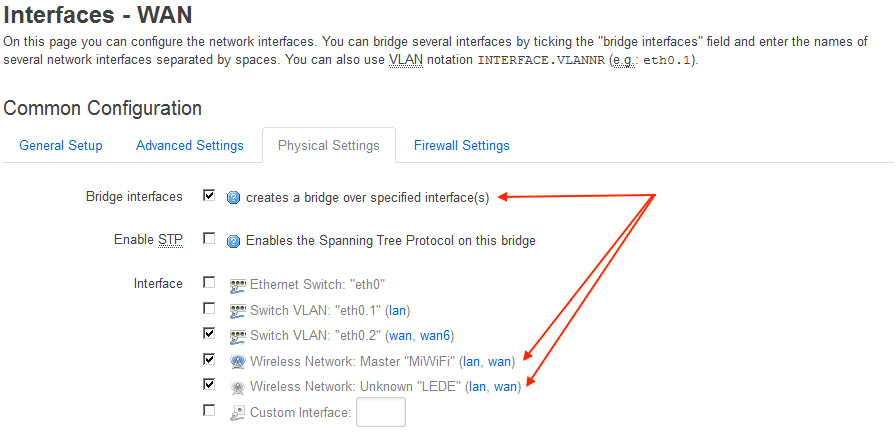
The next step was to bridge the wireless interface to the WAN interface. I did this so that I could plug the router into my gigabit network switch at home (which was connected to my VDSL router). The default LEDE configuration had set up the WAN interface with DHCP, which was exactly what I wanted since my VDSL router already ran a DHCP server.
To do the above, I went over to the Network menu, then Interfaces and clicked Edit on the WAN interface, then in the Physical Settings tab I set the interface to bridged mode connecting it to both of the Wireless interfaces (I really only needed to do this for the 802.11nac one).
Then I connected a network cable between the router's blue WAN port and my gigabit switch. Lights started blinking so that was a good indicator that things were working.
So at that point the configuration was complete, I just had to connect my laptop to the MiWiFi wireless network and see how well it worked. The laptop was sitting right next to the router, but after connecting I was only able to get a signal strength in the 80-90% mark. Quite poor.
The reported transfer rate was also quite low for a 802.11ac interface. 433Mbit/s was way lower than I expected.

I went ahead and did some file transfer tests. The tests were done by transferring a 5Gb file from my file server (Samba) to the laptop. I compared the throughput of the MiWiFi router using 802.11ac to my Apple Airport Express using 802.11n (both on the 5Ghz radio). The graphs below speak for themselves.
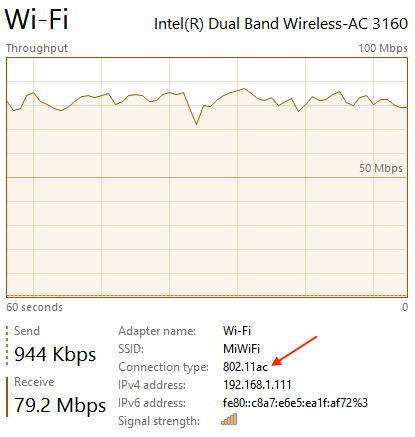

Even though the MiWiFi router had a radio supposedly capable of really fast speeds, it consistently was worse than the 'slower' Airport Express. In addition the connection of the MiWiFi router was a lot less stable with the signal strength jumping up and down.
So there you go, Velvet's Hotshot (MiWifi mini) can be converted into a 802.11ac wireless access point and does do the job, but it performs quite poorly. I've collected signal strength results previously for this device and they confirm what I saw this time around so that's not surprising. With that in mind I wouldn't recommend using this device to extend a wireless network, but it would make for a fun hobby project device and a good way to experiment with custom router firmware.
-i
