Note if you are content with having the Trash emptied once every 30 days, you can do so from Finder preferences...

I wanted to remove unneeded files a bit more often, so here's how I did it...
Step 1 - Open the Script Editor application from the Applications/Utilities folder.
Step 2 - Enter the following code into the AppleScript editor and click the compile button (the hammer)...
AppleScript
tell application "Finder"
set warns before emptying of trash to false
empty the trash
set warns before emptying of trash to true
end tell
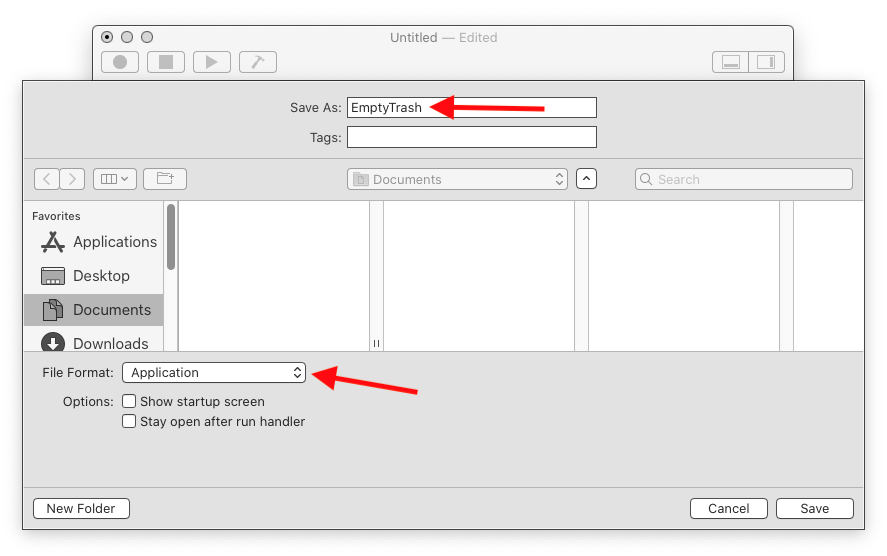
Step 3 - Save your code as an Application called EmptyTrash somewhere convenient (e.g. the Documents folder)...
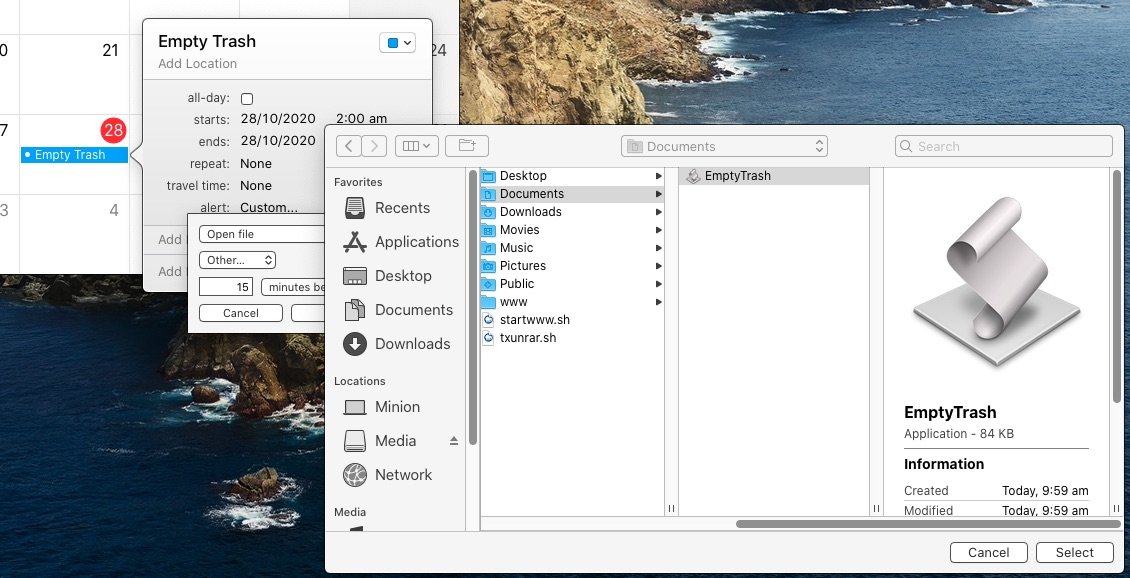
Step 4 - Open the Calendar application...

Step 5 - Create a new event at a convenient time (when your Mac is likely to be on) and in the alert field set it to Custom > Open File > Other, and select the EmptyTrash application you created earlier.
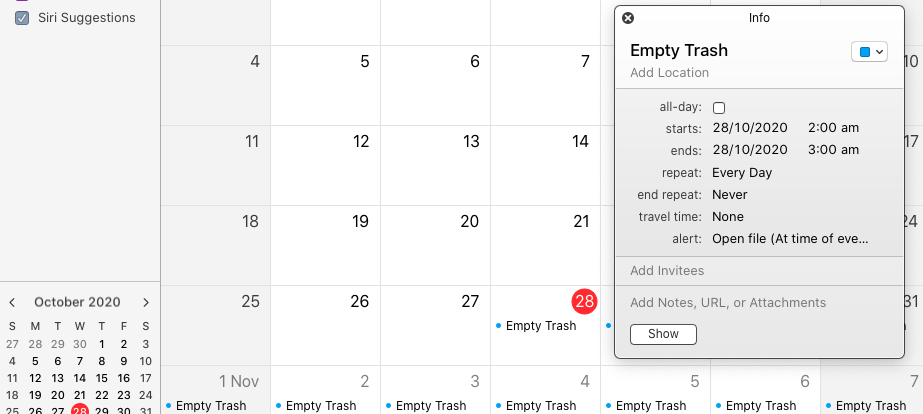
Step 6 - Set the repeat interval (I picked every day). You can also create a new calendar and place this event there, then hide the calendar if you do not want this event to appear all over the place. I didn't do this because my Mac is only used as a media centre.
Once all that is done, your Mac's Trash will be emptied automatically at the time you set (assuming the Mac is on).
Update - Operation timed out
If you implement the above script and keep getting the operation timed out error, the best alternative is to switch to using shell commands to empty the trash. This is done by replacing the AppleScript from step 2 with the following...
AppleScript
do shell script "/bin/bash -c 'rm -rf ~/.Trash/*'"
In addition, you have to give the EmptyTrash app you've created full disk access permissions by following this guide - How to fix 'Operation not permitted' error in macOS terminal and ~/.Trash.
-I
