This article is split into five parts, as each part becomes available I'll link to it below.
In the last post I got as far as re-capping the Lynx 2 motherboard which fixed the crackling sound problem I was having but the speaker volume was still very low. I did some searching around and came across this forum post which suggested that it could be the speaker itself. I would not have thought that the speaker could be at fault, but hey whatever I thought I'll give it a try.
I did test the headphone jack first to verify that there was some sound coming out of the Lynx. There was sound in my headphones, loud and clear. So next I disassembled one of my other Lynx 2 consoles to use its speaker. I got lazy and didn't disassemble it fully so just connected its speaker directly to the console I was repairing...
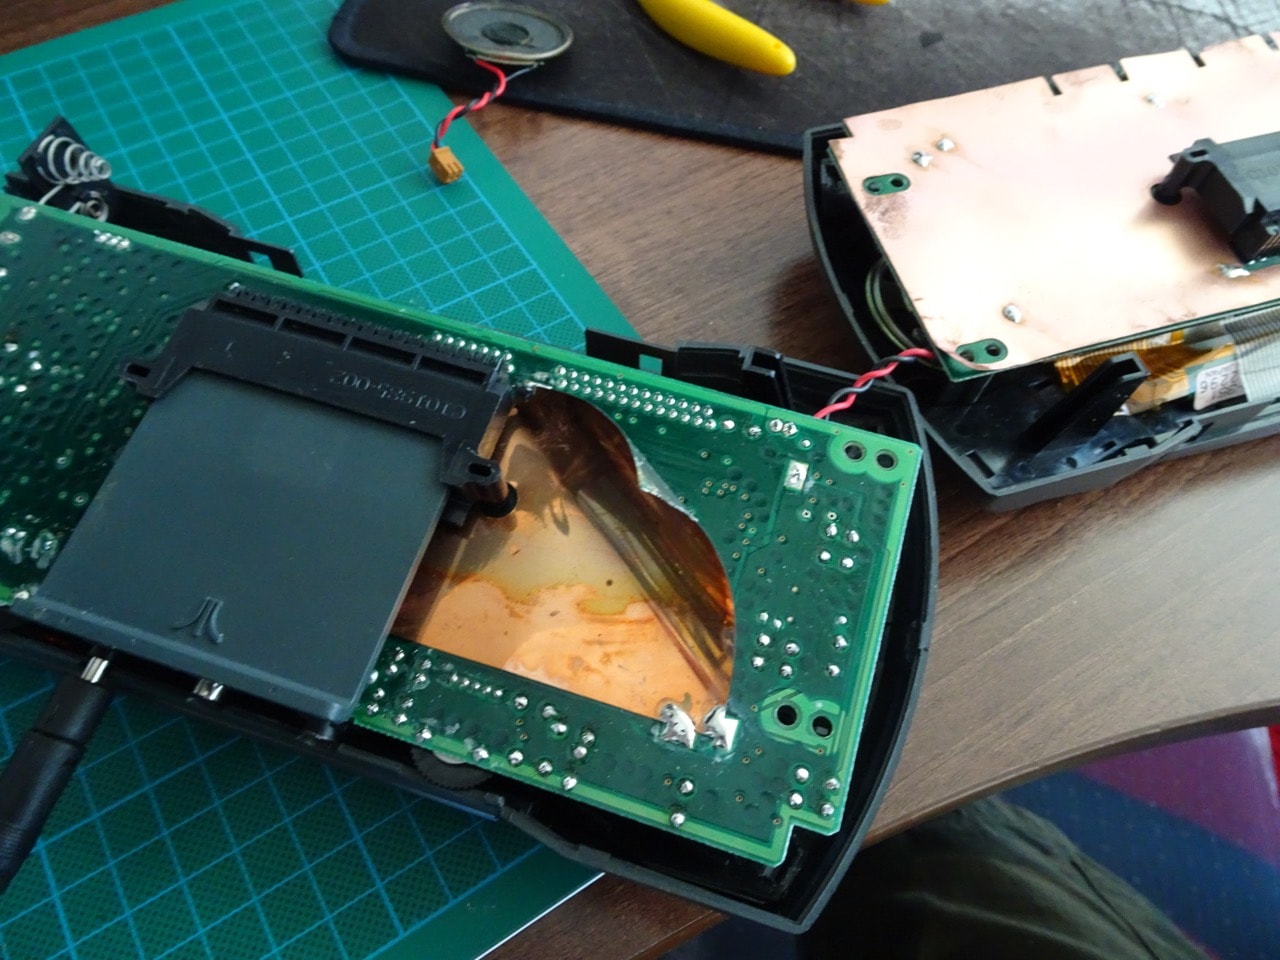
Lo and behold, I had loud, clear sound!
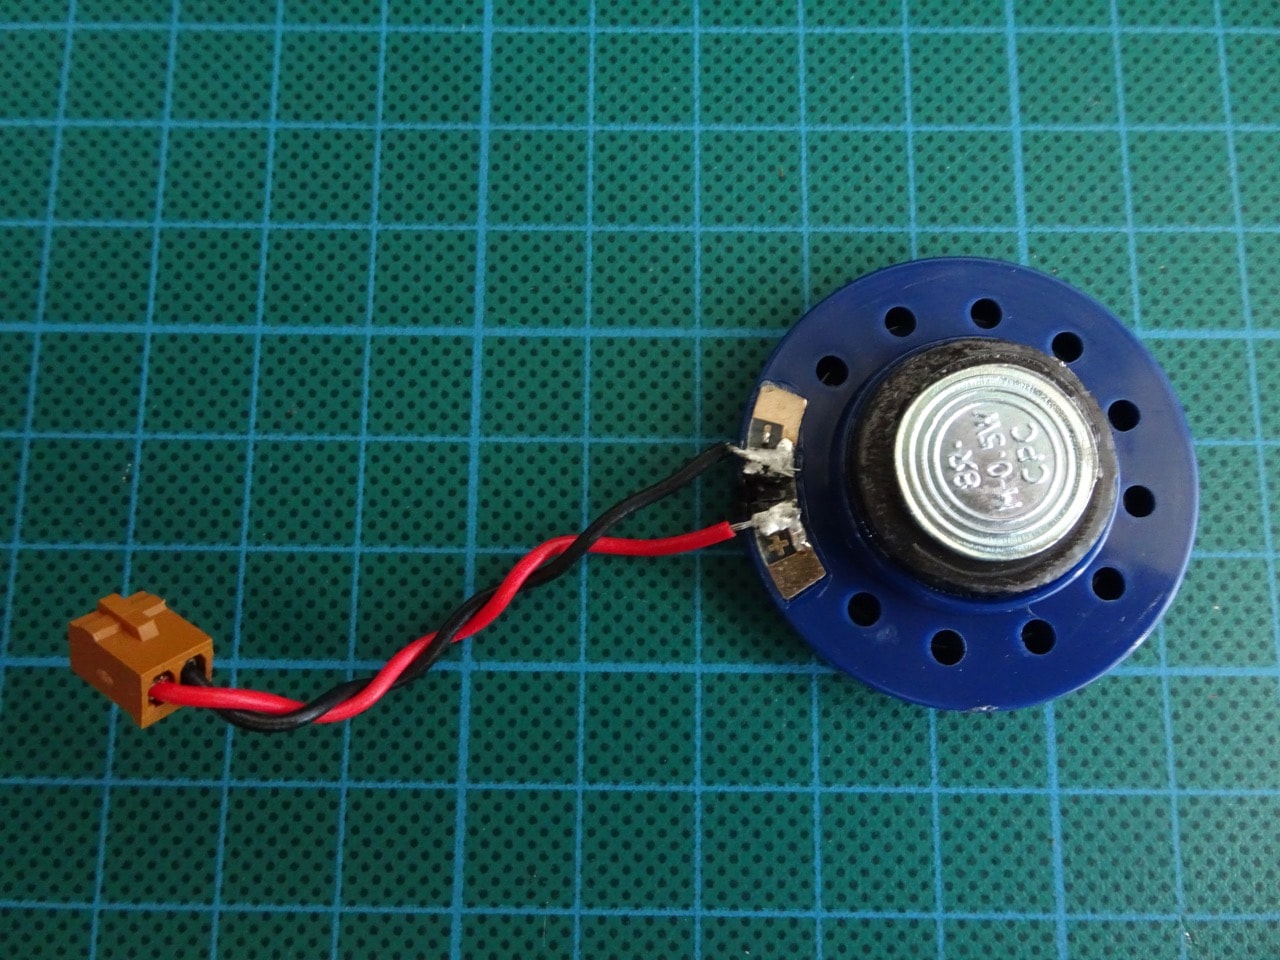
So I needed a new speaker. Unfortunately Lynx 2 uses a weird 40mm 16 Ohm speaker. This isn't very common, but 40mm 8 Ohm speakers are. I decided to try one out and went to JayCar to buy a 40mm 8 Ohm 0.5W mylar all purpose speaker. Size-wise it was more or less the same, impedance of course was different and the power rating was almost the same. Overall it was close enough.
I desoldered the connector from the original speaker and soldered it onto the new one.

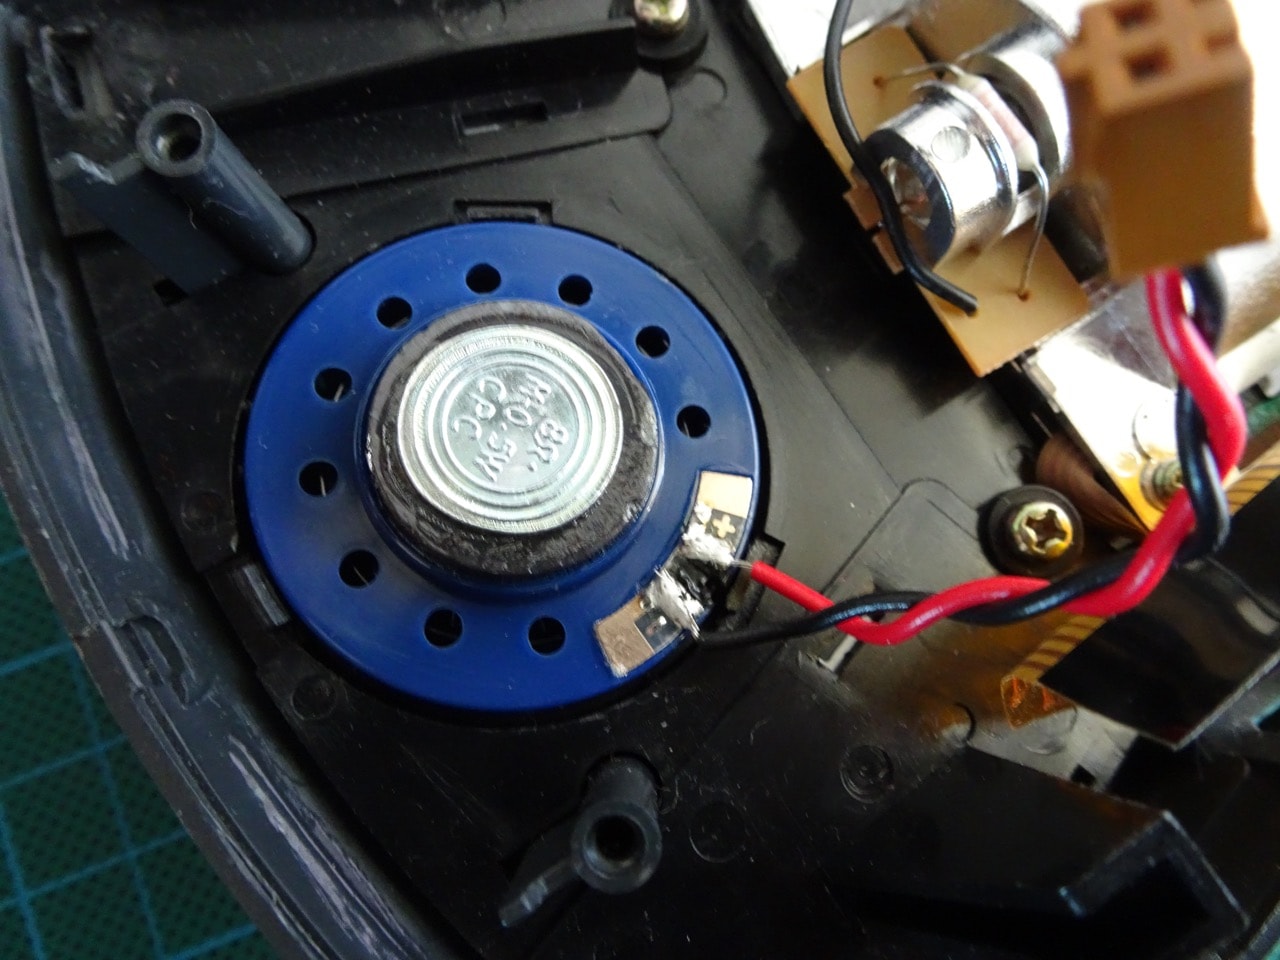
Plugging it in...I had sound again! Success! The volume was louder versus the speaker in the other Lynx, so I was happy with that. I wasn't too concerned with the change in impedance as I wouldn't be running the Lynx with maximum volume anyway.
The replacement speaker fit perfectly into the original speaker's location too!
Continue reading: Atari Lynx repair - Part 4 - screen cover replacement.
-i
