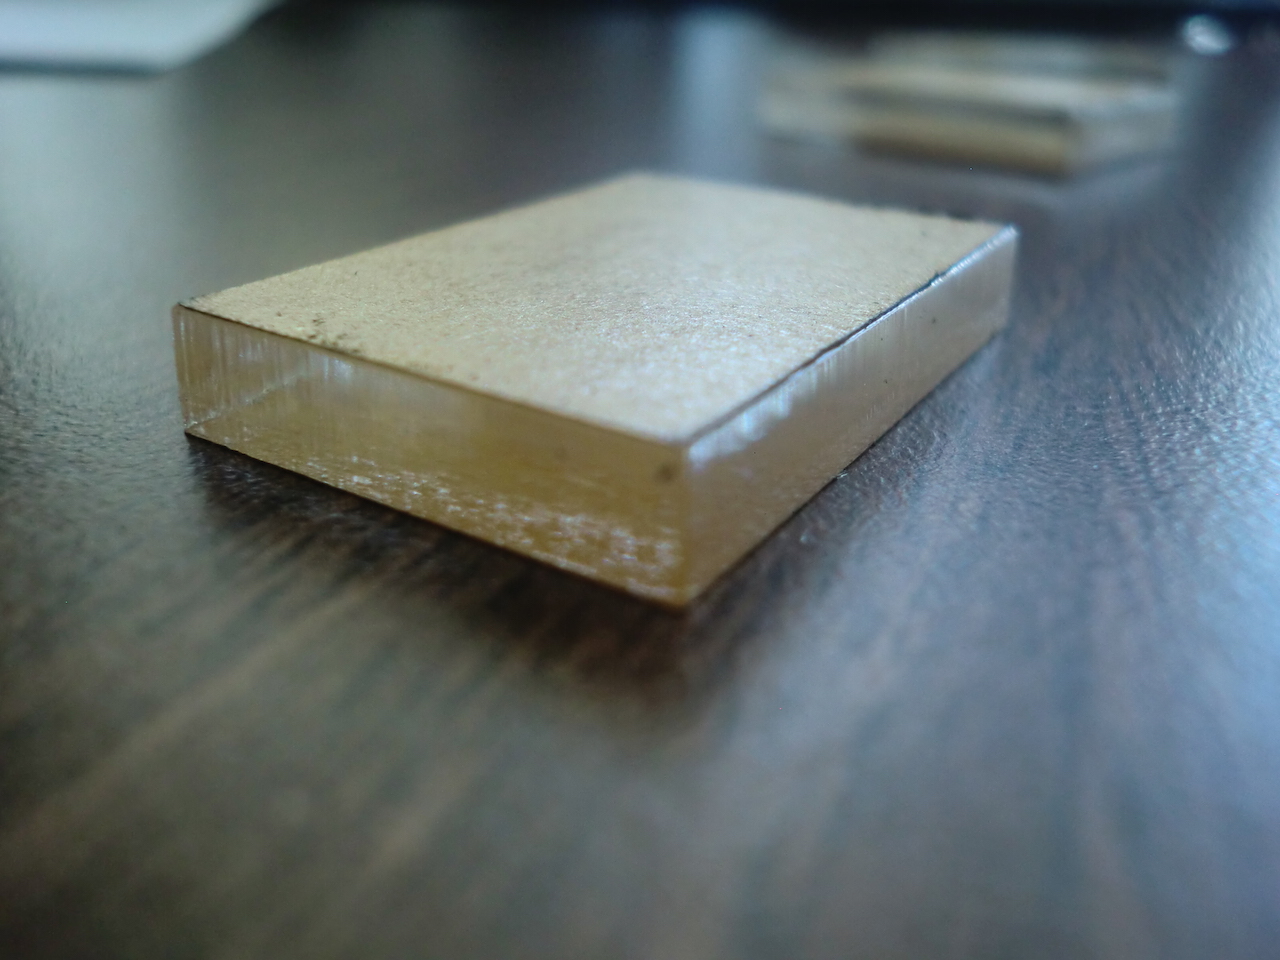
The very first material I tried was a piece of left over bamboo board from my bamboo floor. I didn't try to cut it, just engrave it. In both cases the same text was engraved, 'Testing', but at different levels set for the current regulator. The thicker text is set at about 3/4 power and the thinner is 1/2 power. It worked as expected, thought a little too deep for my liking.

Here's a video of the engraving. It looks like when the engraving mode is active, the cutting head behaves like a printer, it engraves one line at a time where each line is a pixel wide, then moves down to the next line, engraves, and so on. Basically it doesn't do continuous movements in this mode.
Cutting mode is different, it tends to follow continuos lines as much as possible.
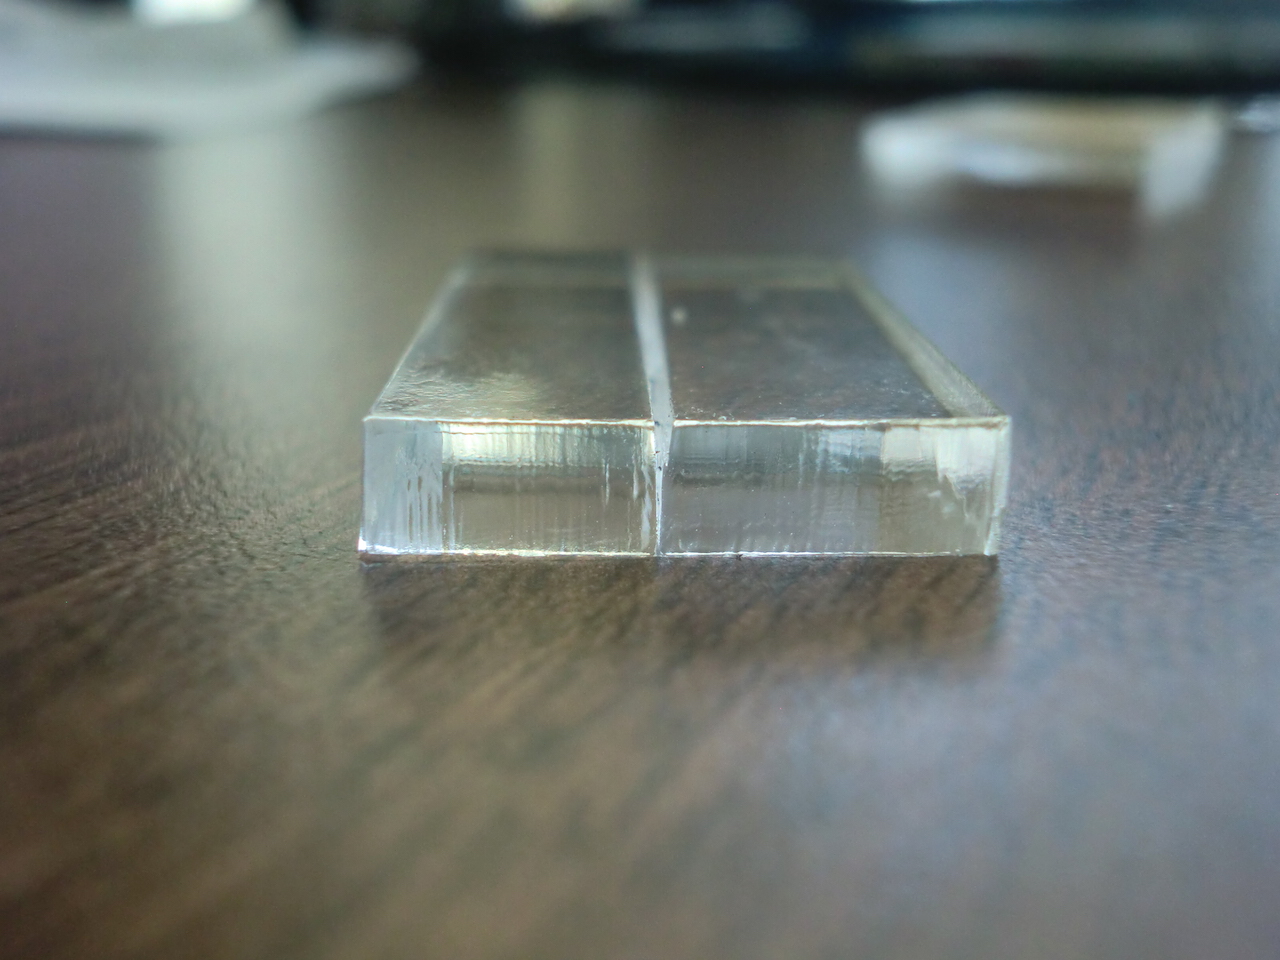
I've tried cutting 4.5mm acrylic next. Results were pretty good, though I noticed that it took several passes to cut through the 4.5mm sheet. I noticed that if I slowed down the cutter to say 5mm/s it actually cut through 4.5mm acrylic in one pass, but that caused the plastic to heat up significantly and made it warp. The best approach I found was to cut fast (15-20mm/s) and just do multiple passes.
Here's a piece of 4.5mm acrylic that I cut out and next to it is another piece with a line cut through its centre on a single pass over the material. It's clearly visible how far the laser beam penetrated in this case. The cut was not square, as expected, since the beam was most focused in the centre. The cut would always have a slight angle that would get more visible when cutting thicker materials.
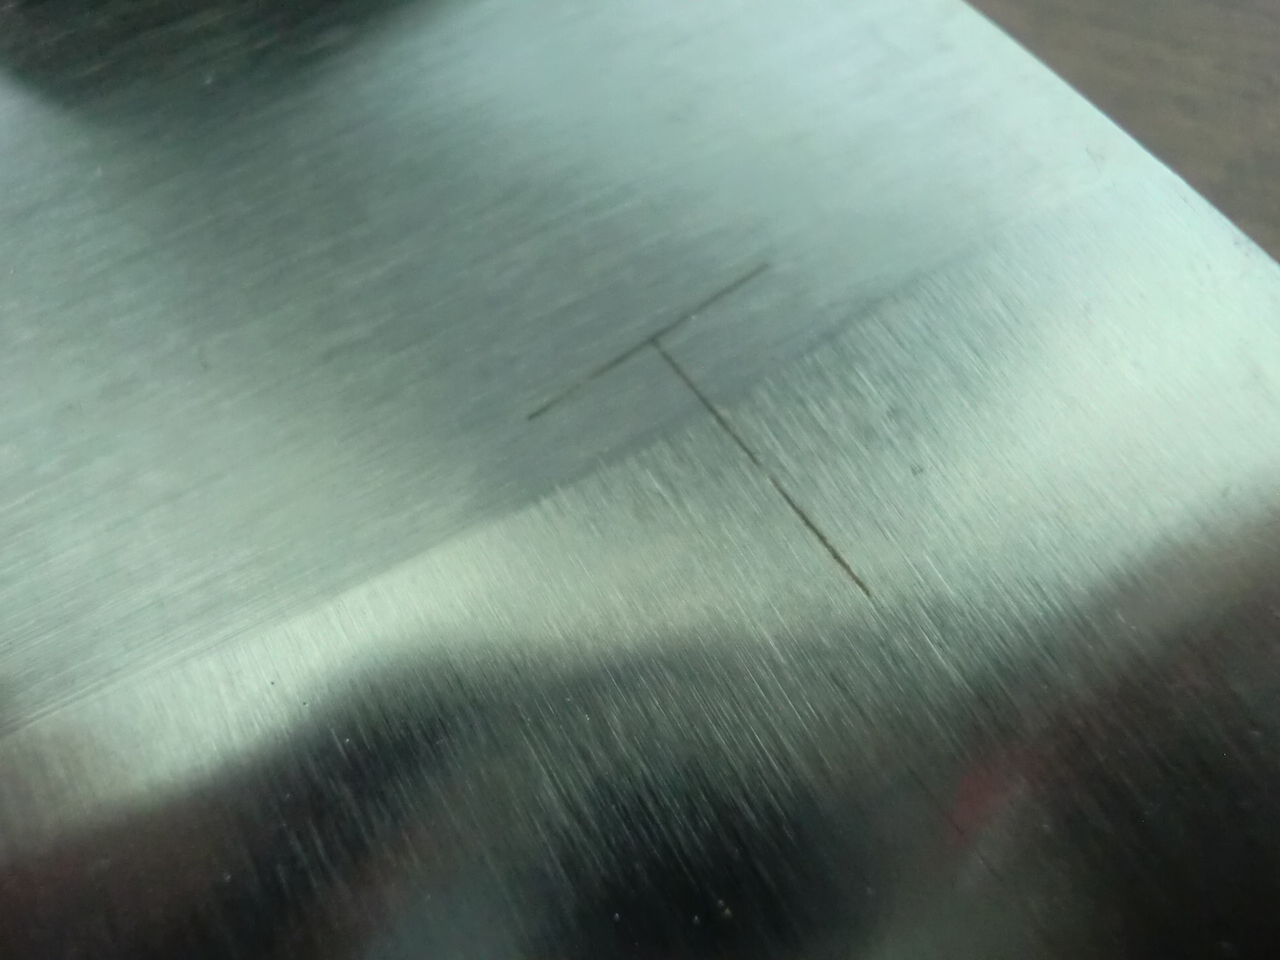
Engraving onto metal was tough. No matter how high I set the laser power, on the engraving setting it never put a scratch on the metal. When I switched to full power cutting setting, I finally managed to produce some results. It was barely a scratch but was now visible. I guess 40W was just not enough to make a mark on metal.
Now what about cutting AND engraving on the same piece, like a keyring decoration? It's possible but you have to do it as a two step process. First do the parts you want engraved, then cut out the shape. Here is an example that I made...
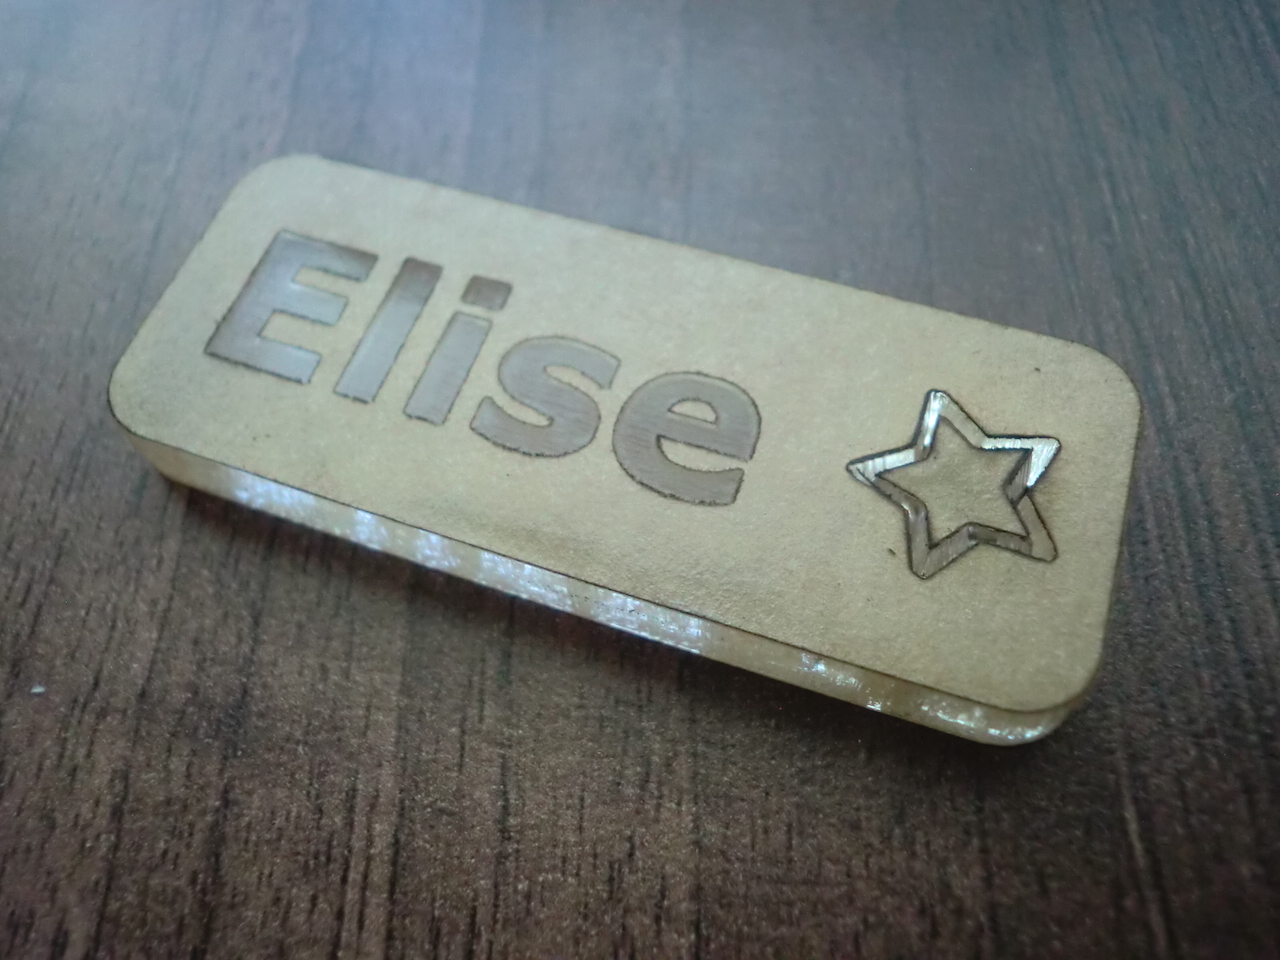
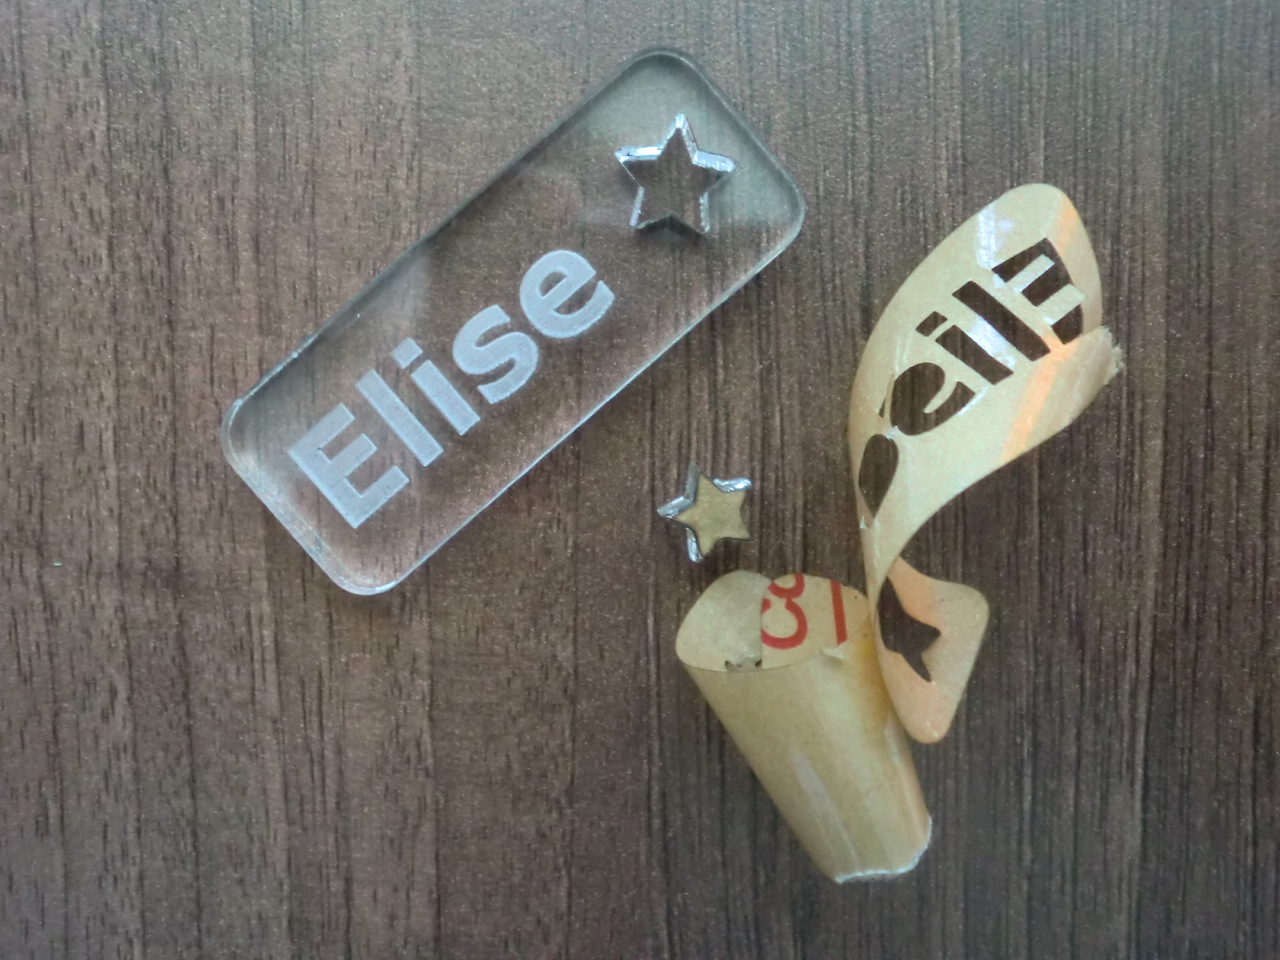
I used Inkscape in all cases. For the engrave/cut combination I found it the easiest to just make two files, one for the outline of the shape (cutting) and the other for the text/design (engraving). The text/design file must also include the outline of the overall shape. If the outline is not included in the engraving file the software will reposition the laser cutting head and the shapes will not align when cutting, so be careful.
Here are some videos of the laster cutter in action cutting some blister pack plastic. I would not recommend cutting this in closed quarters, or ever really! I'm showing it here as an example because it generates a lot of fumes, these are visible in both of the videos below.
If you have tips for this kind of machine please feel free to add them in the comments below.
-i
